ITS (Inventory and Transport Space)
Introduction
The Inventory and Transport Space (ITS) in KubeStellar provides a centralized, real-time view of all managed Kubernetes clusters. It is the system of record for cluster inventory, their health and availability, and the labels that organize clusters by environment, region, tier, or any custom taxonomy. Use ITS when you manage multiple clusters across environments (production, staging, dev), geographies, or edge sites, and need consistent discovery,, and policy-driven organization.
Key benefits:
- Centralized cluster management across many contexts
- Flexible import methods (Quick Connect, Kubeconfig upload, Manual API URL)
- Powerful labeling system (single and bulk operations)
- Fast filtering and search via label chips and status filters
- Real-time status visibility and detail views for each cluster
ITS serves as the entry point for cluster lifecycle operations, integrates with Binding Policies (BP) for label-driven selection, and is a prerequisite for WECS monitoring and workload status aggregation.
Prerequisites
- KubeStellar core installed and accessible
- Access to Kubernetes clusters to be managed
- Kubeconfig files (for Kubeconfig import)
- Network connectivity to cluster API servers
- Authentication tokens where required
Feature Overview
- Architecture: ITS aggregates cluster metadata, status, and labels from the KubeStellar backend. It presents search, filters, and actions to manage clusters and labels.
- Cluster lifecycle: Discover → Import → Label → Monitor → Detach. ITS keeps status in sync and exposes per-cluster detail dialogs and logs.
- Relationships:
- BP: Labels in ITS drive cluster selectors in Binding Policies.
- WECS: Workloads monitored on clusters imported via ITS; health is visible across systems.
- Key concepts:
- Cluster contexts: Logical grouping (e.g.,
its1) associated with hub configuration. - Label-based organization: Key/value labels for flexible grouping and policy targeting.
- Status tracking: Active/Unavailable/Pending indicators, plus joined state and metrics in detail view.
- Cluster contexts: Logical grouping (e.g.,
Step-by-Step Guides
Guide 1: Importing Your First Cluster (Quick Connect)
-
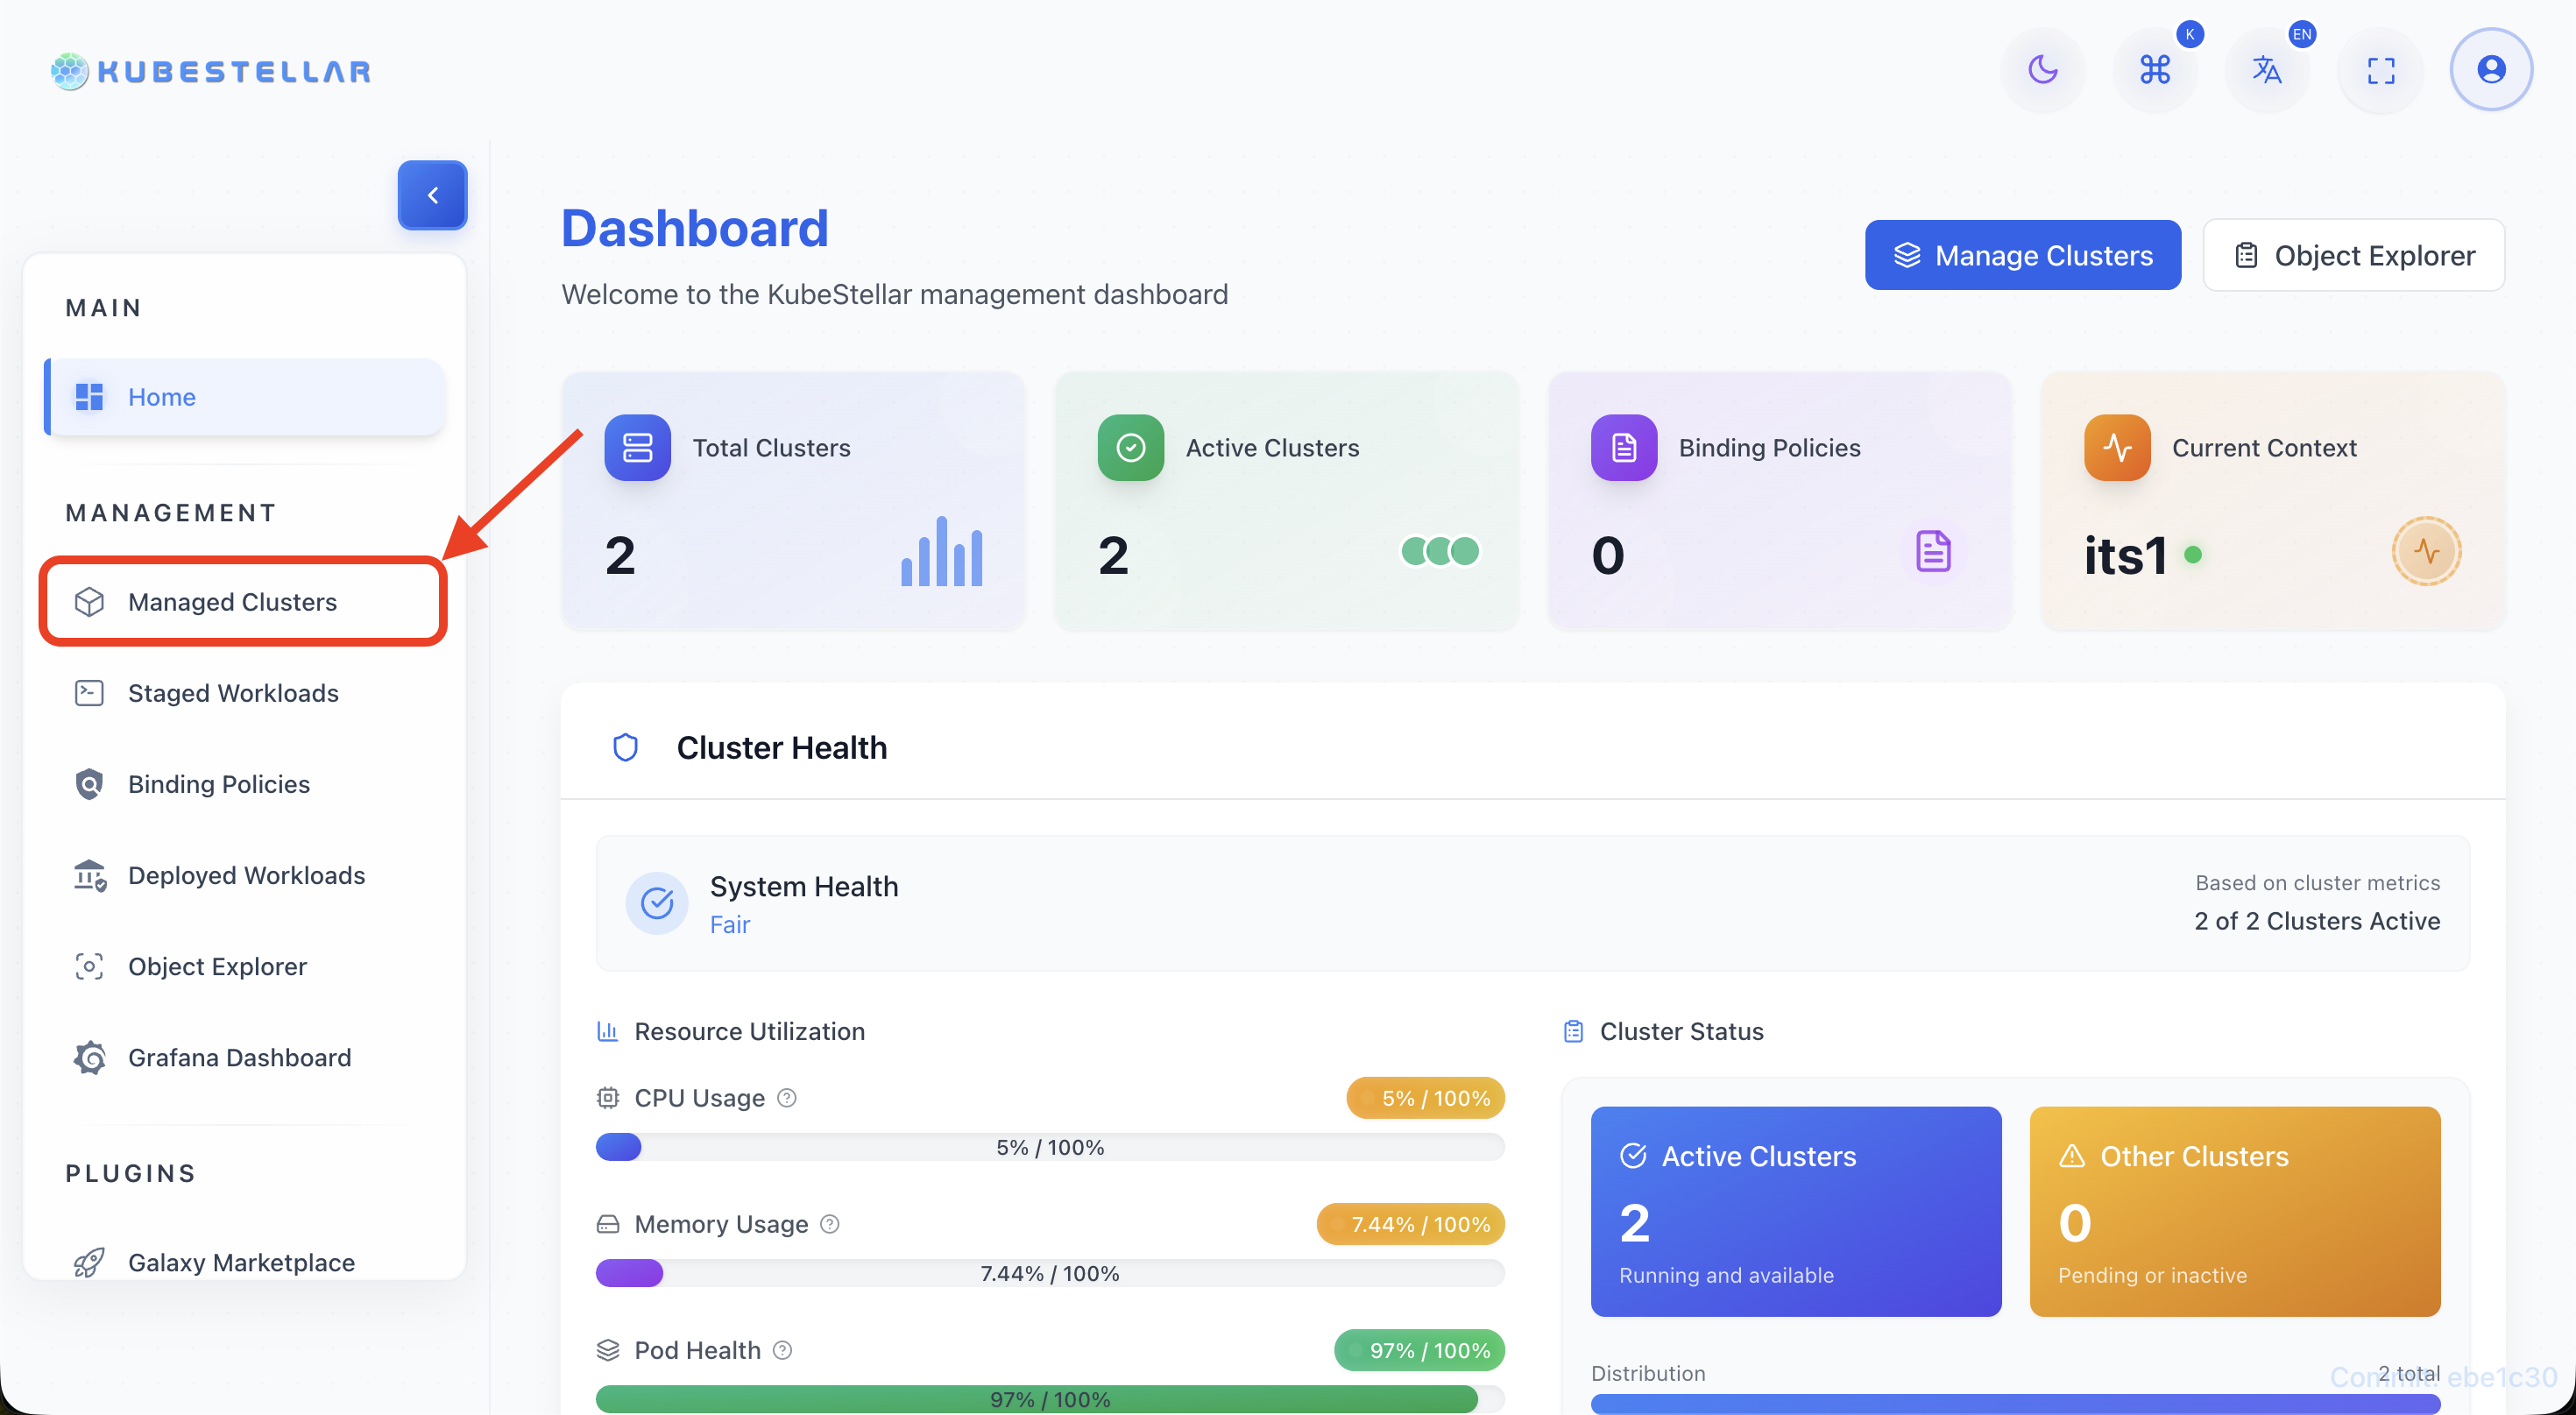
Navigate to ITS page
- Open the KubeStellar dashboard and select “Managed Clusters” from the main menu.
-
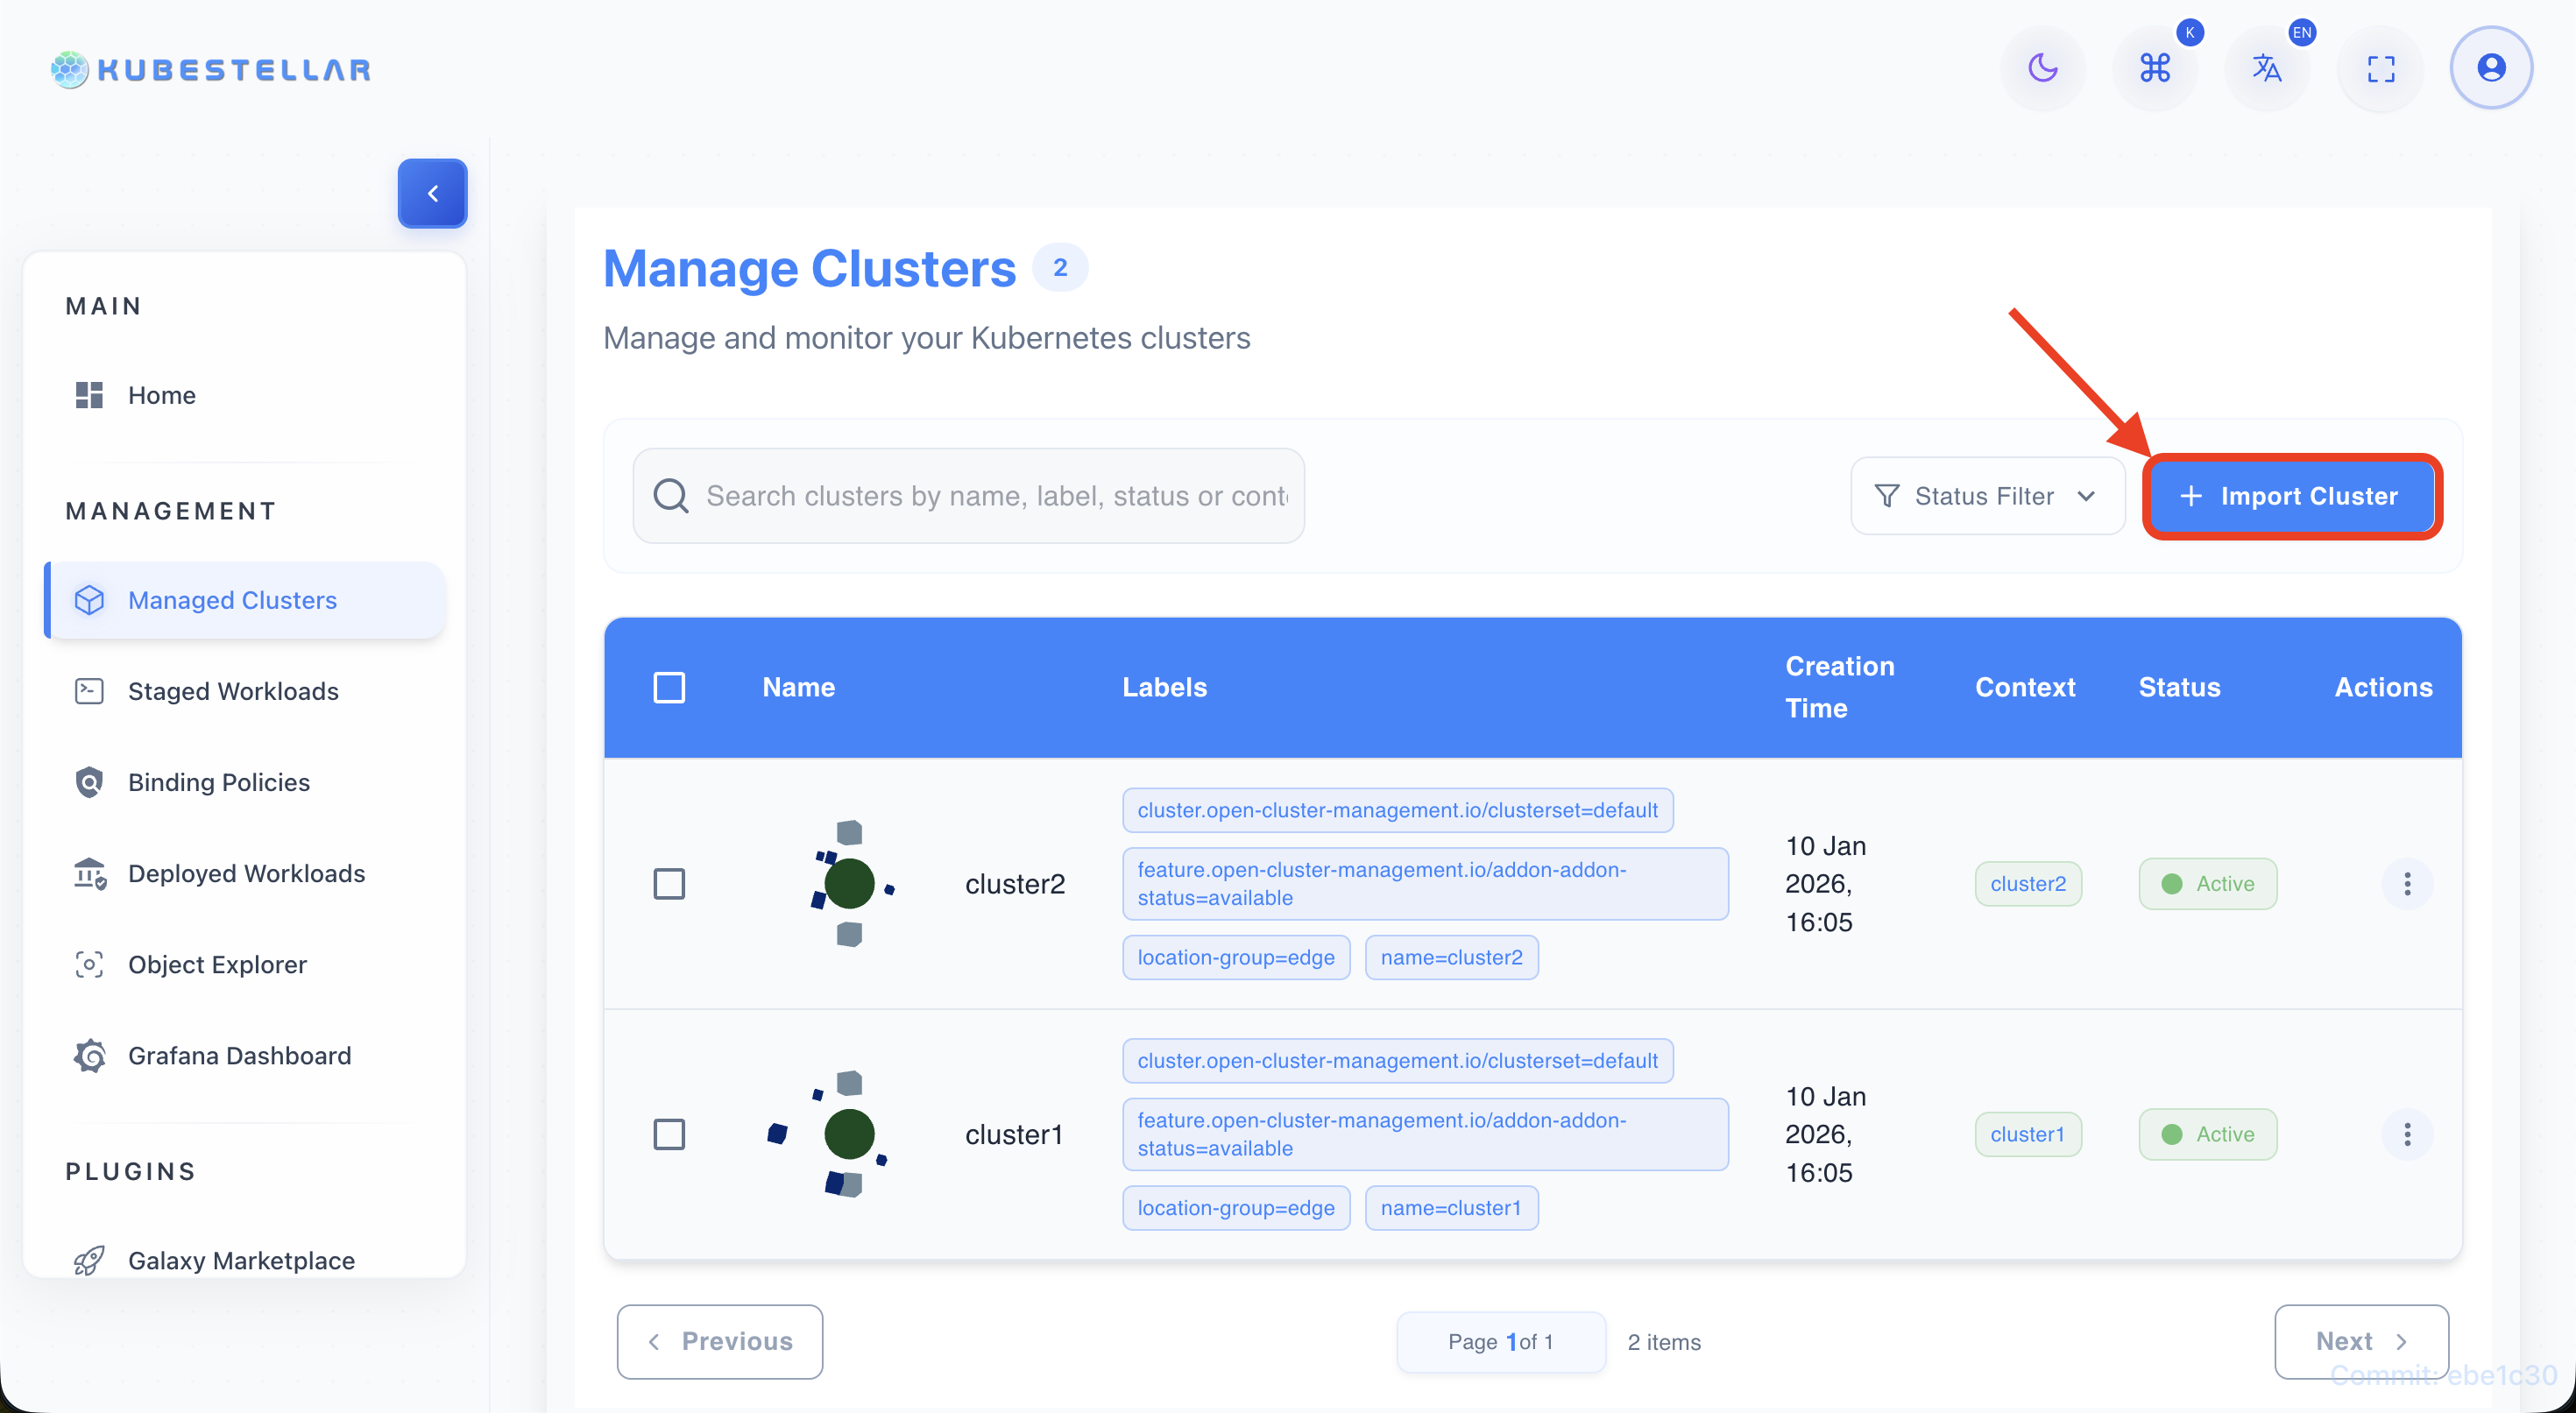
Click “Import Cluster” button
- Look for the blue “Import Cluster” button in the top-right of the clusters table.
-
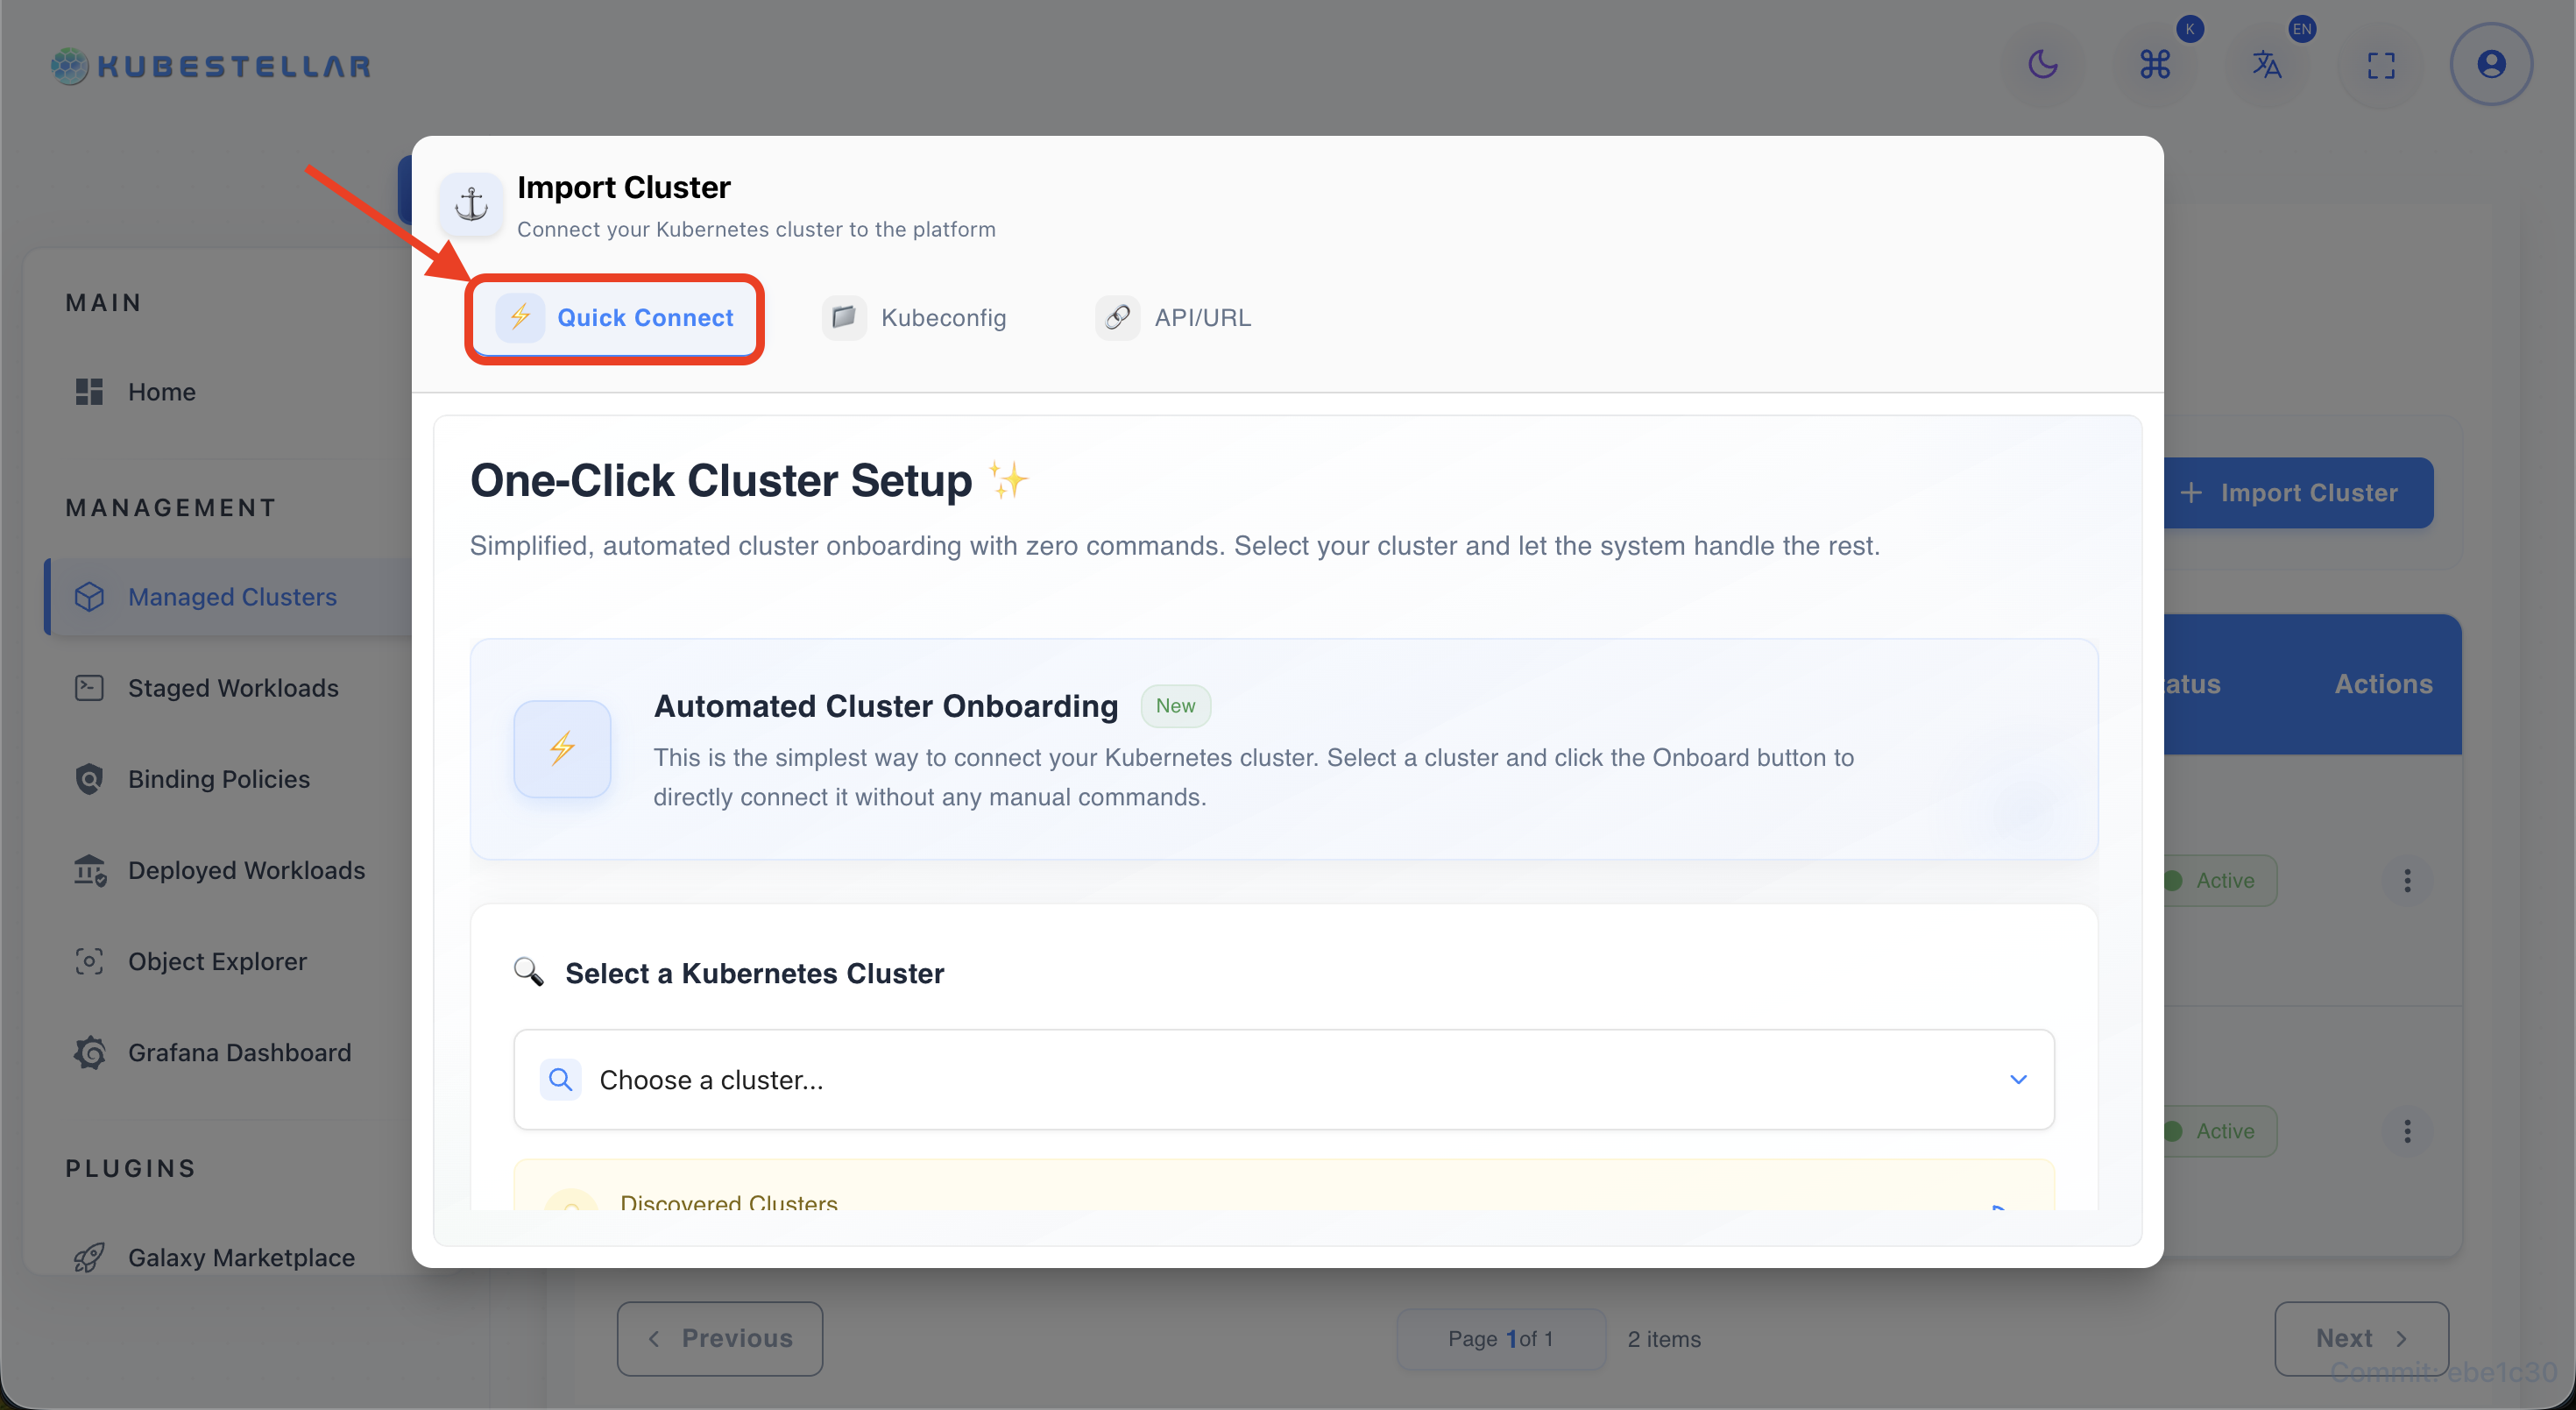
Select “Quick Connect” tab
- The import dialog opens with three tabs. Select the “Quick Connect” tab (⚡ icon).
-
View auto-discovered clusters
- The system automatically discovers available clusters from the hub. Wait for the list to populate.

-
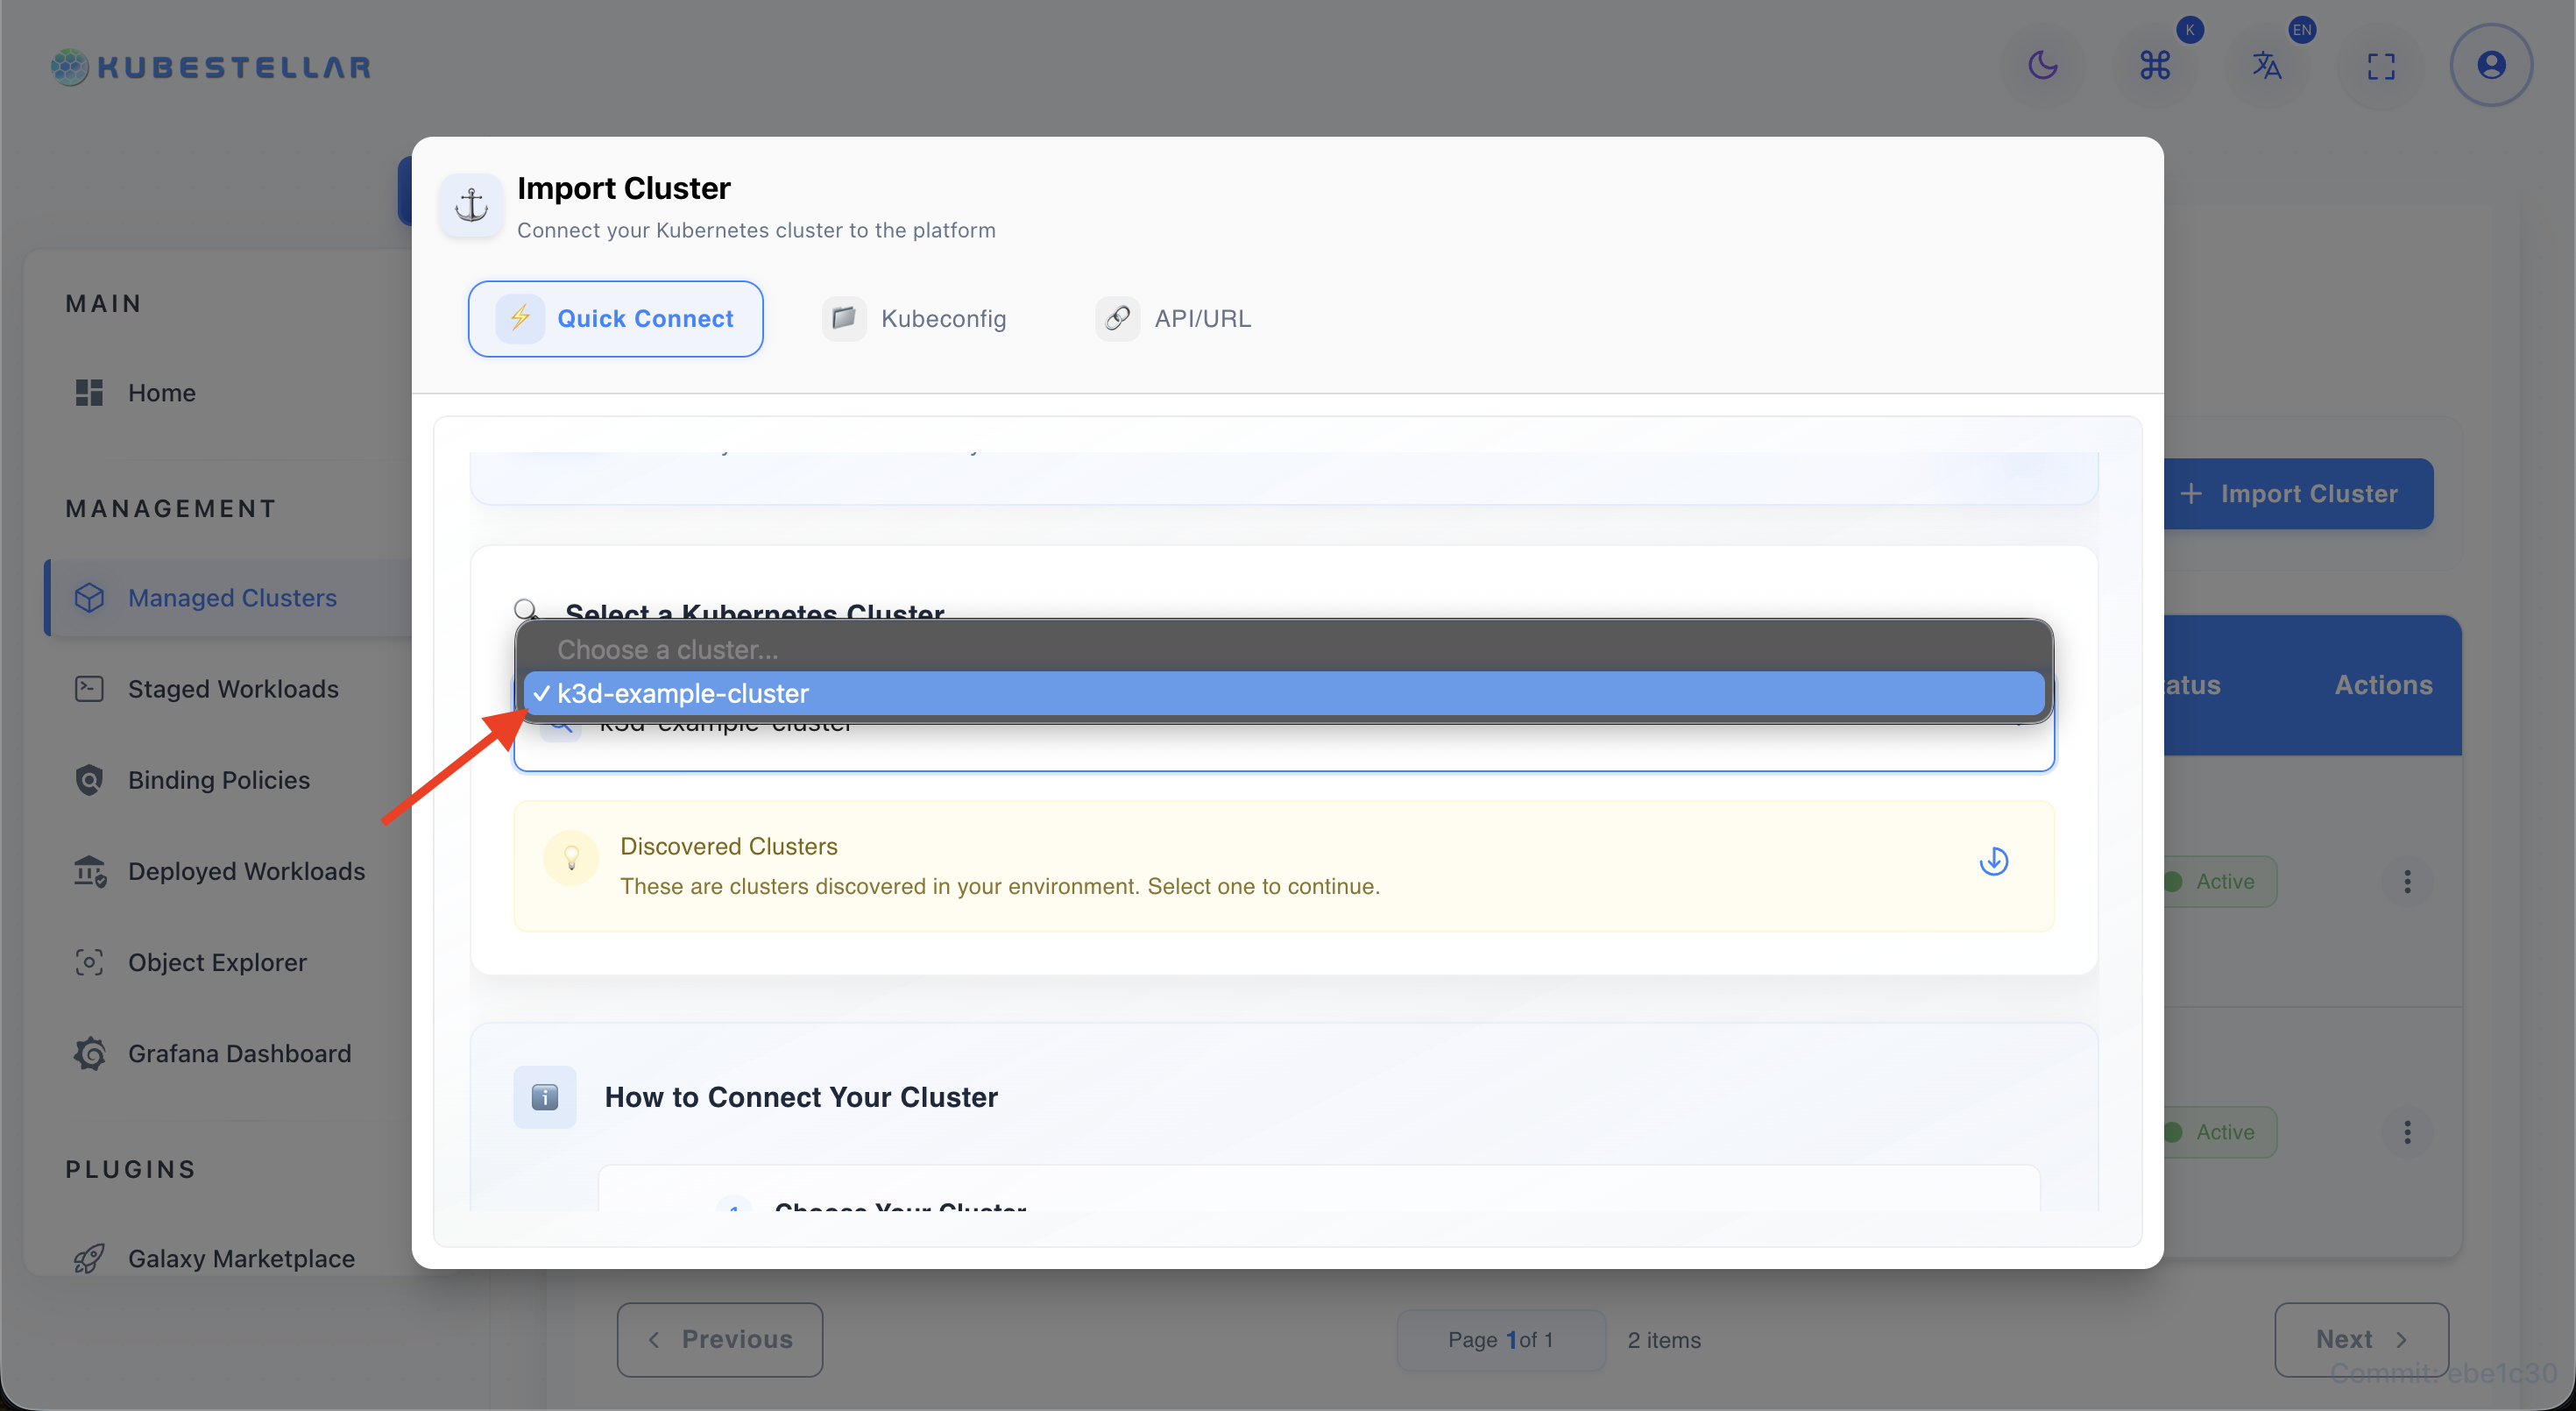
Click on desired cluster
- Select the cluster you want to import from the discovered list.
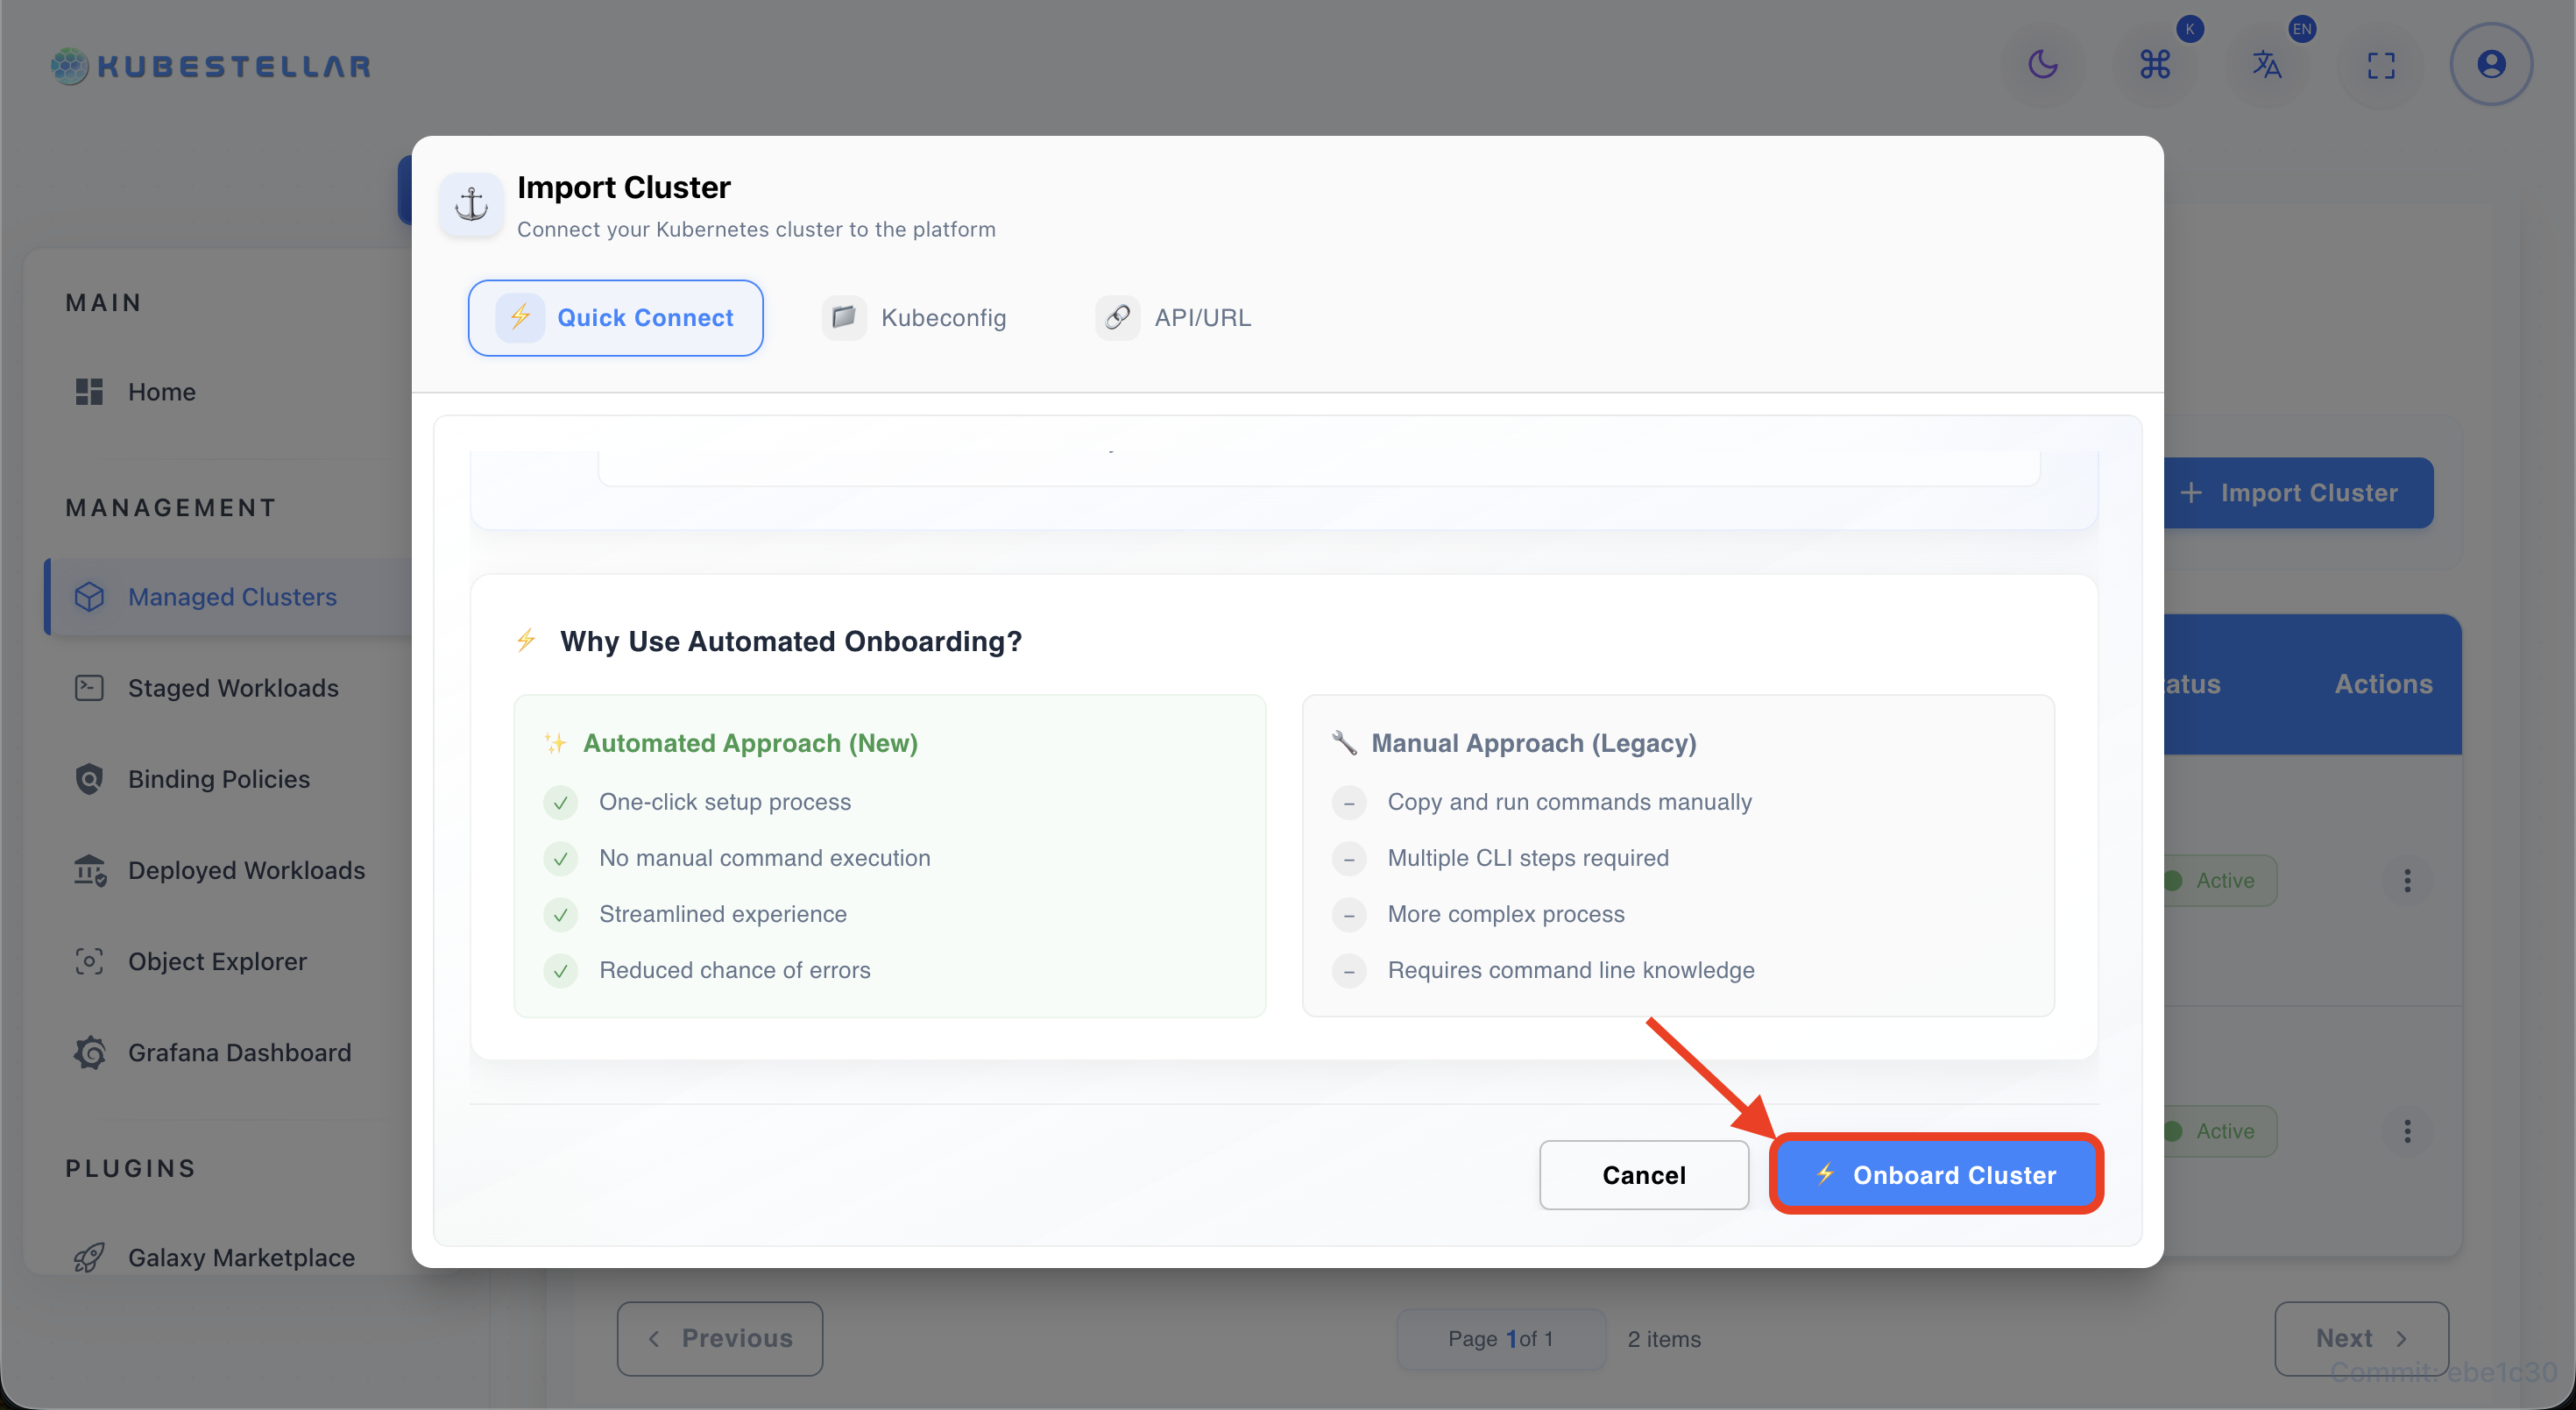
-
Click “Onboard Cluster”
- Scroll down and press the Onboard Cluster button to start.
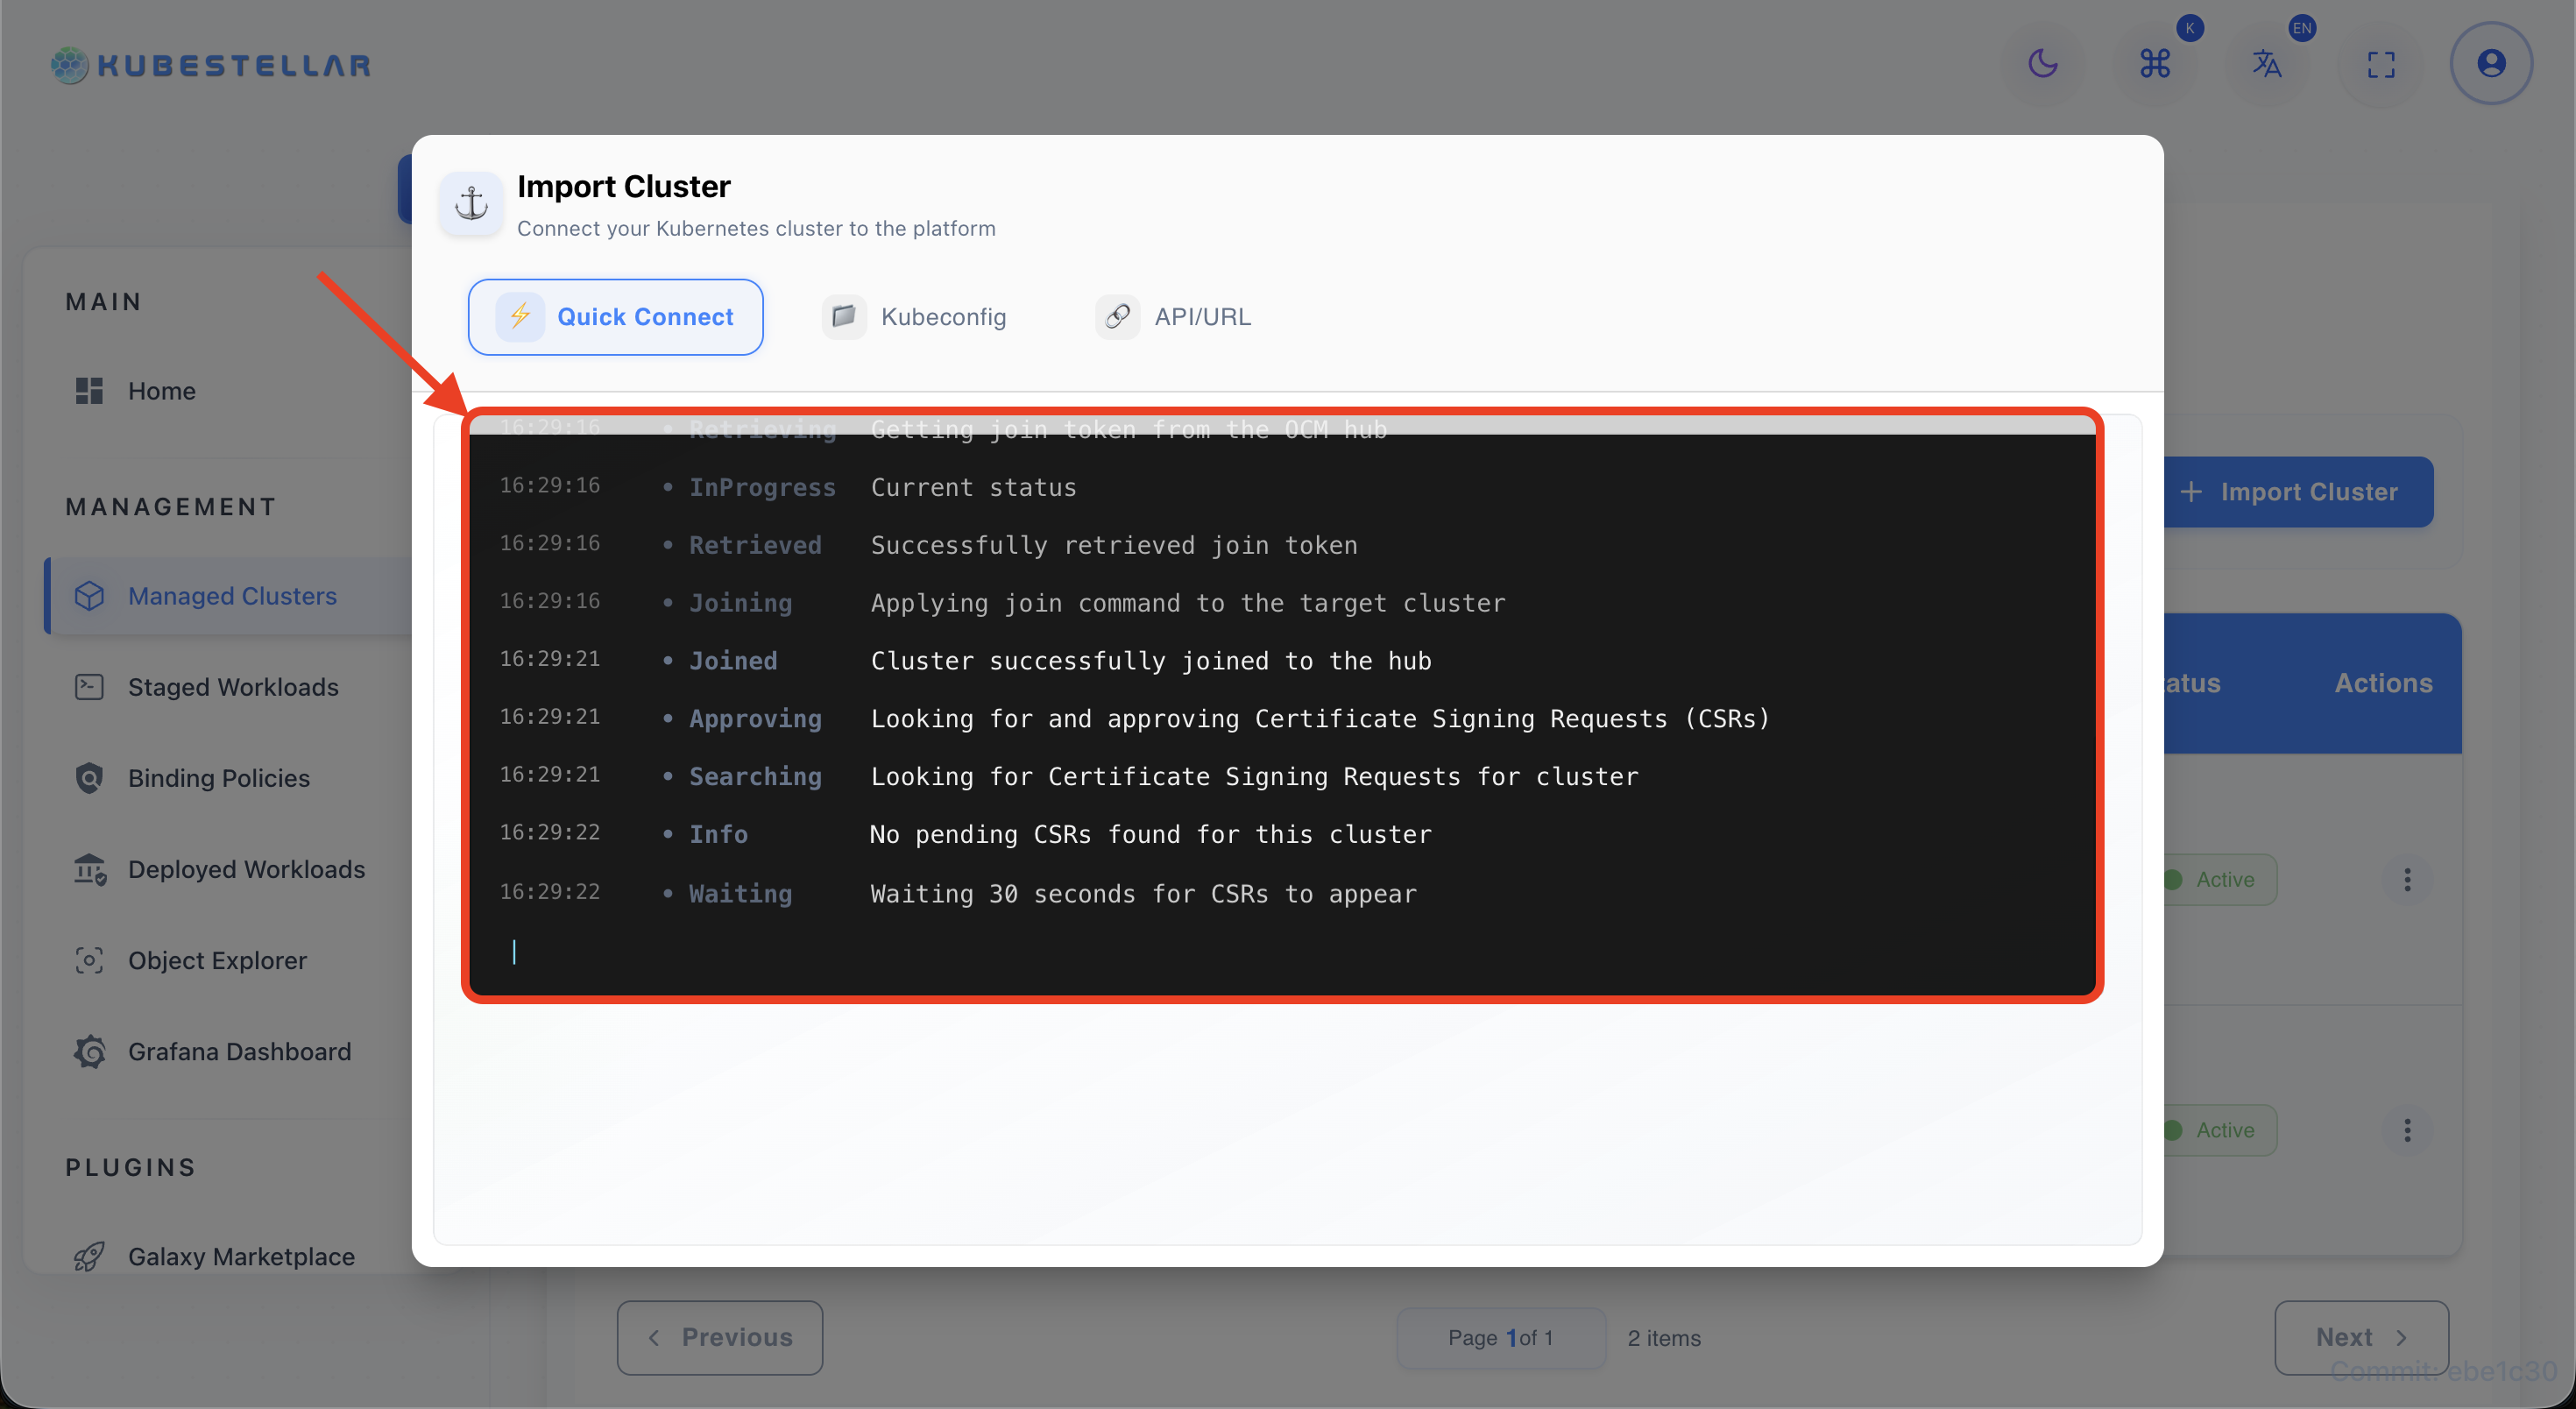
-
Watch logs
- Observe real-time logs and status updates in the dialog until completion.
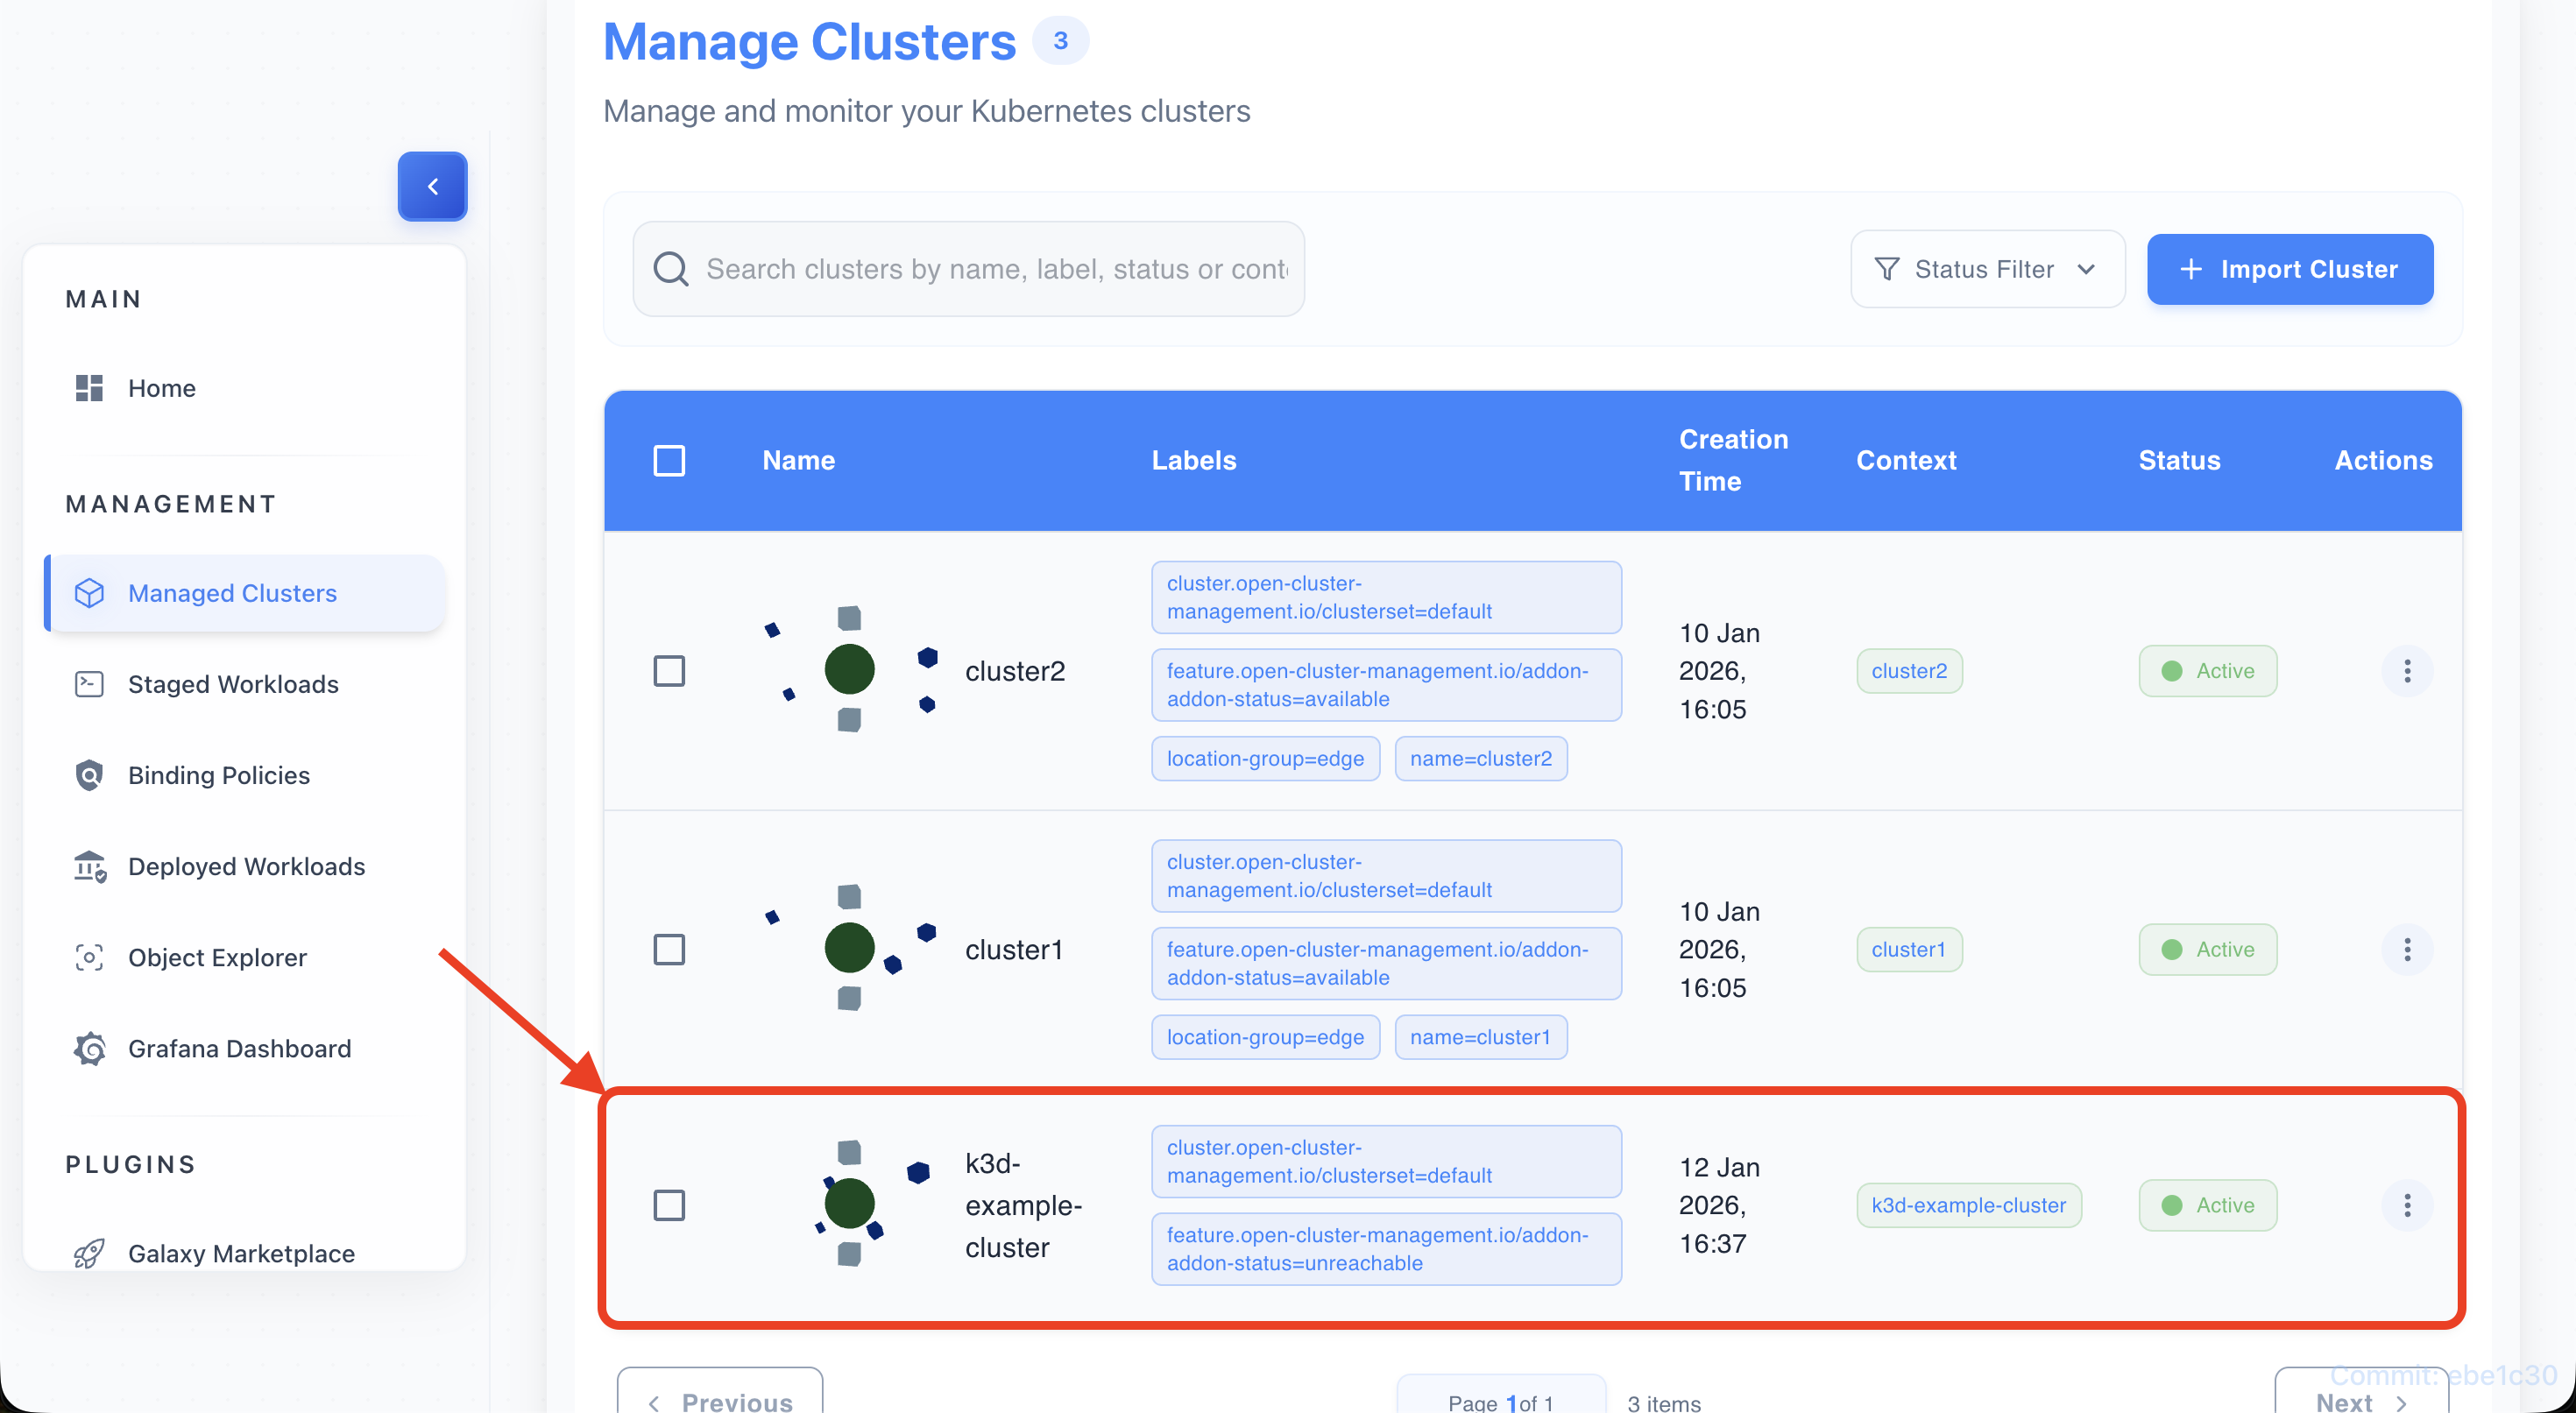
-
Verify import success
- Return to ITS and confirm the cluster now appears in the table with status “Active”.
Guide 2: Importing via Kubeconfig
Will be added soon.
Guide 3: Manual Import with API URL
Will be added soon.
Guide 4: Adding Labels to Clusters
-
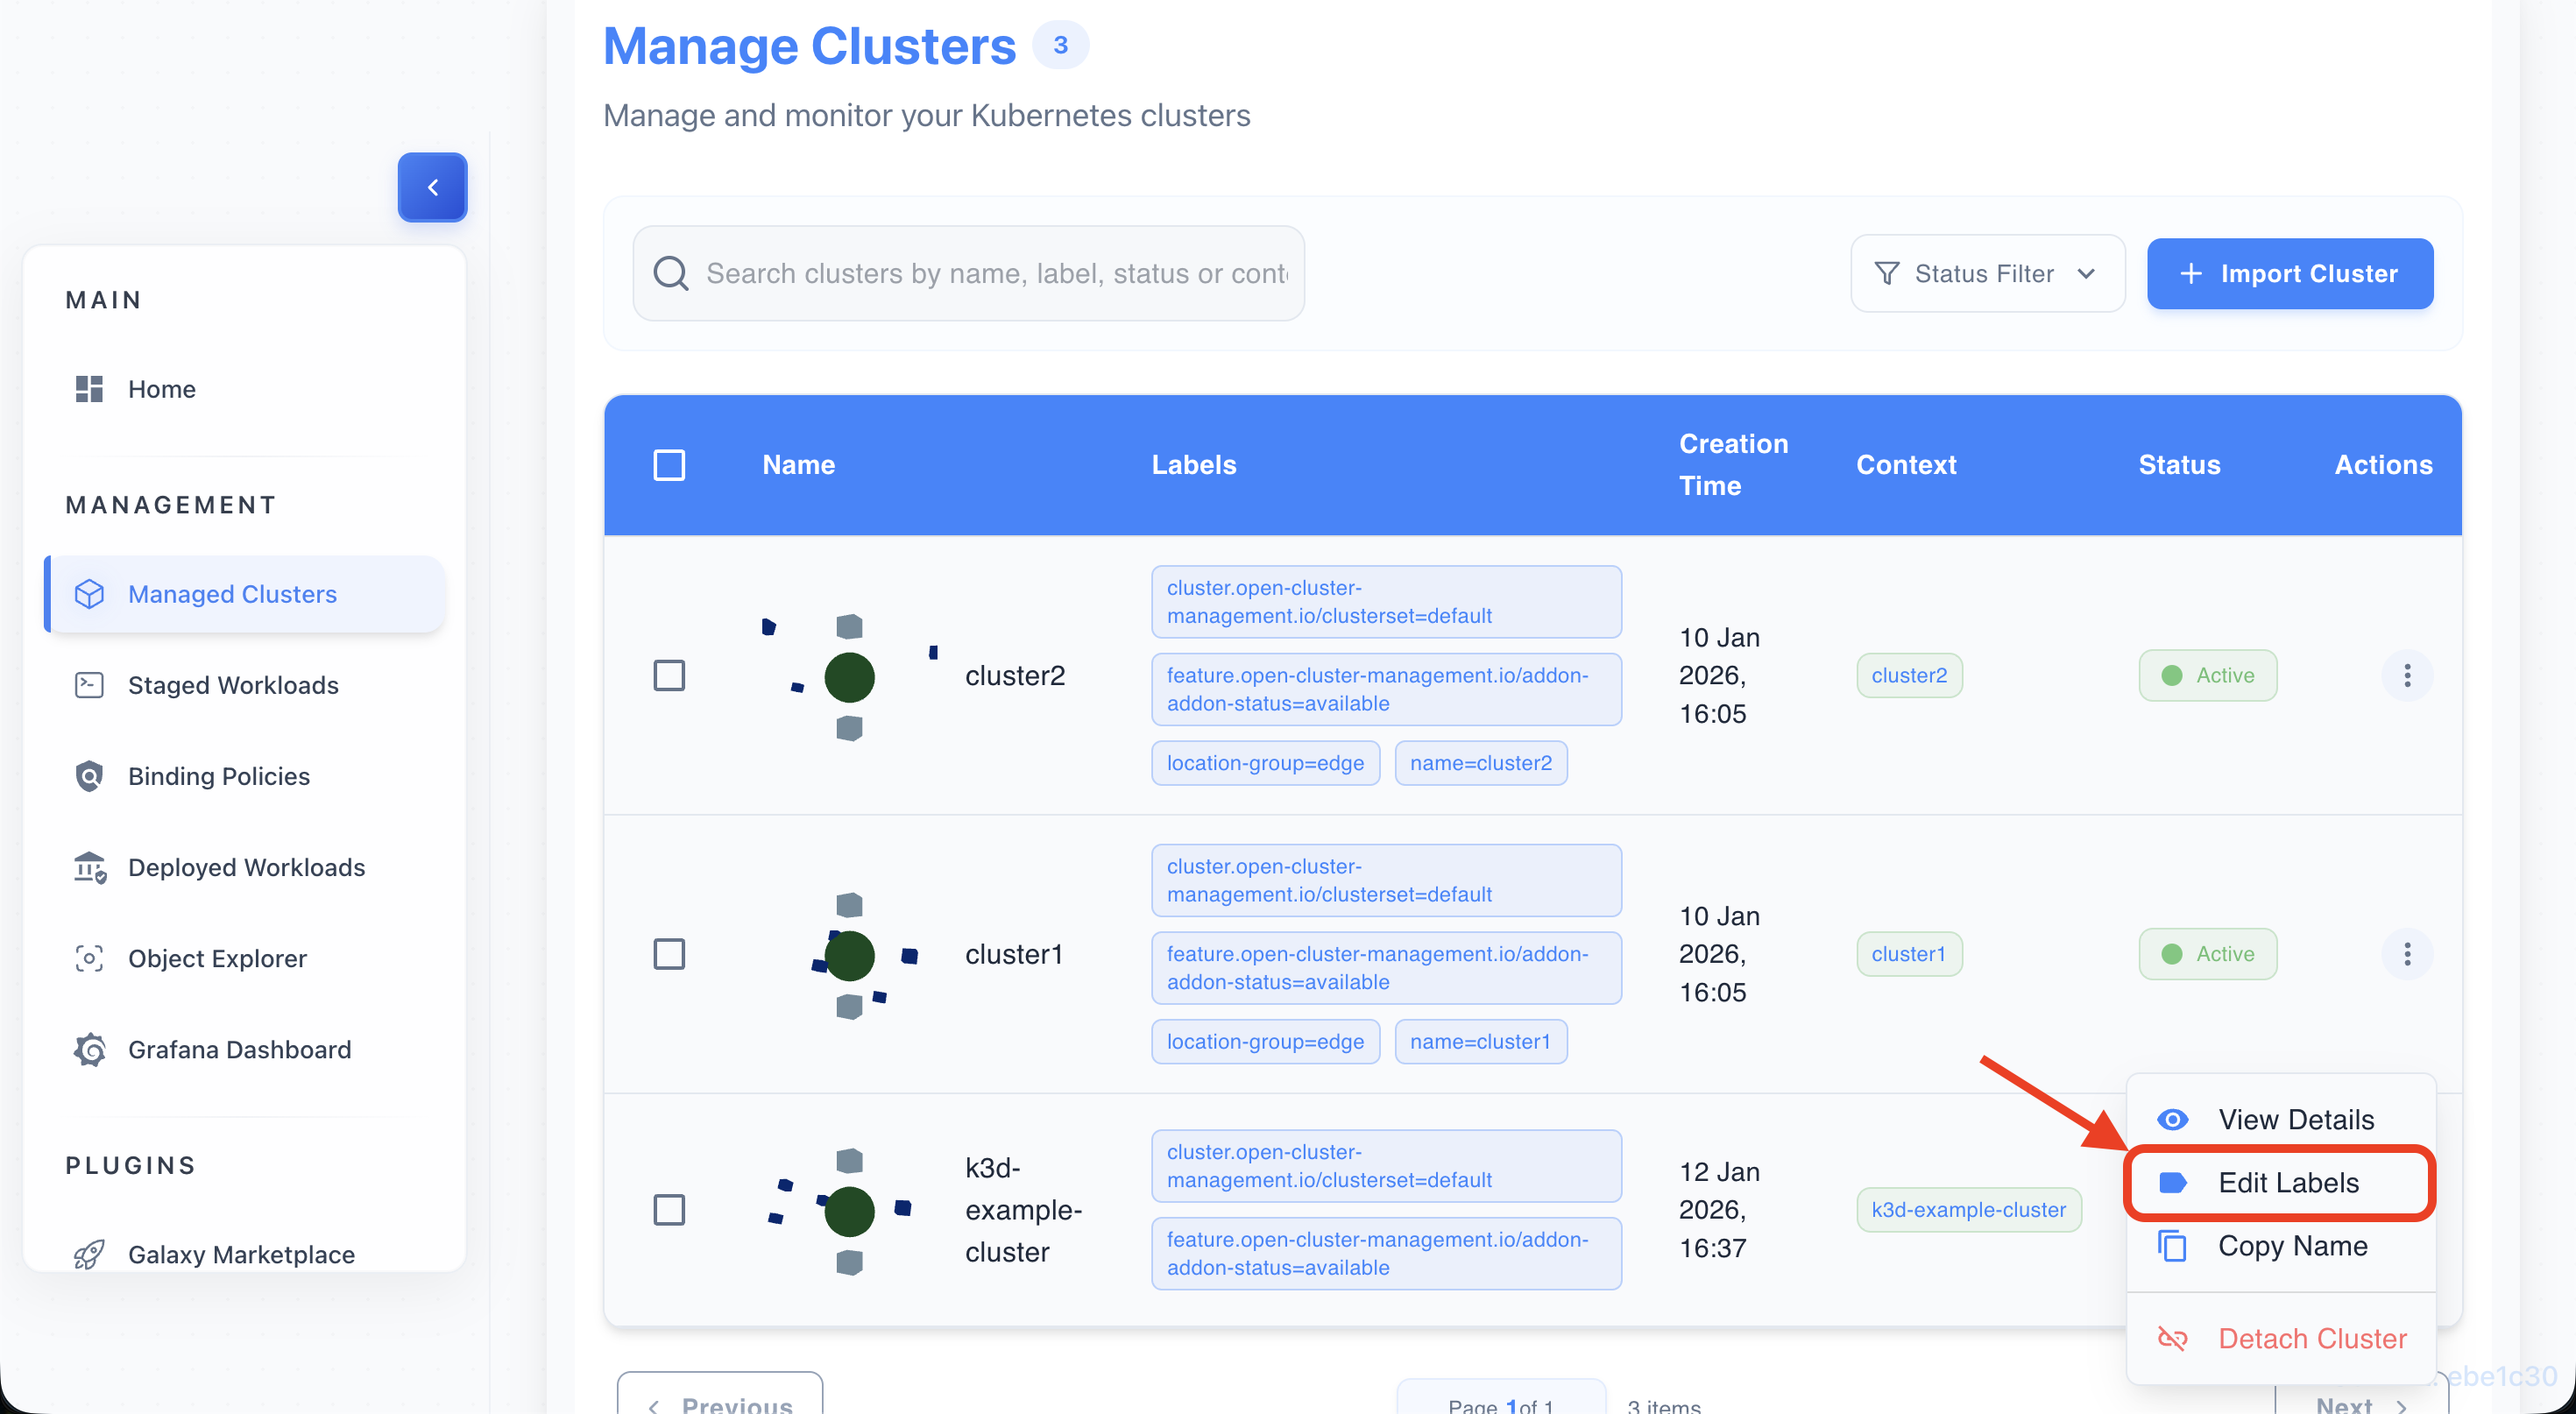
Locate cluster in table
- Find the target cluster in the ITS clusters list.

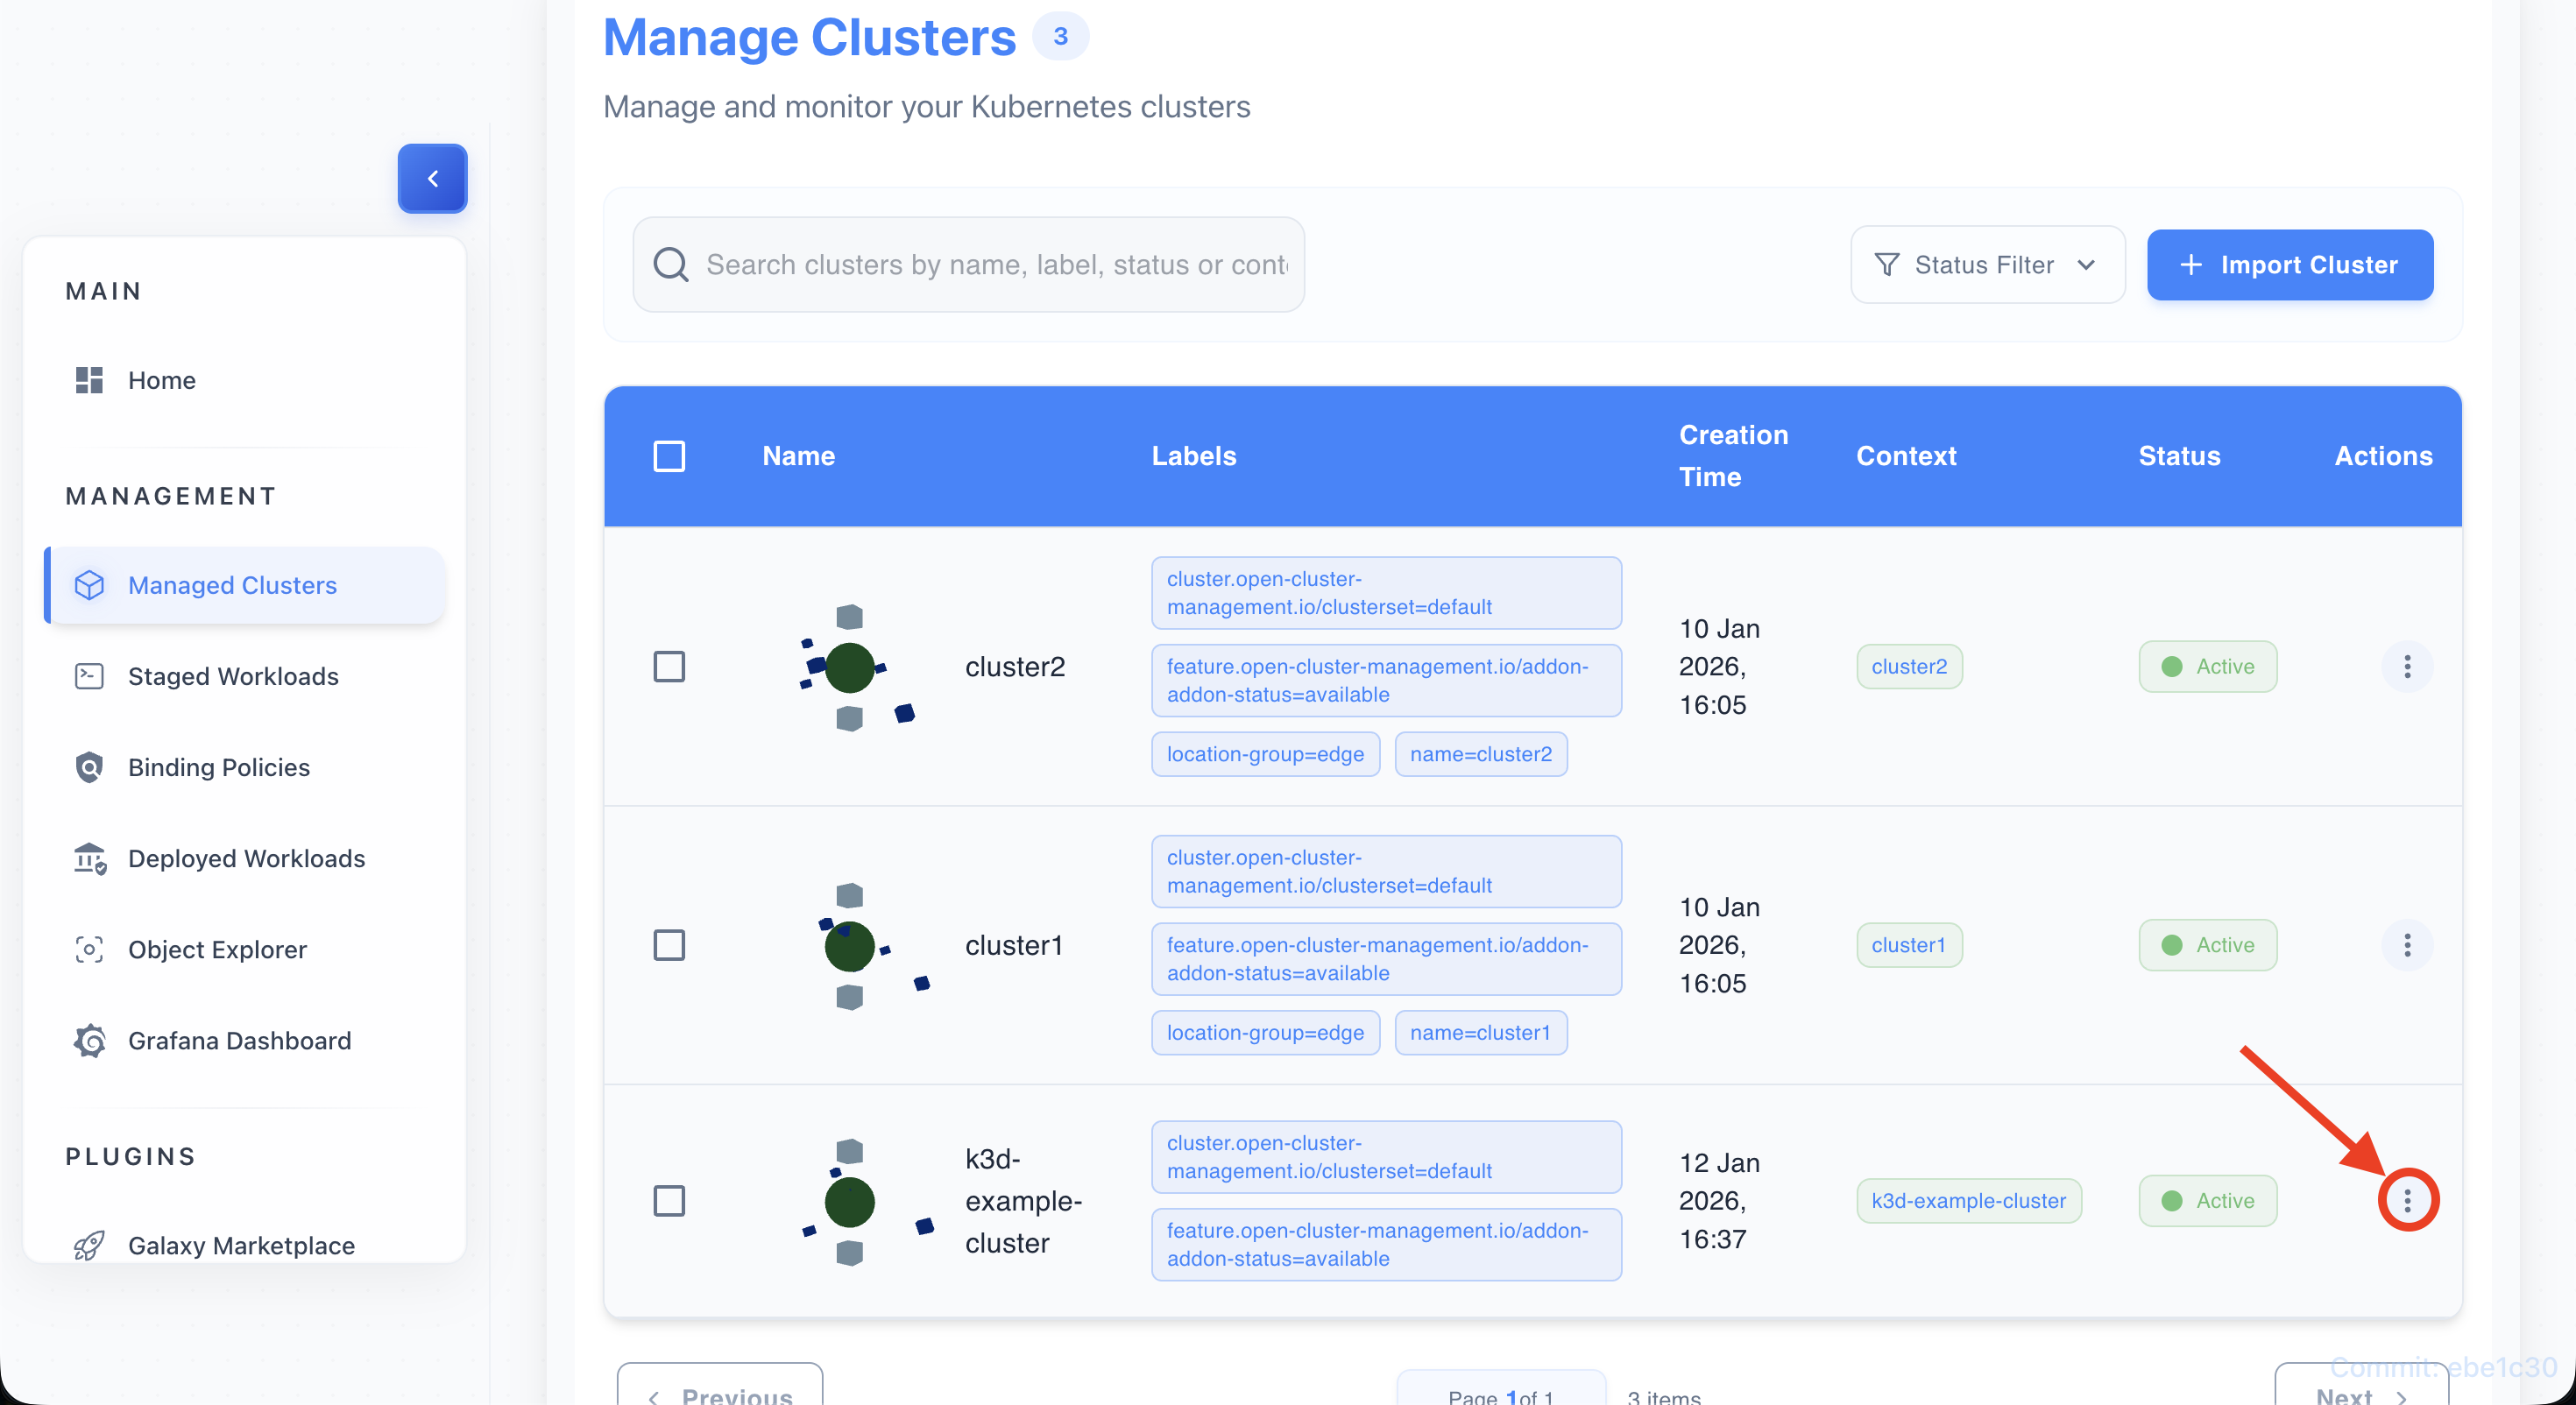
-
Click on action menu (3 dots)
- Open the actions menu for that cluster.
-
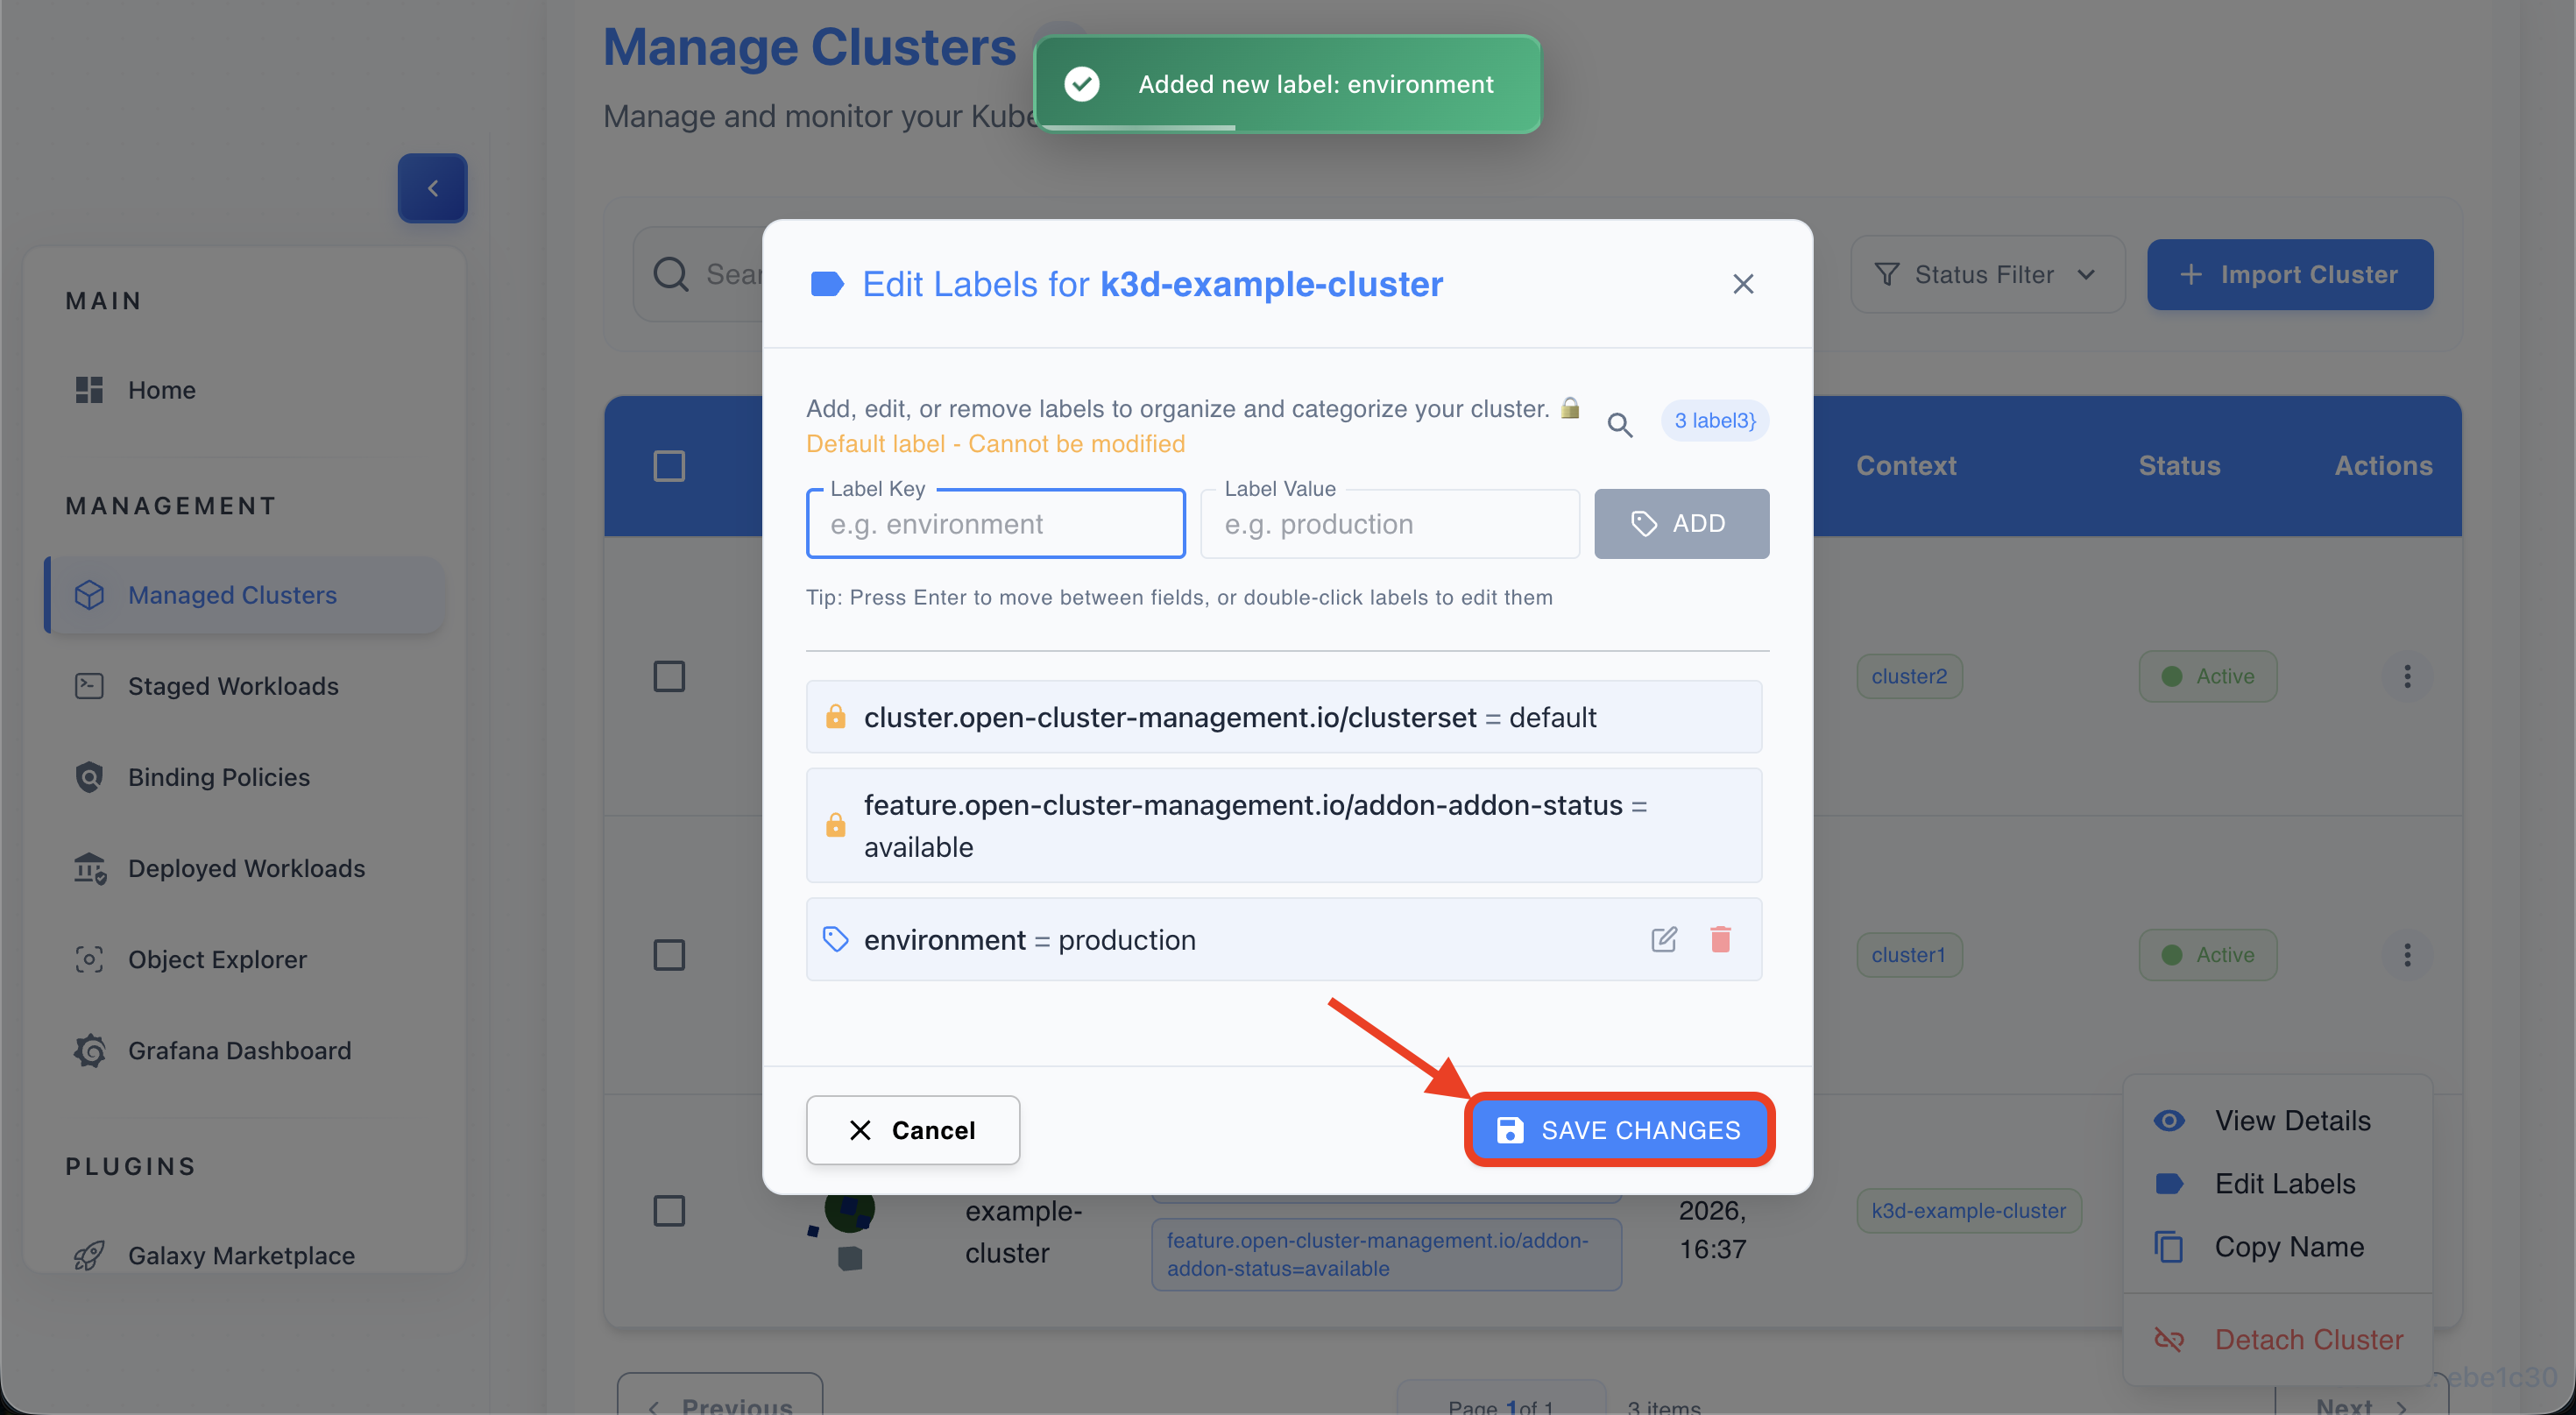
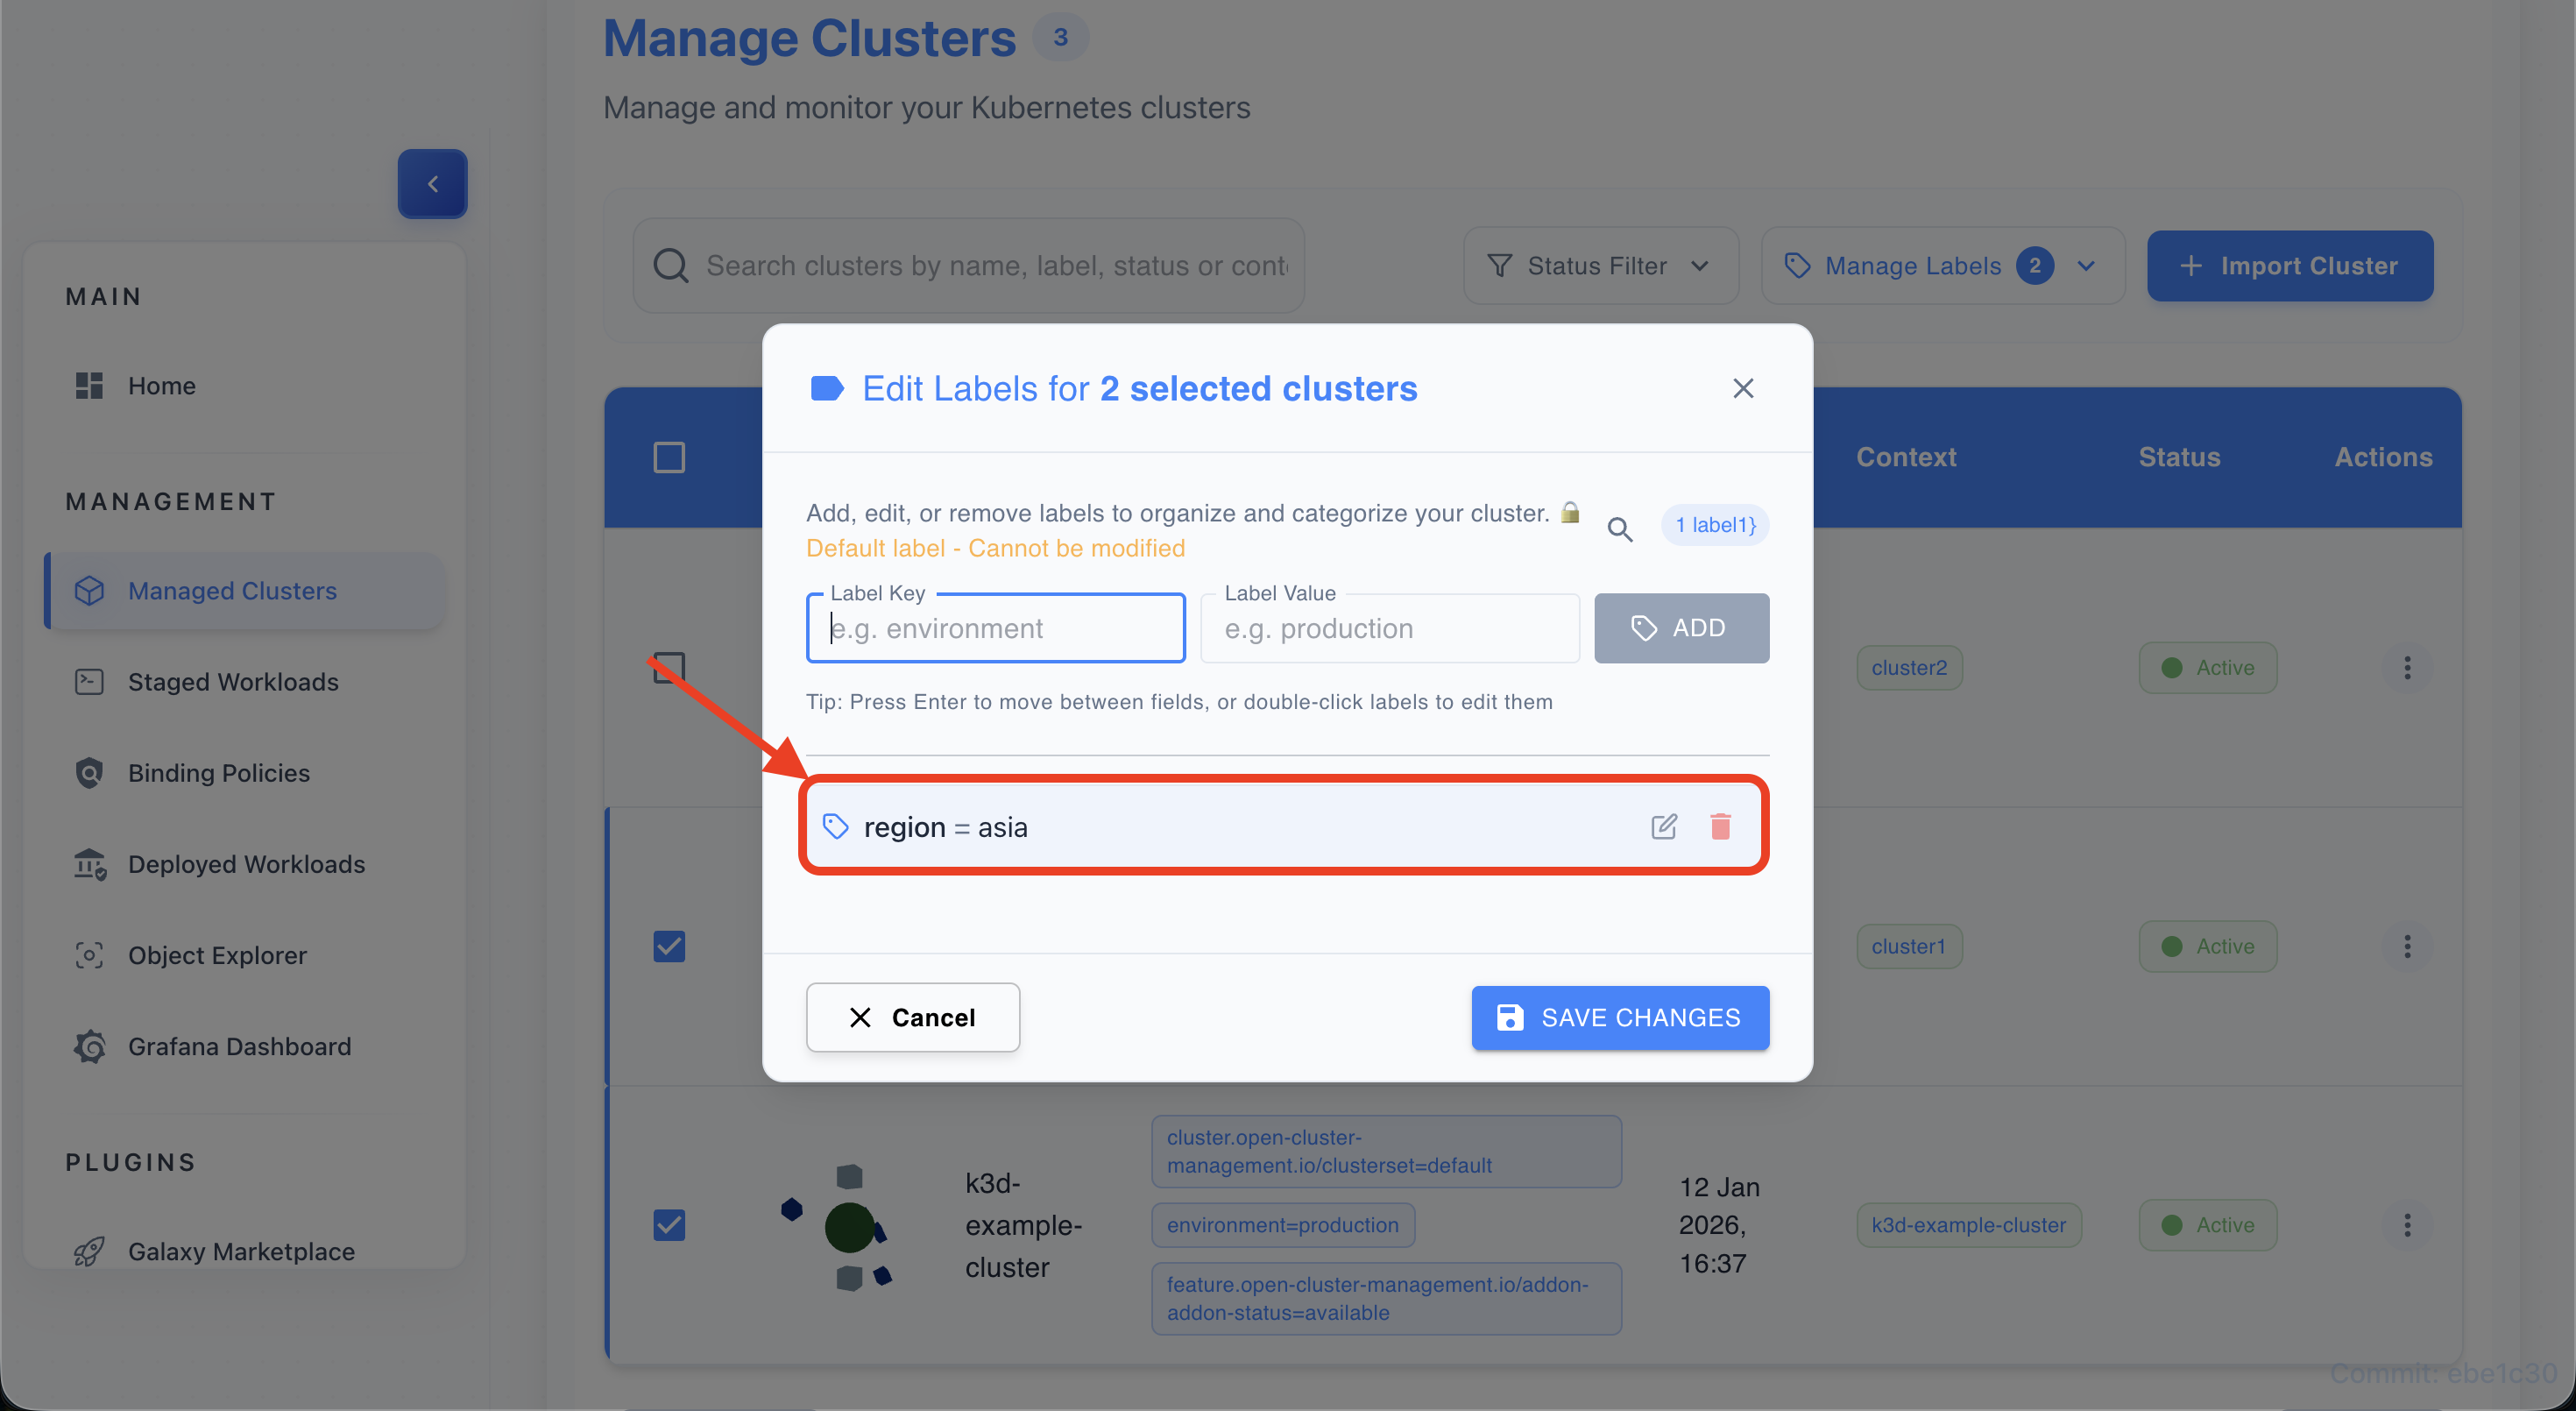
Select “Edit Labels”
- Choose Edit Labels to open the labeling dialog.
-
Enter key (e.g., environment)
- Type the label key, for example
environment.
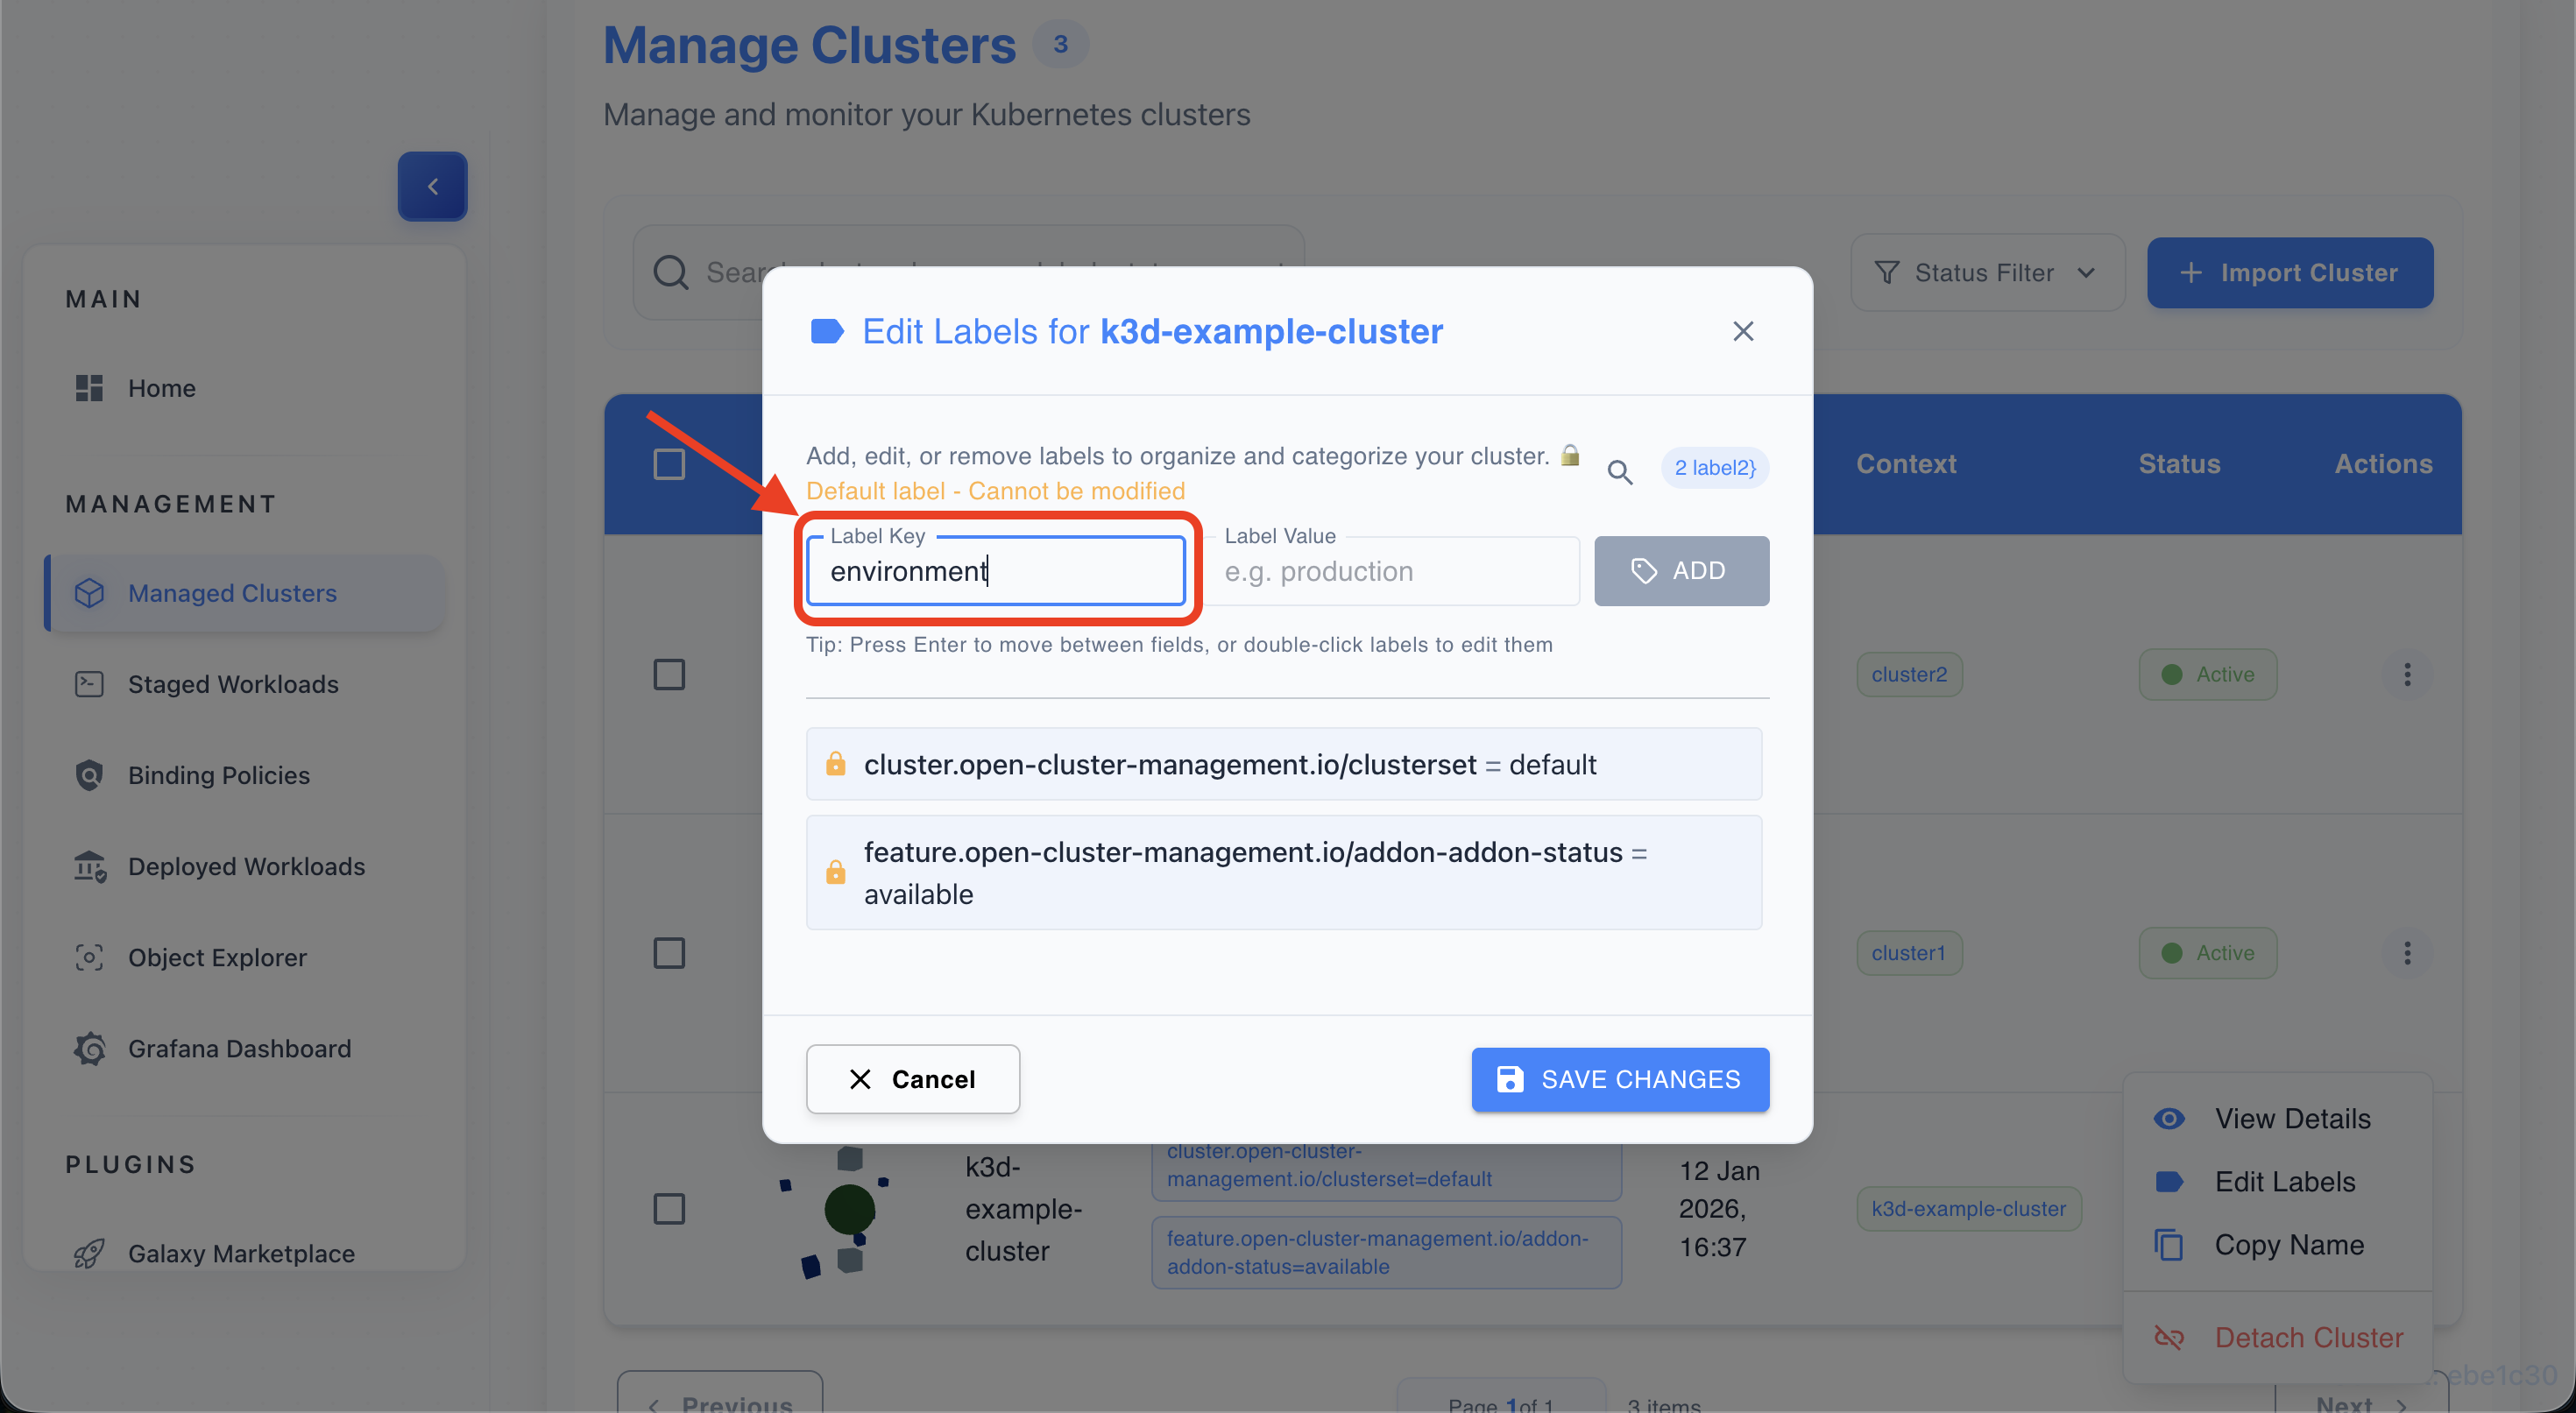
- Type the label key, for example
-
Enter value (e.g., production)
- Type the label value, for example
production.
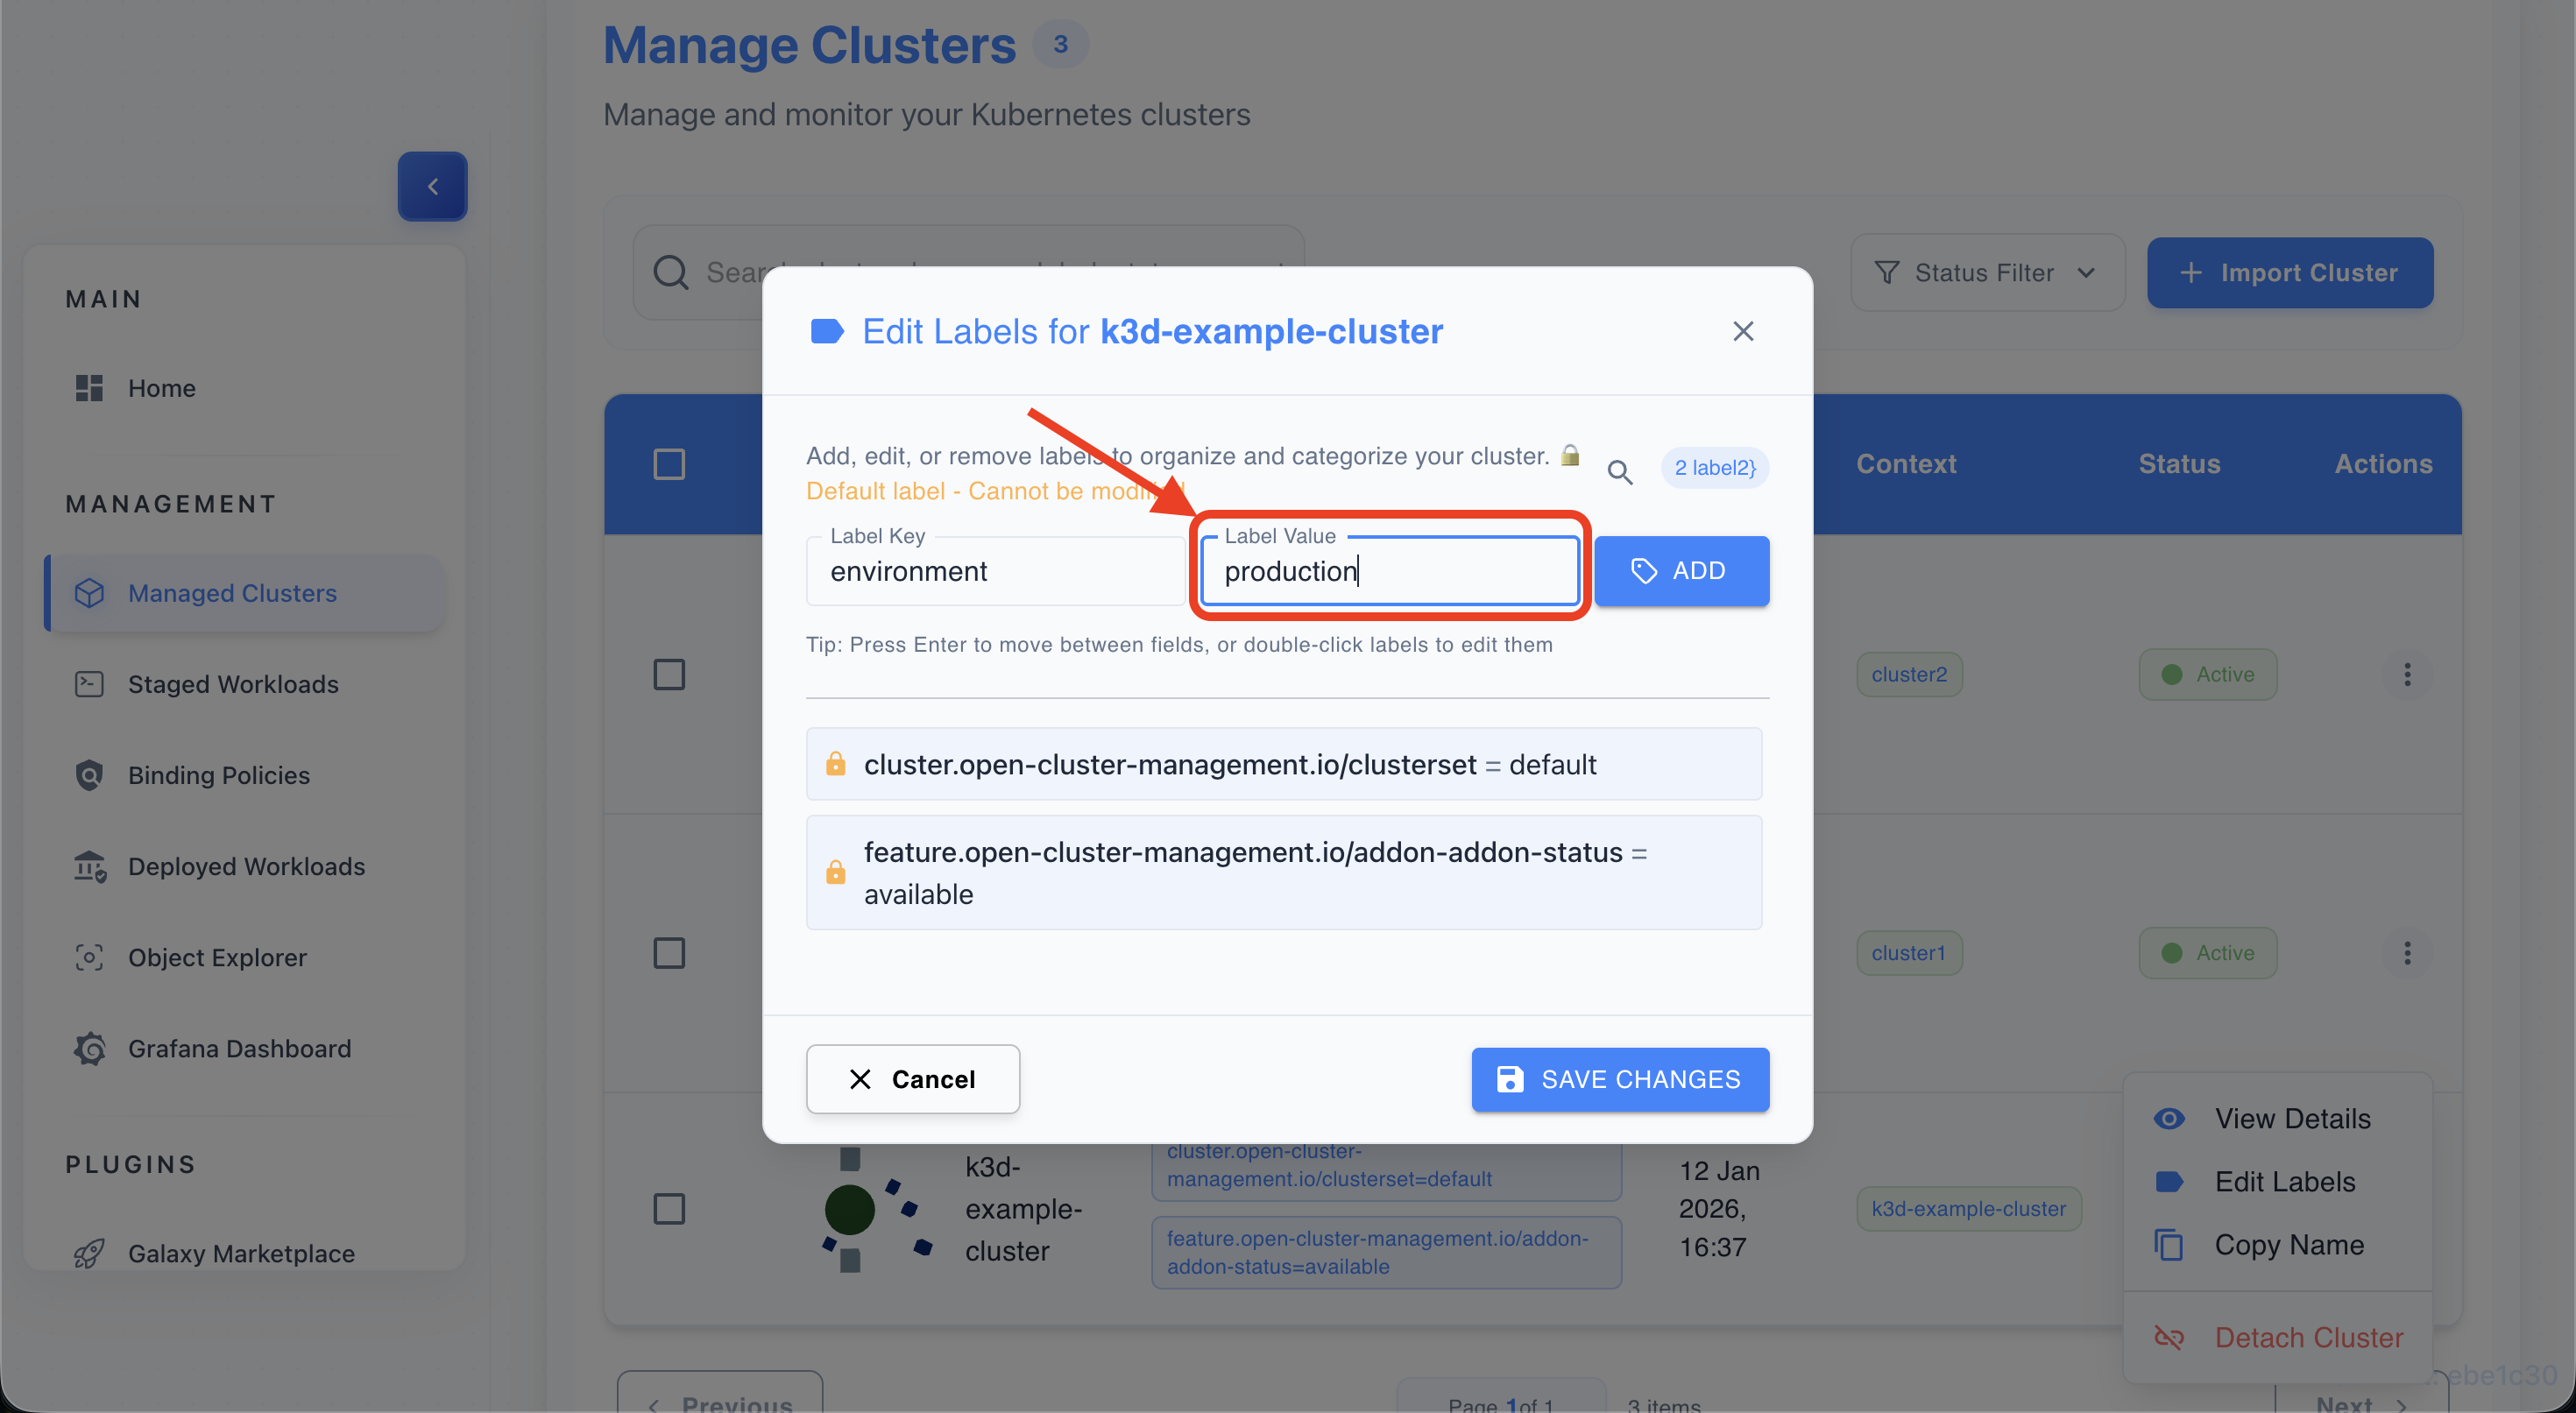
- Type the label value, for example
-
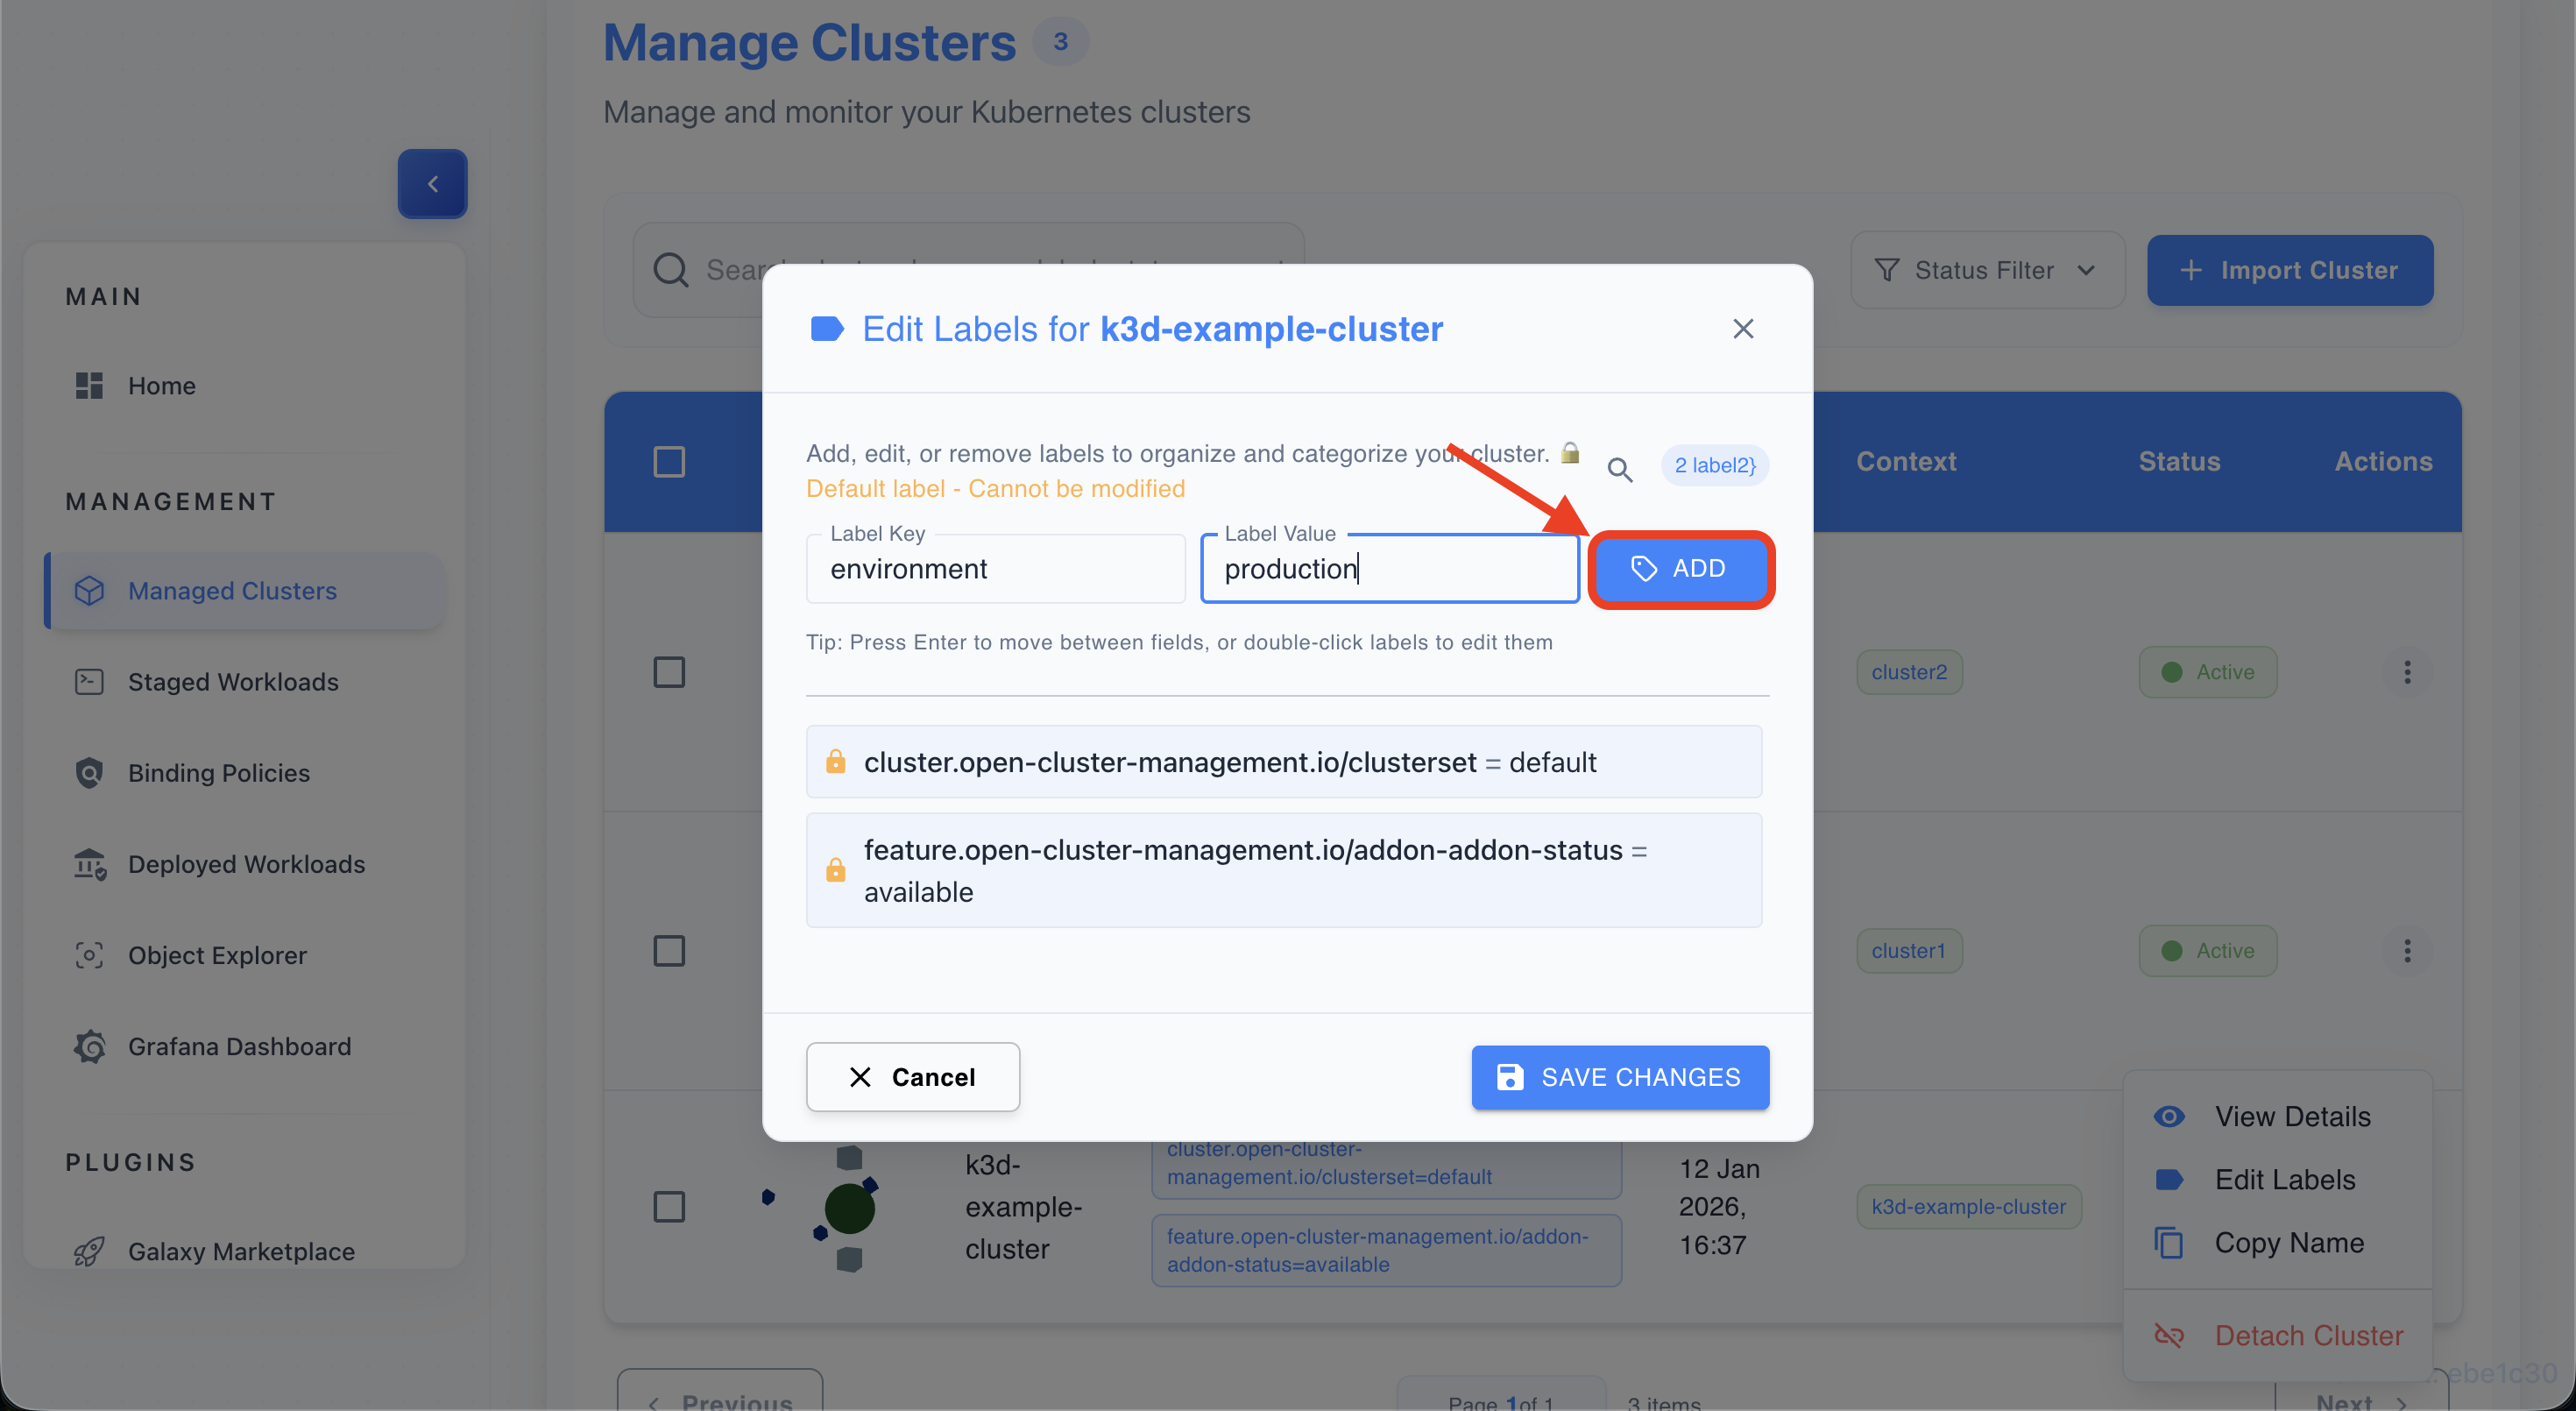
Click “Add”
- Confirm the new key/value label to add it to the list.
-
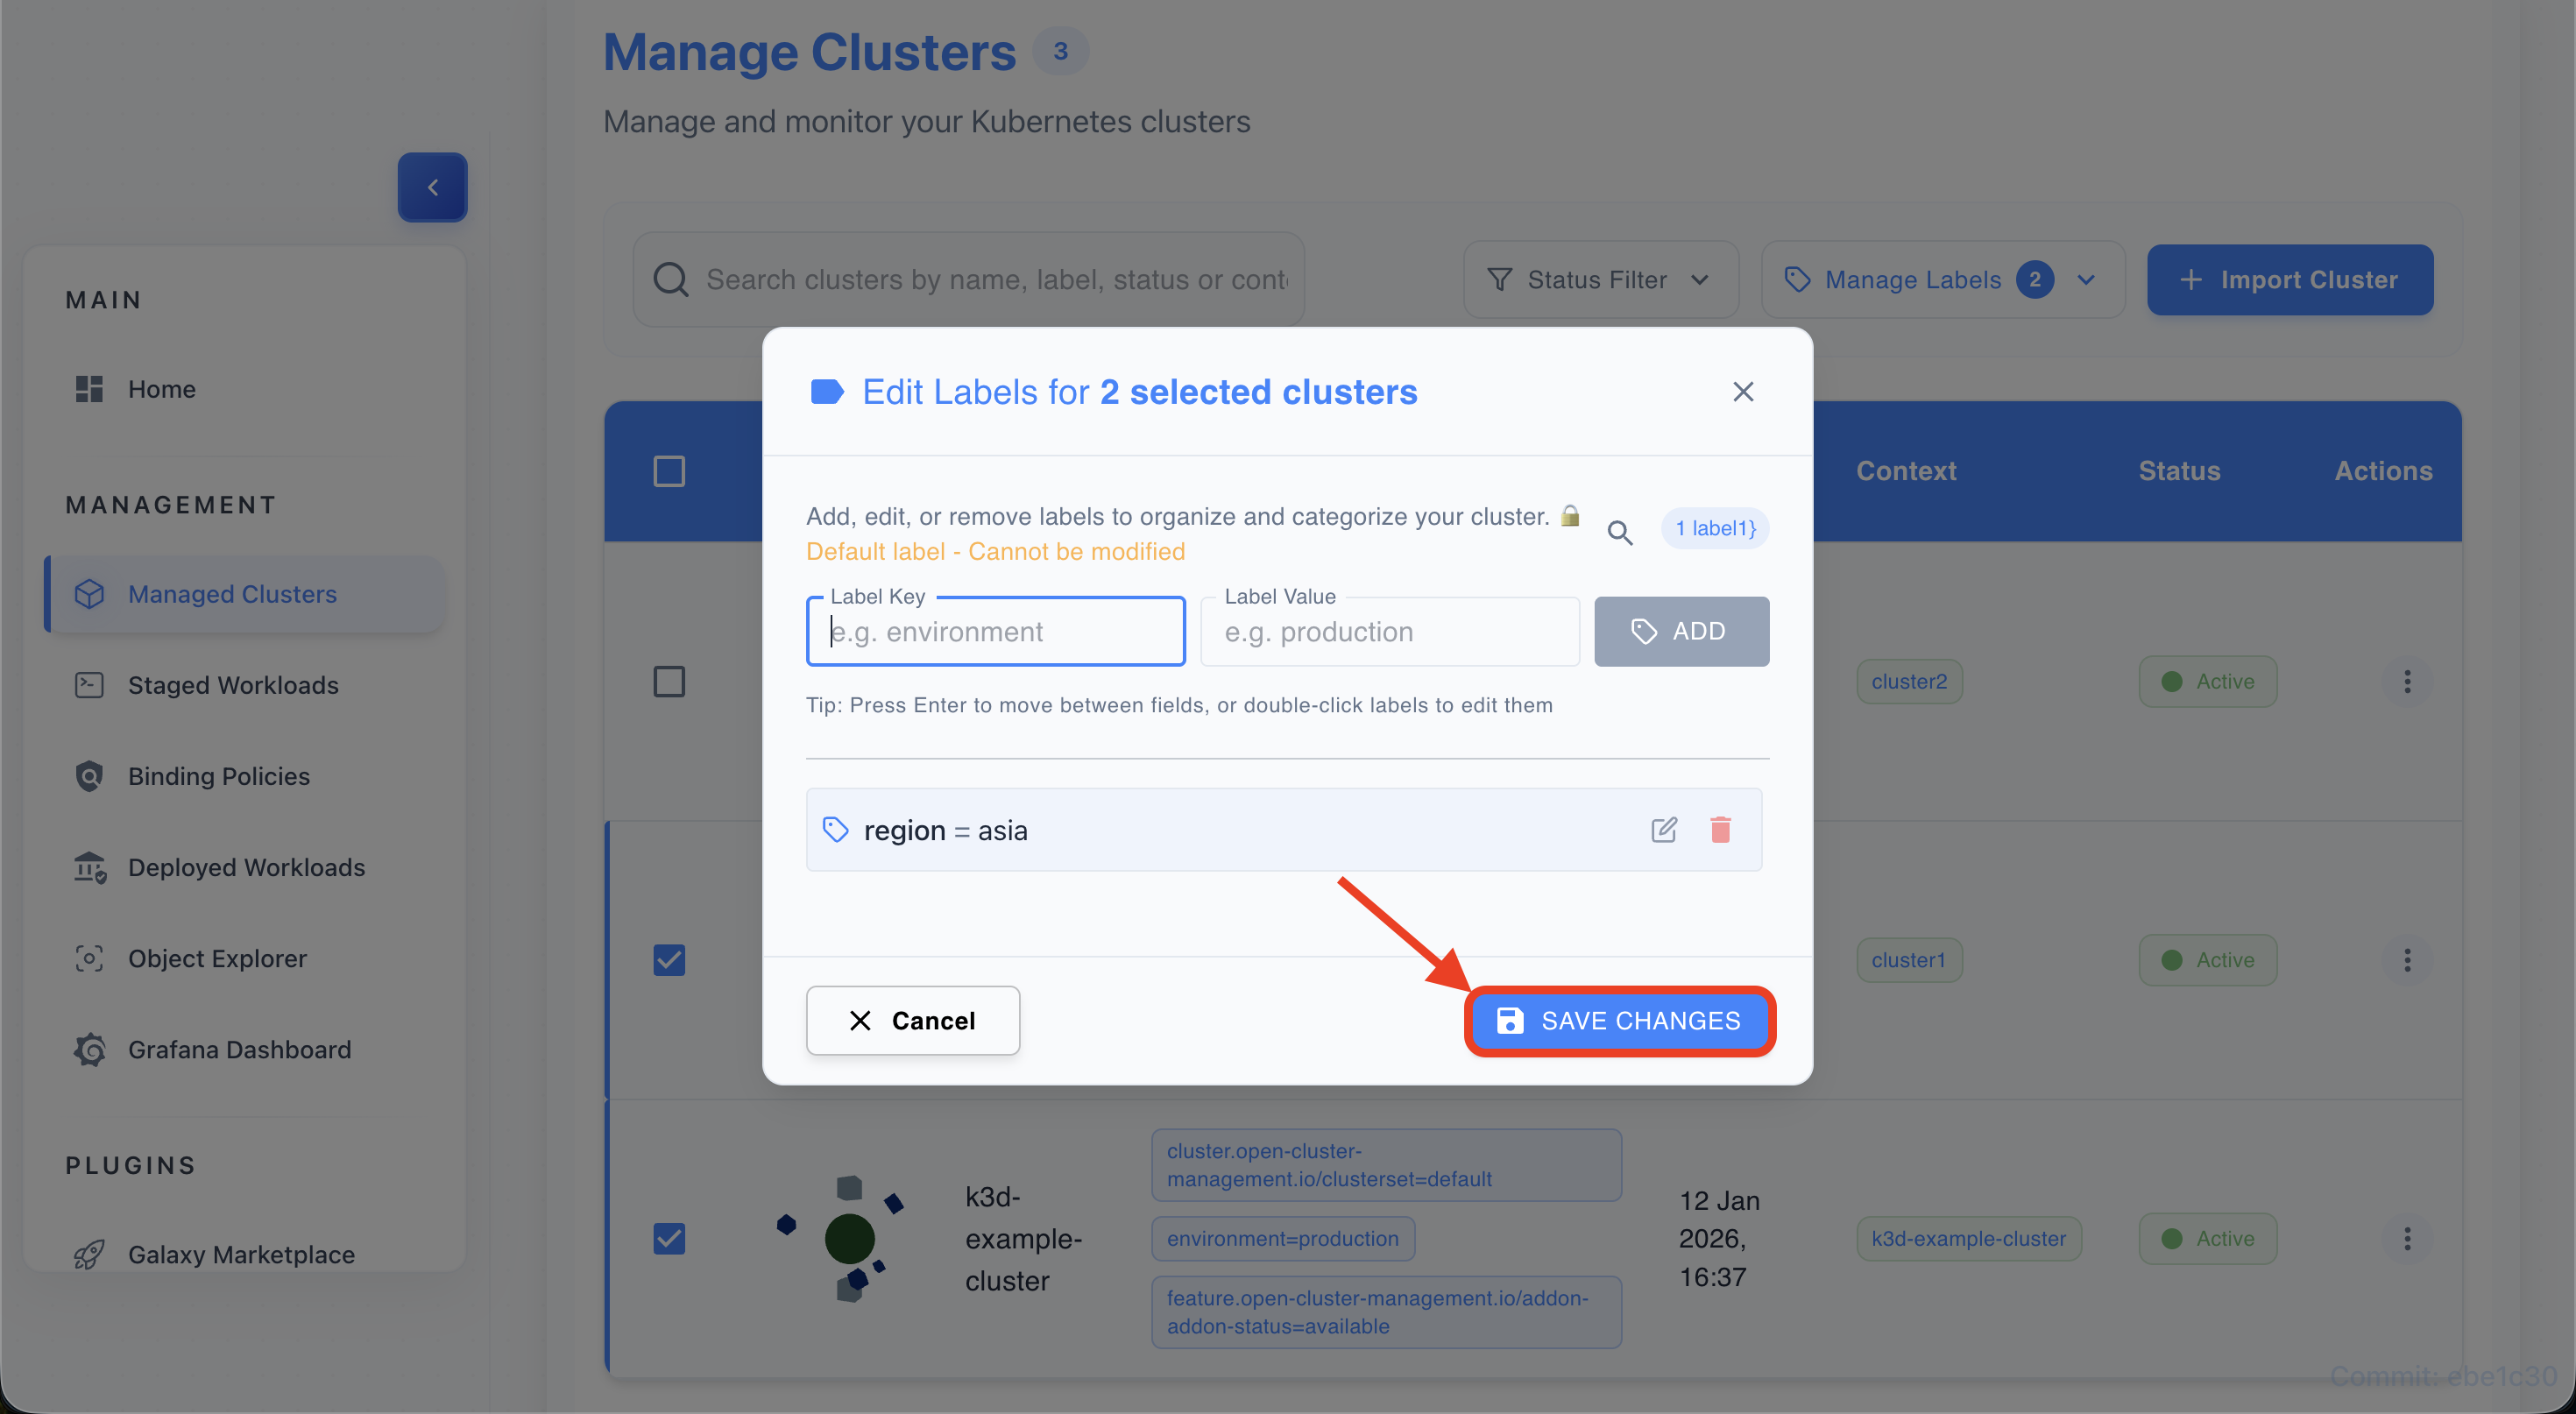
Click “Save Changes”
- Save changes to apply labels to the cluster.
Guide 5: Bulk Labeling Clusters
-
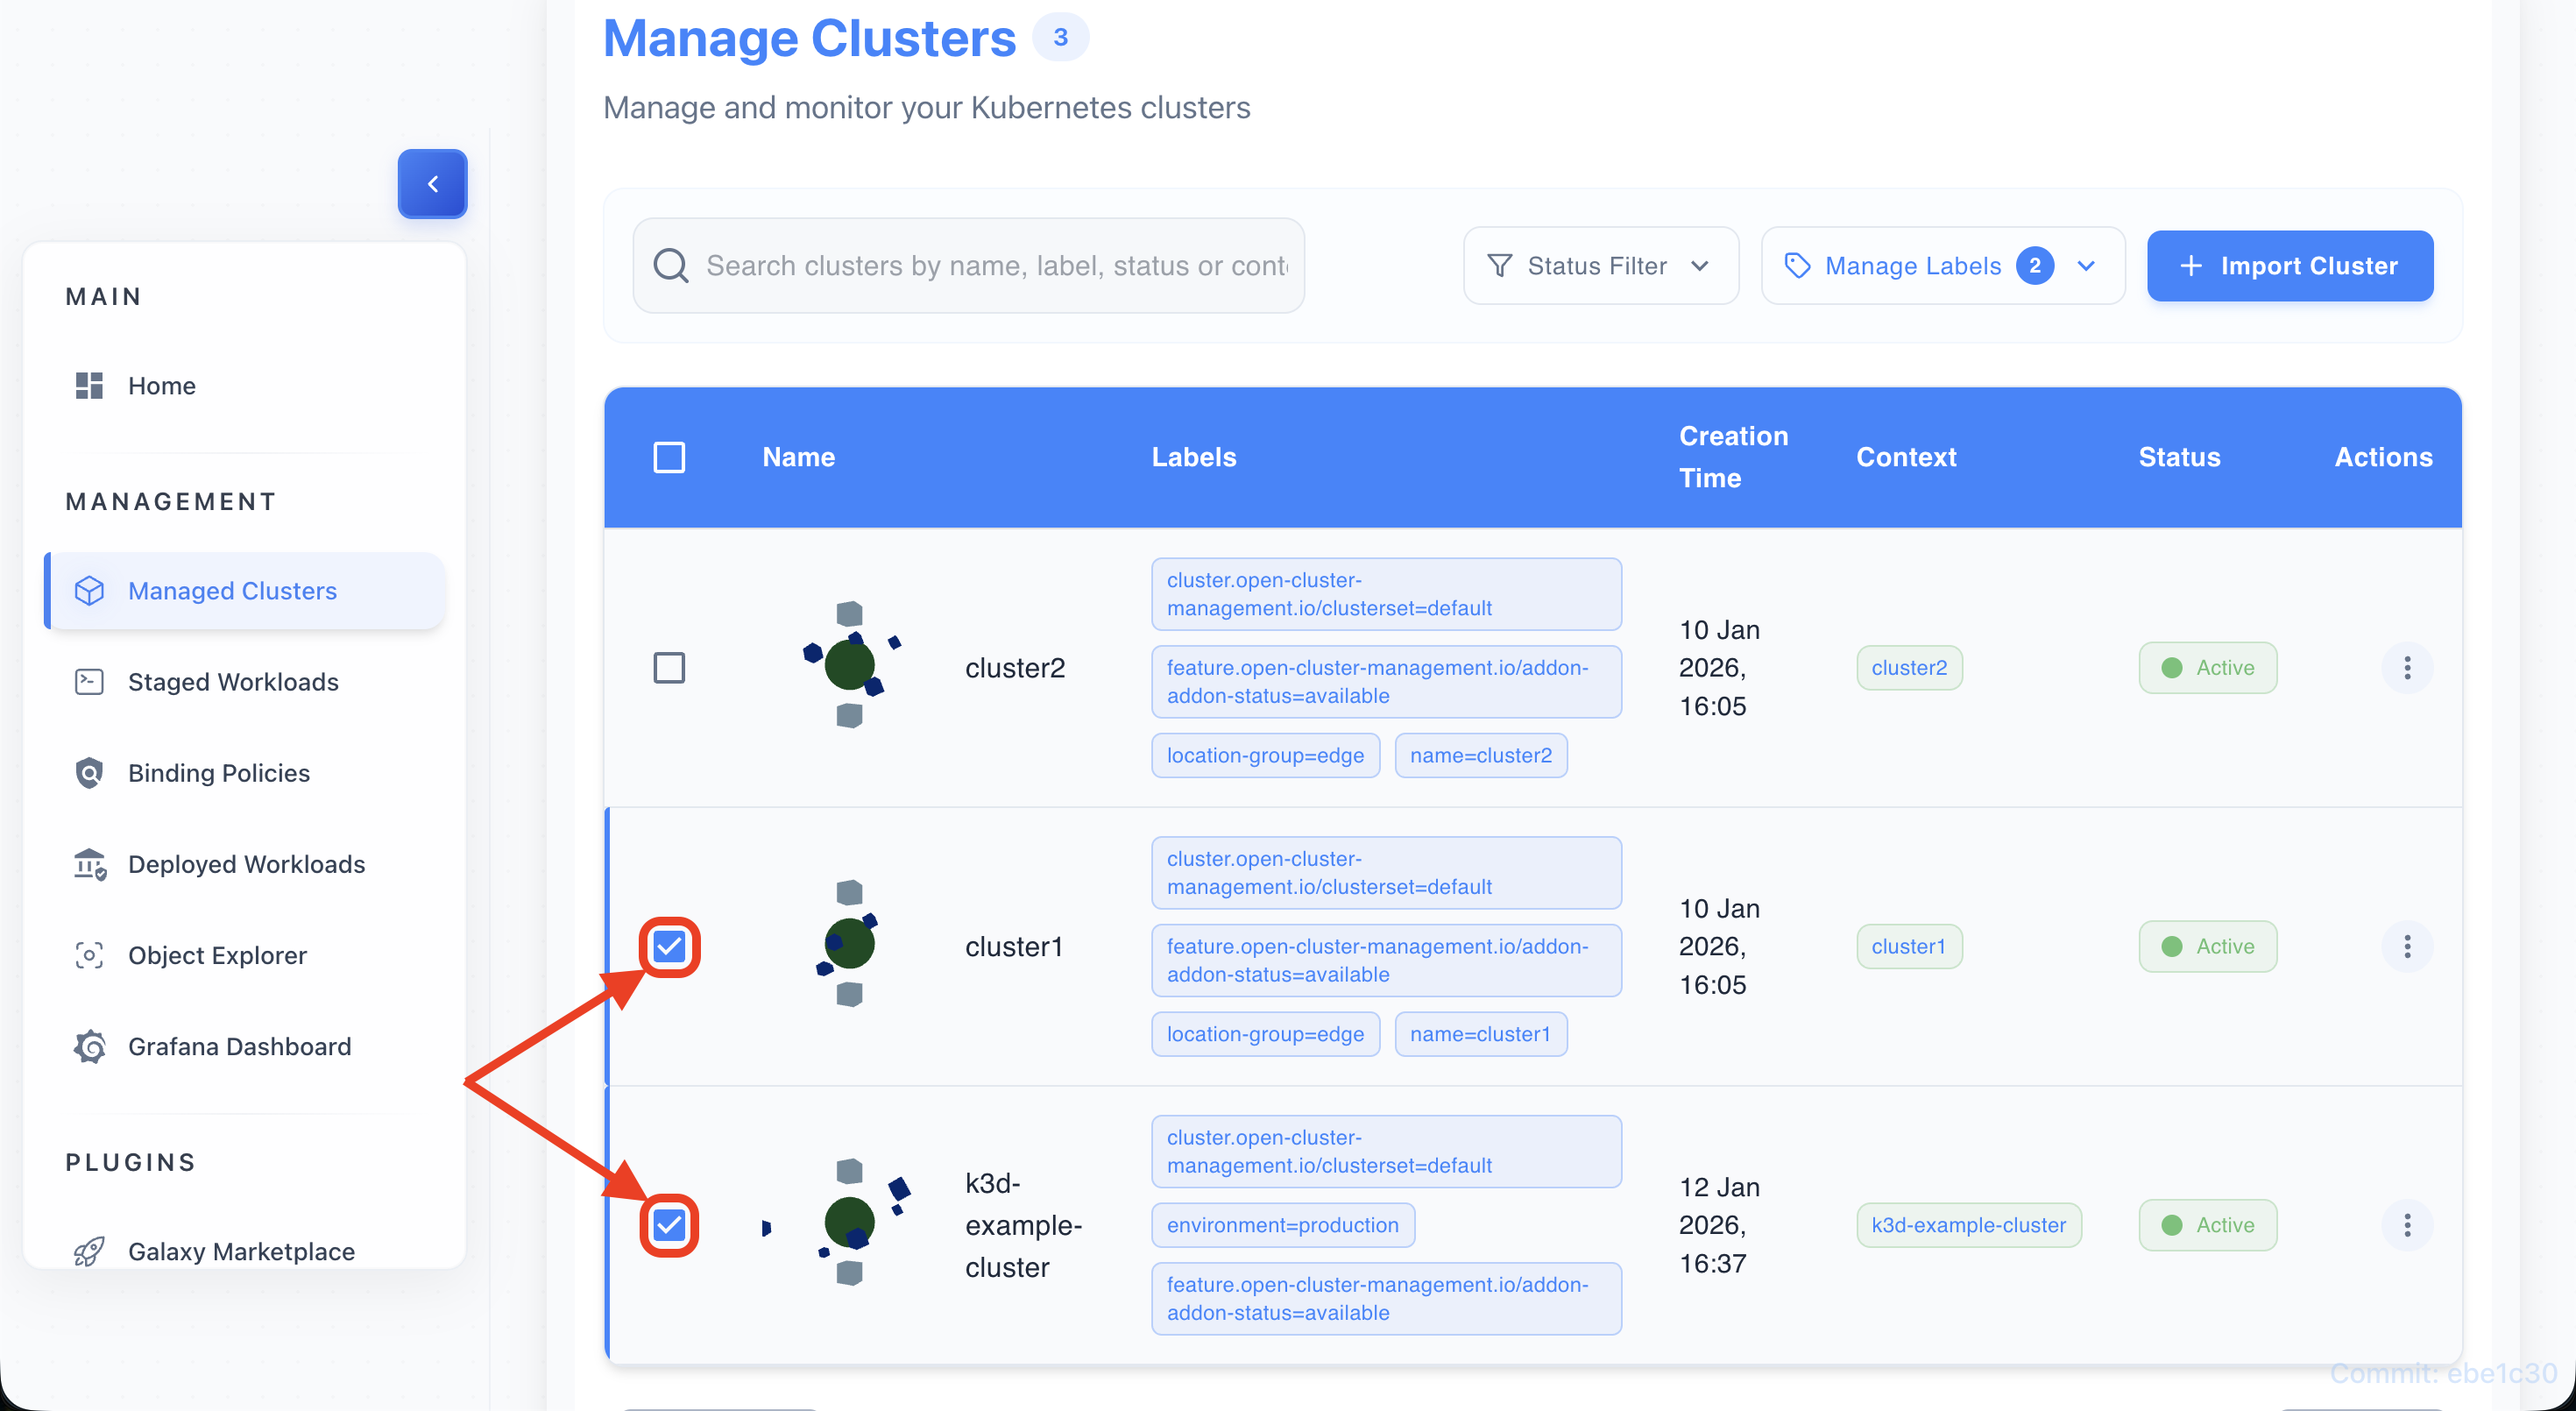
Select checkboxes for multiple clusters
- Use the table checkboxes to select two or more clusters.
-
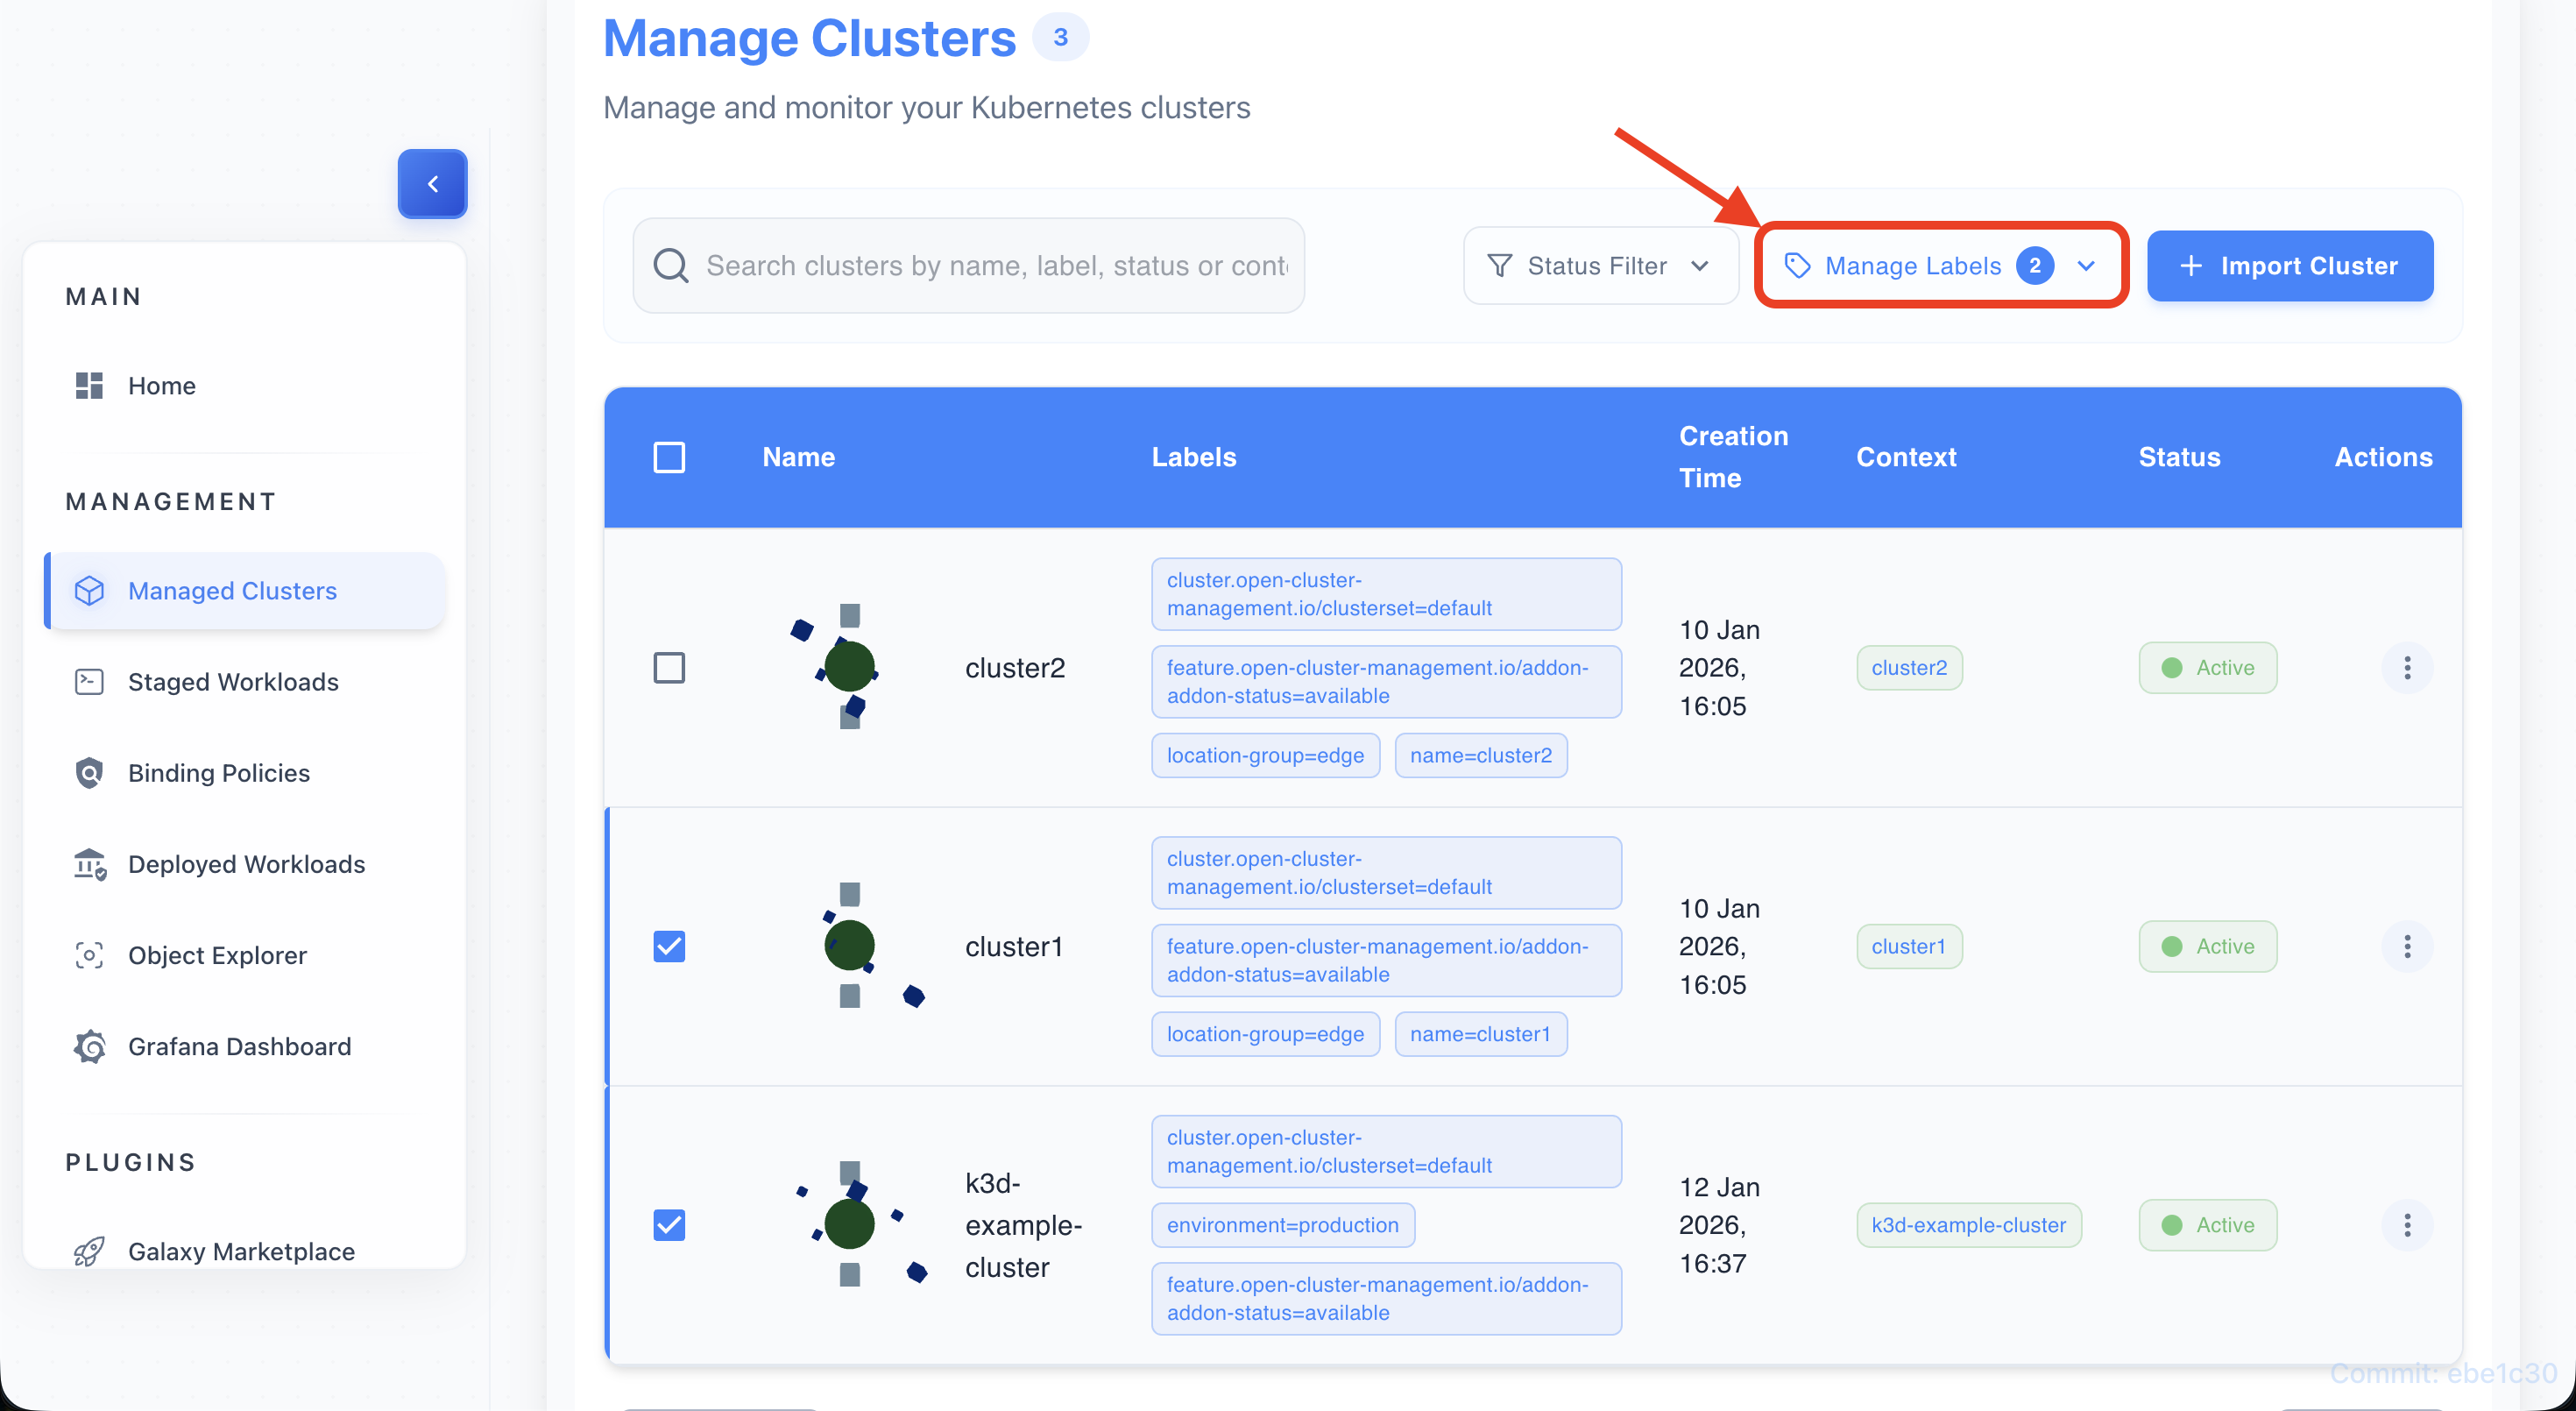
Click “Manage Labels” button
- Click on the “Manage Labels” button that appears above the table.
-
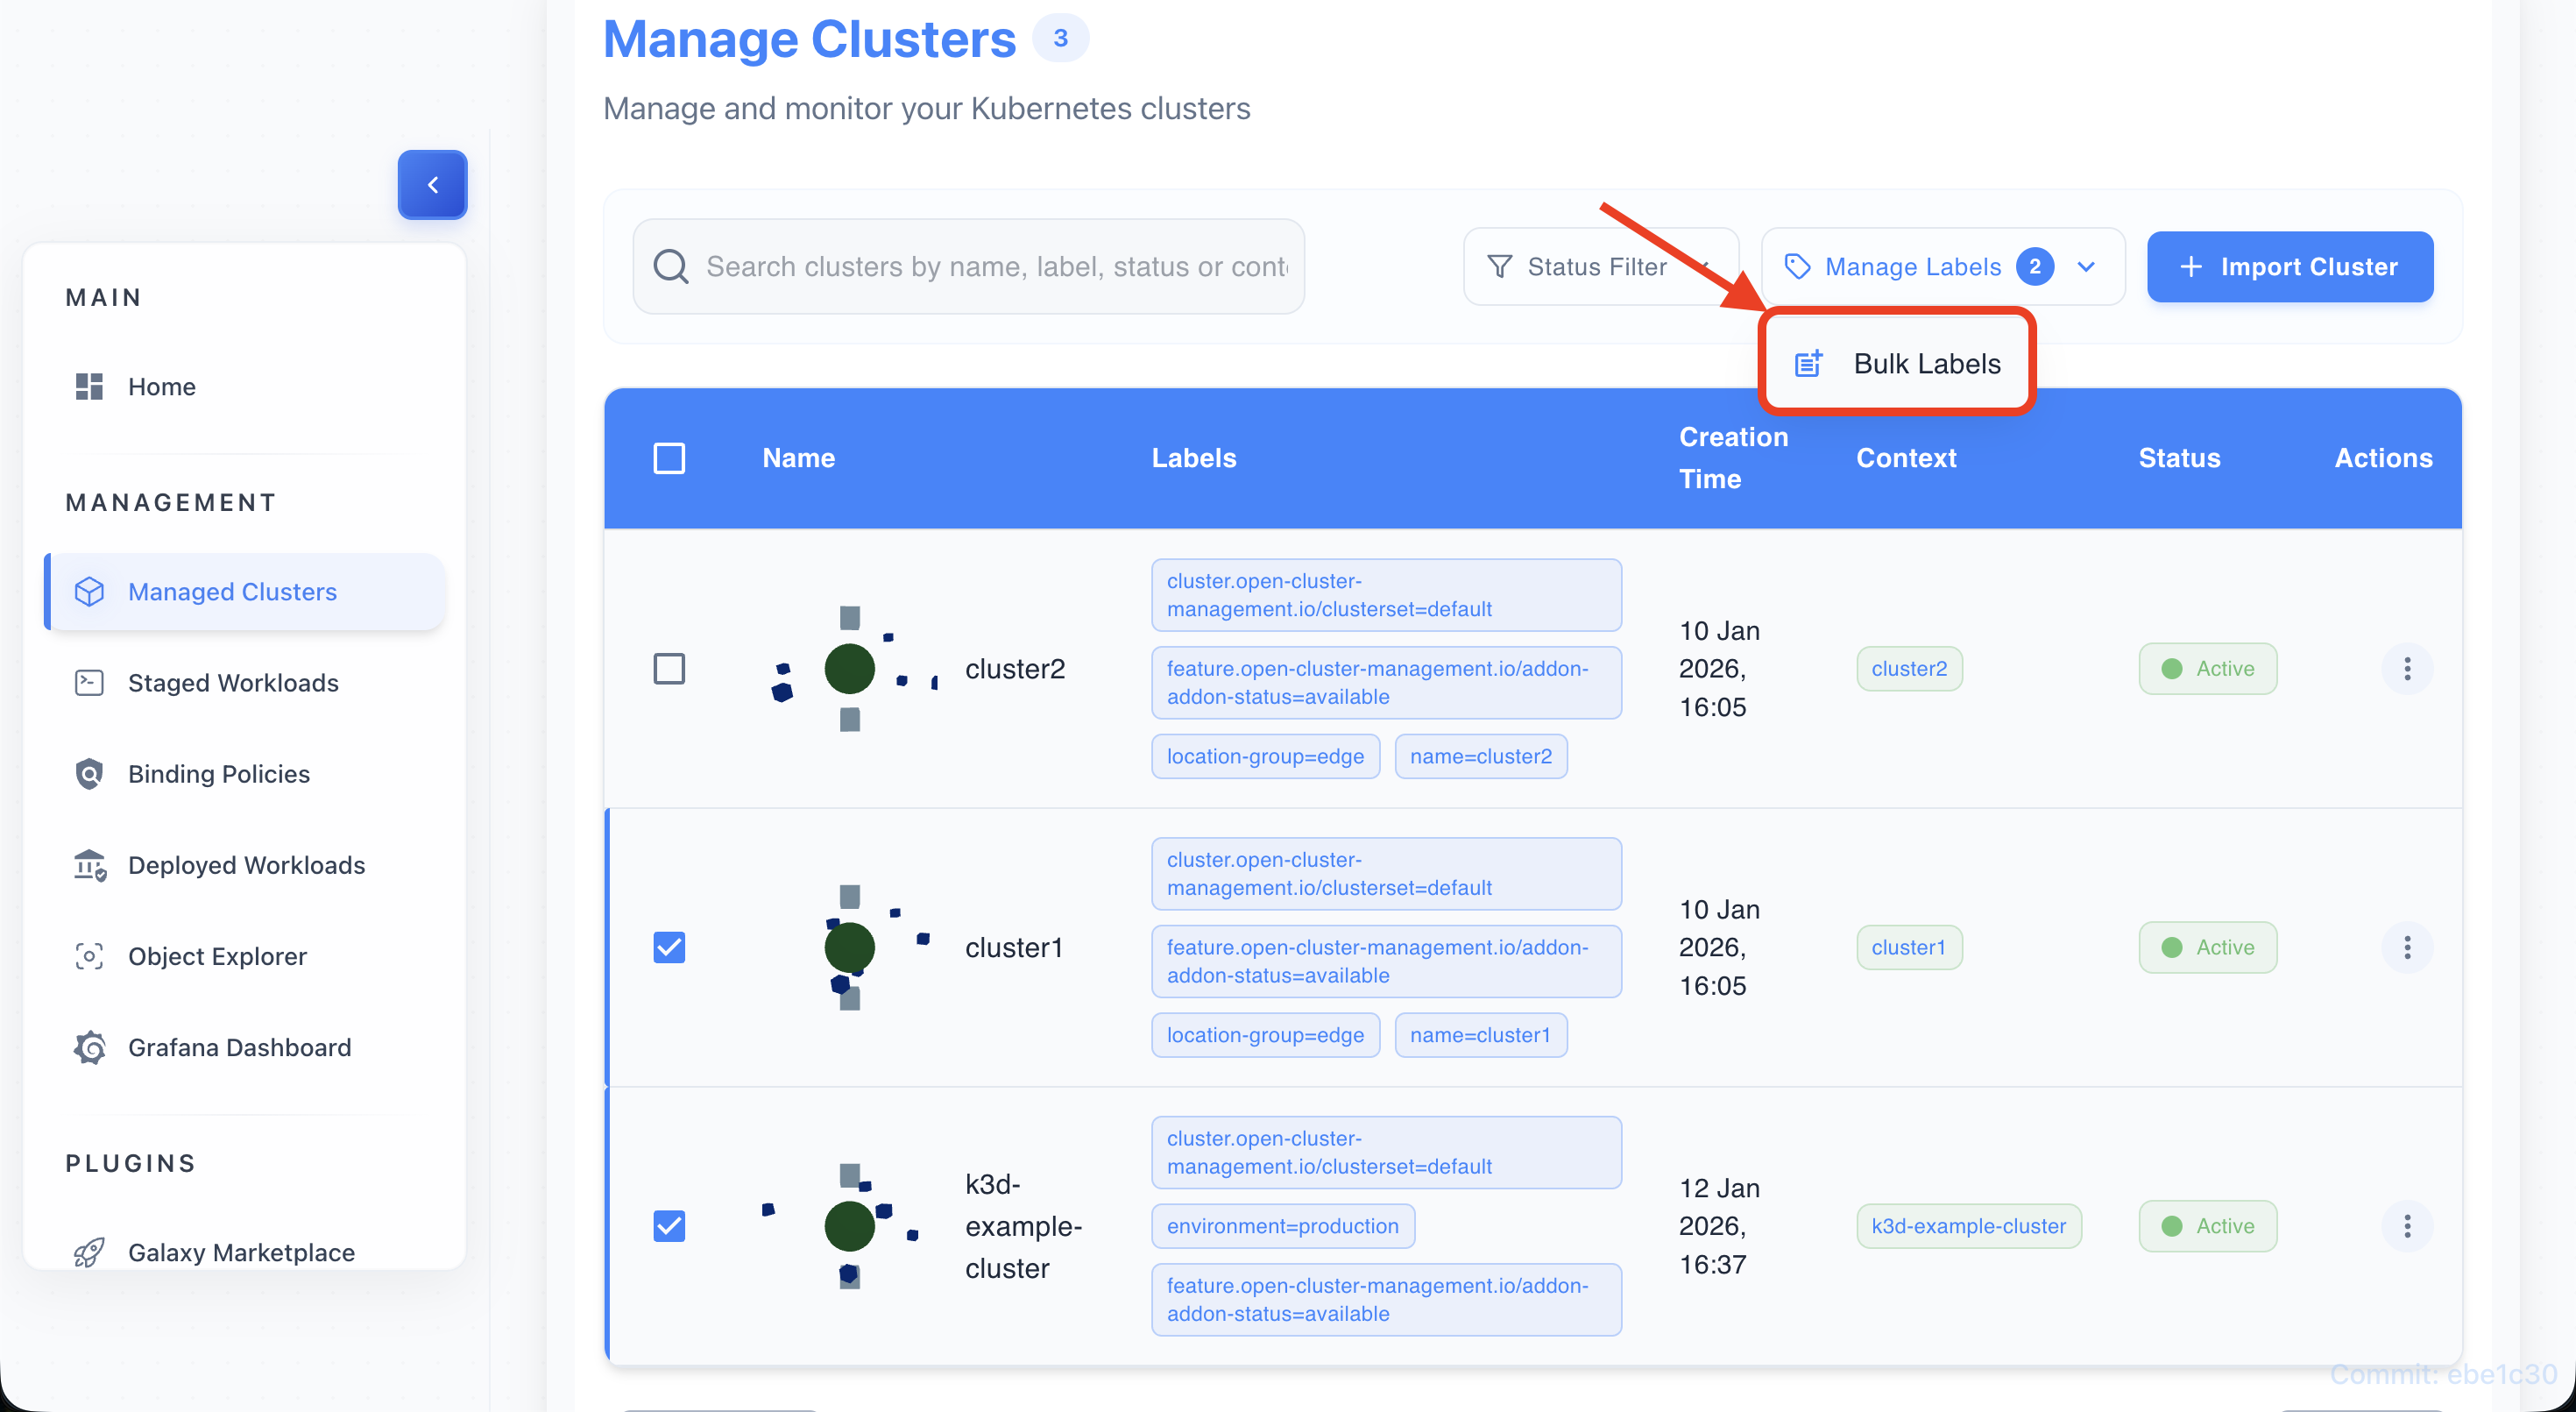
Choose “Bulk Labels”
- Choose the Bulk Labels option in the dialog.
-
Add new labels
- Enter or more key/value labels to apply.
-
Click “Save Changes”
- Apply the labels in bulk and wait for confirmation.
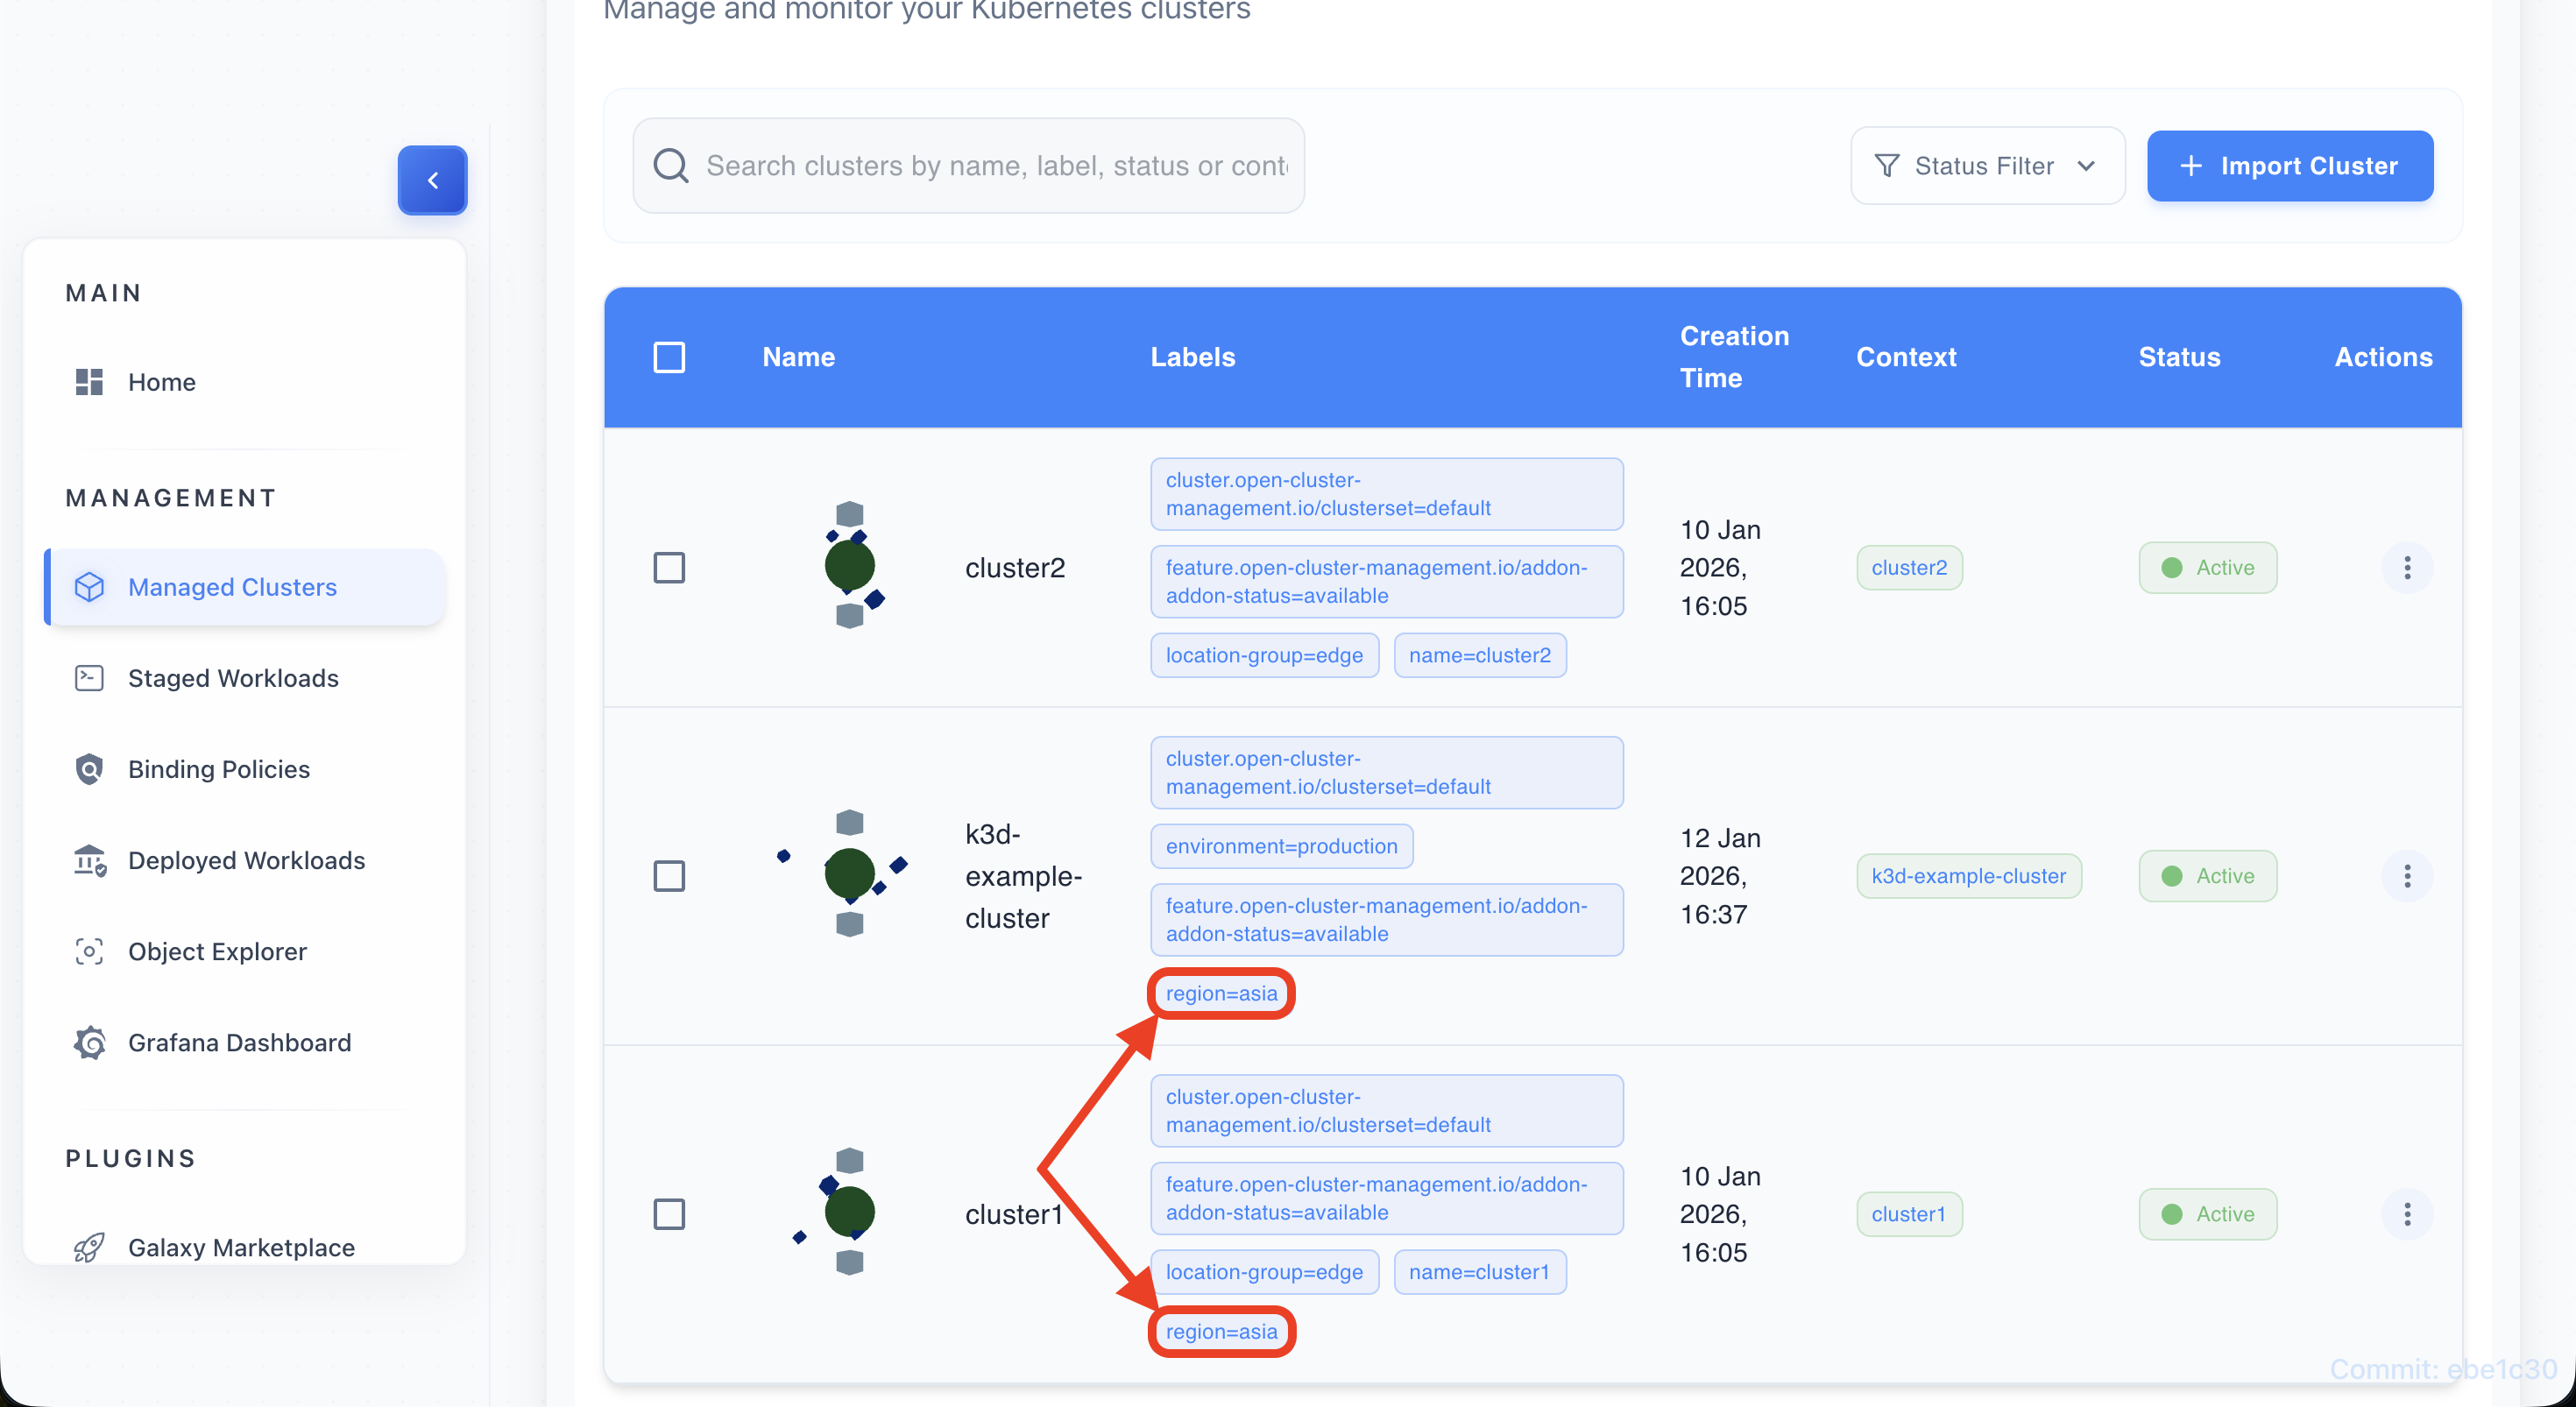
-
Verify labels applied
- Ensure labels appear on all selected clusters; check toasts.
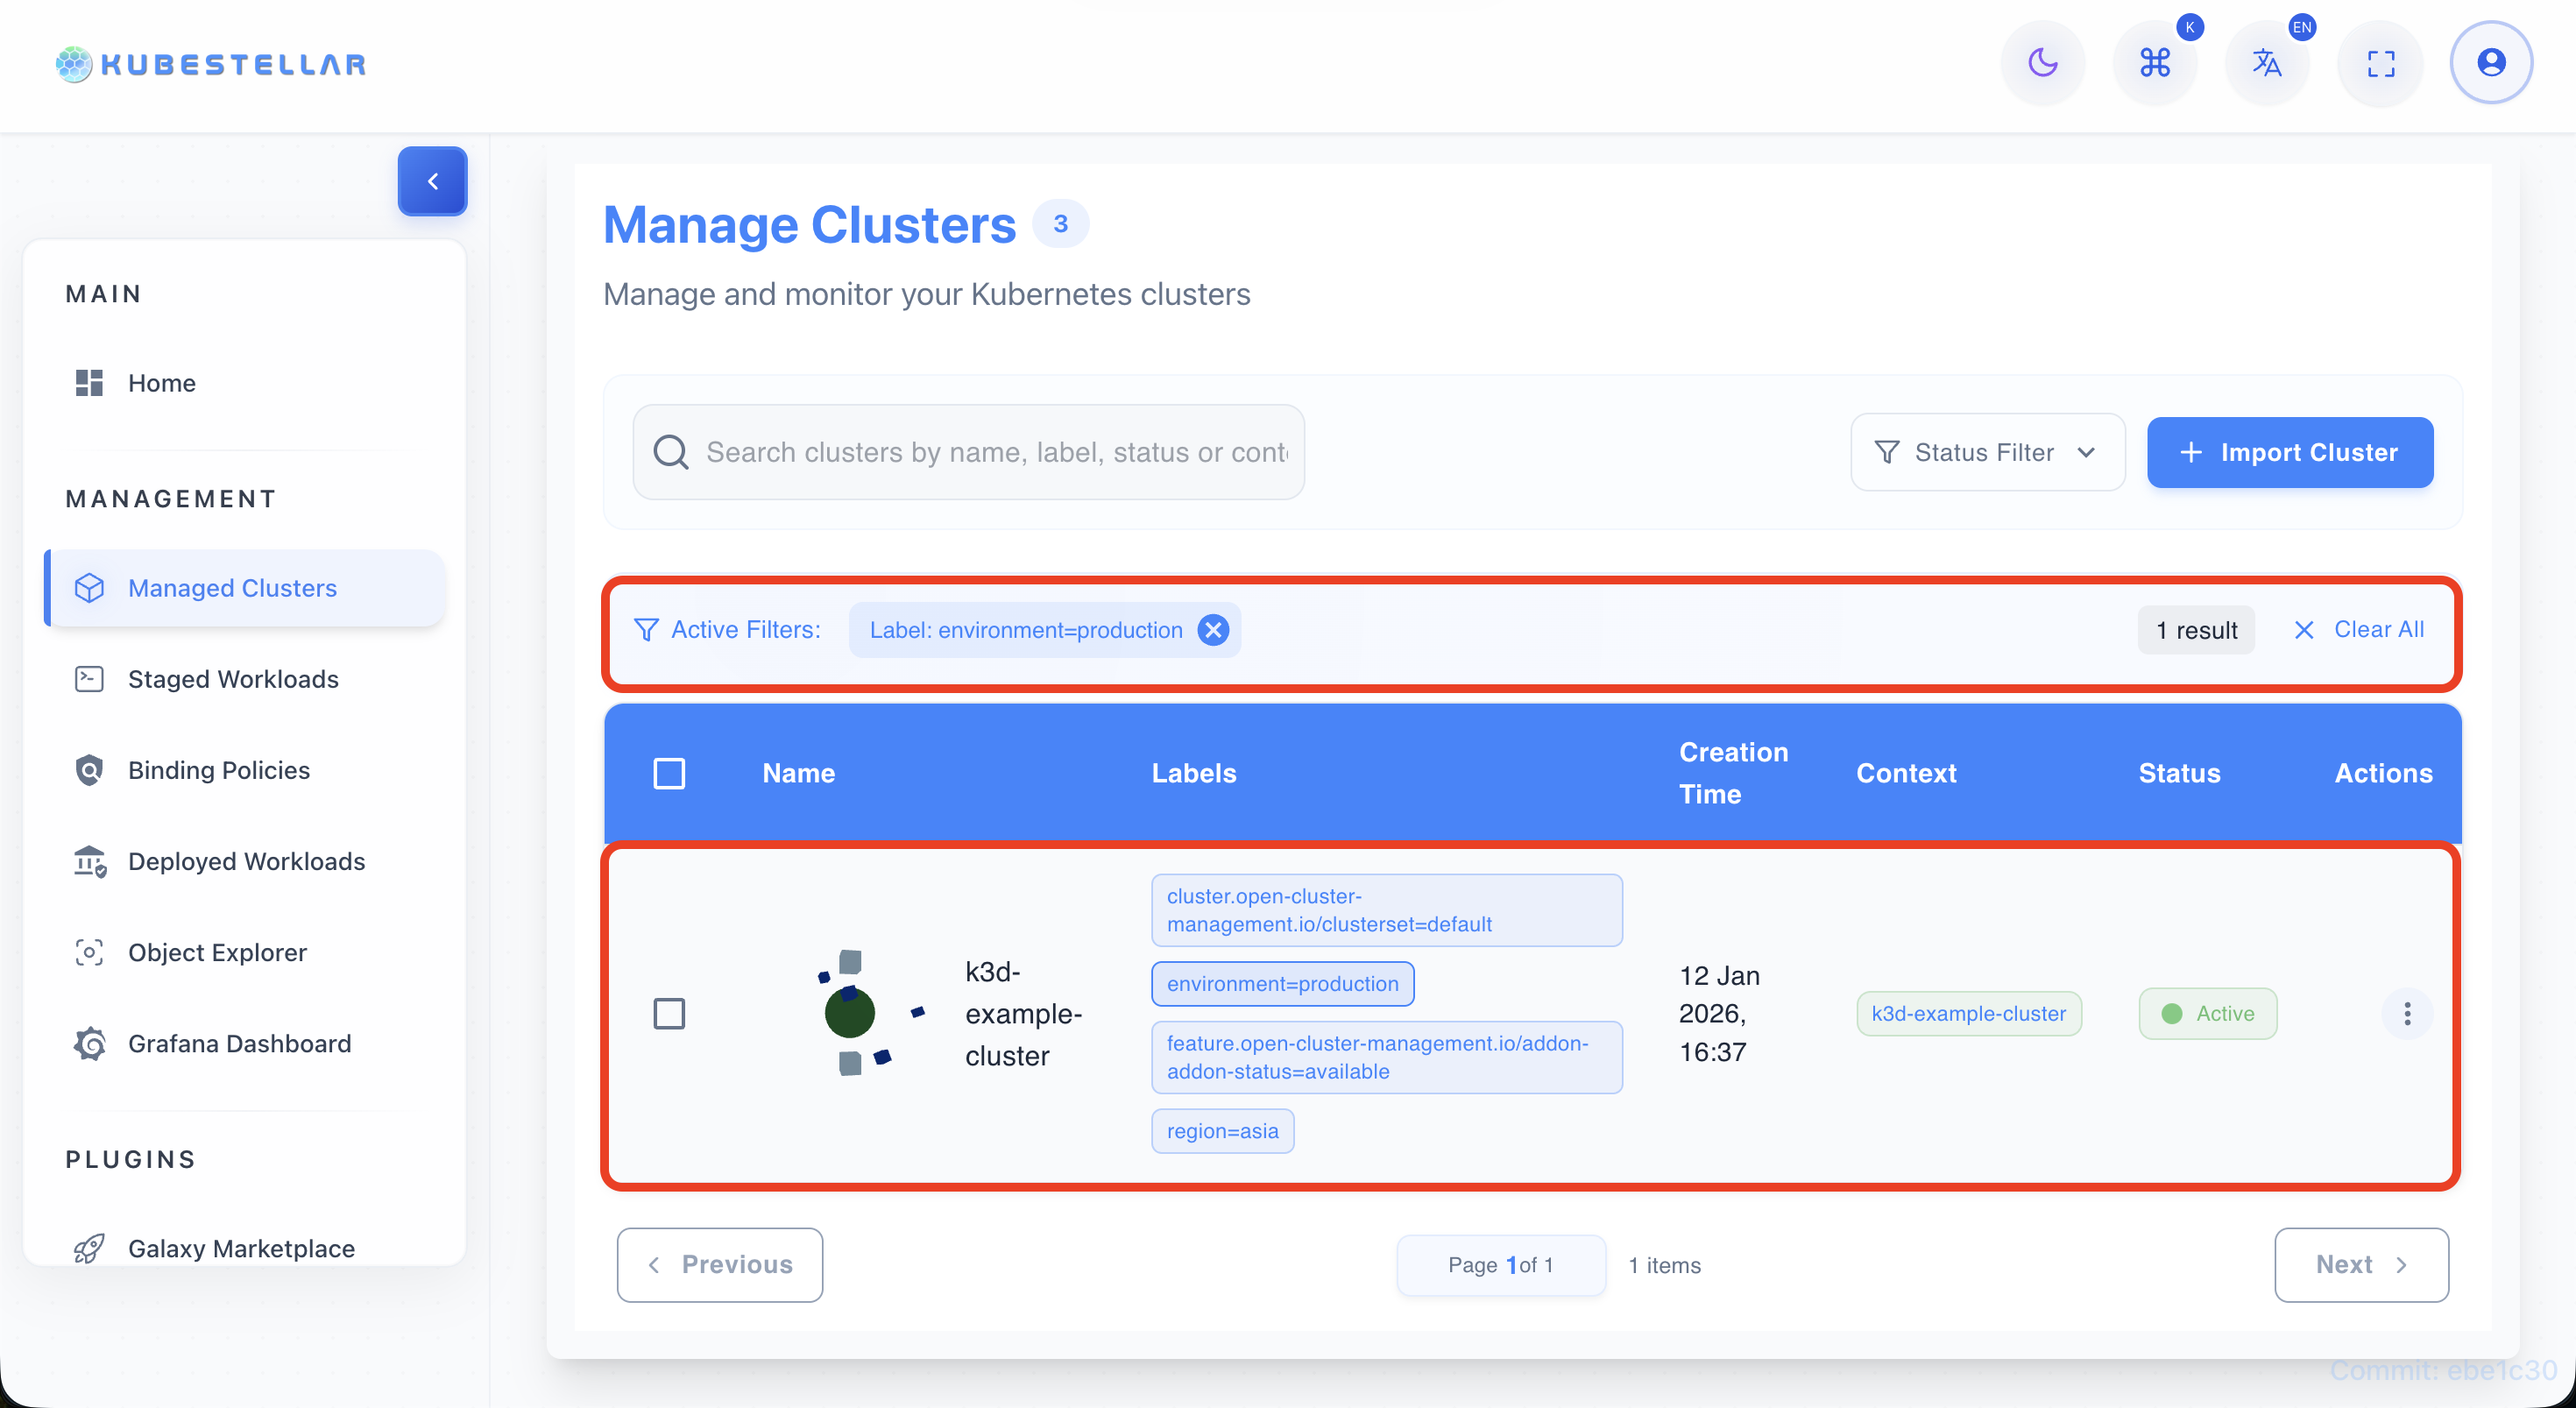
Guide 6: Filtering Clusters by Labels
-
Locate label chip on any cluster
- Find a label chip (e.g.,
environment=production) on any cluster row.
- Find a label chip (e.g.,
-
Click on the label chip
- Click the chip to apply a filter for that
key=value.
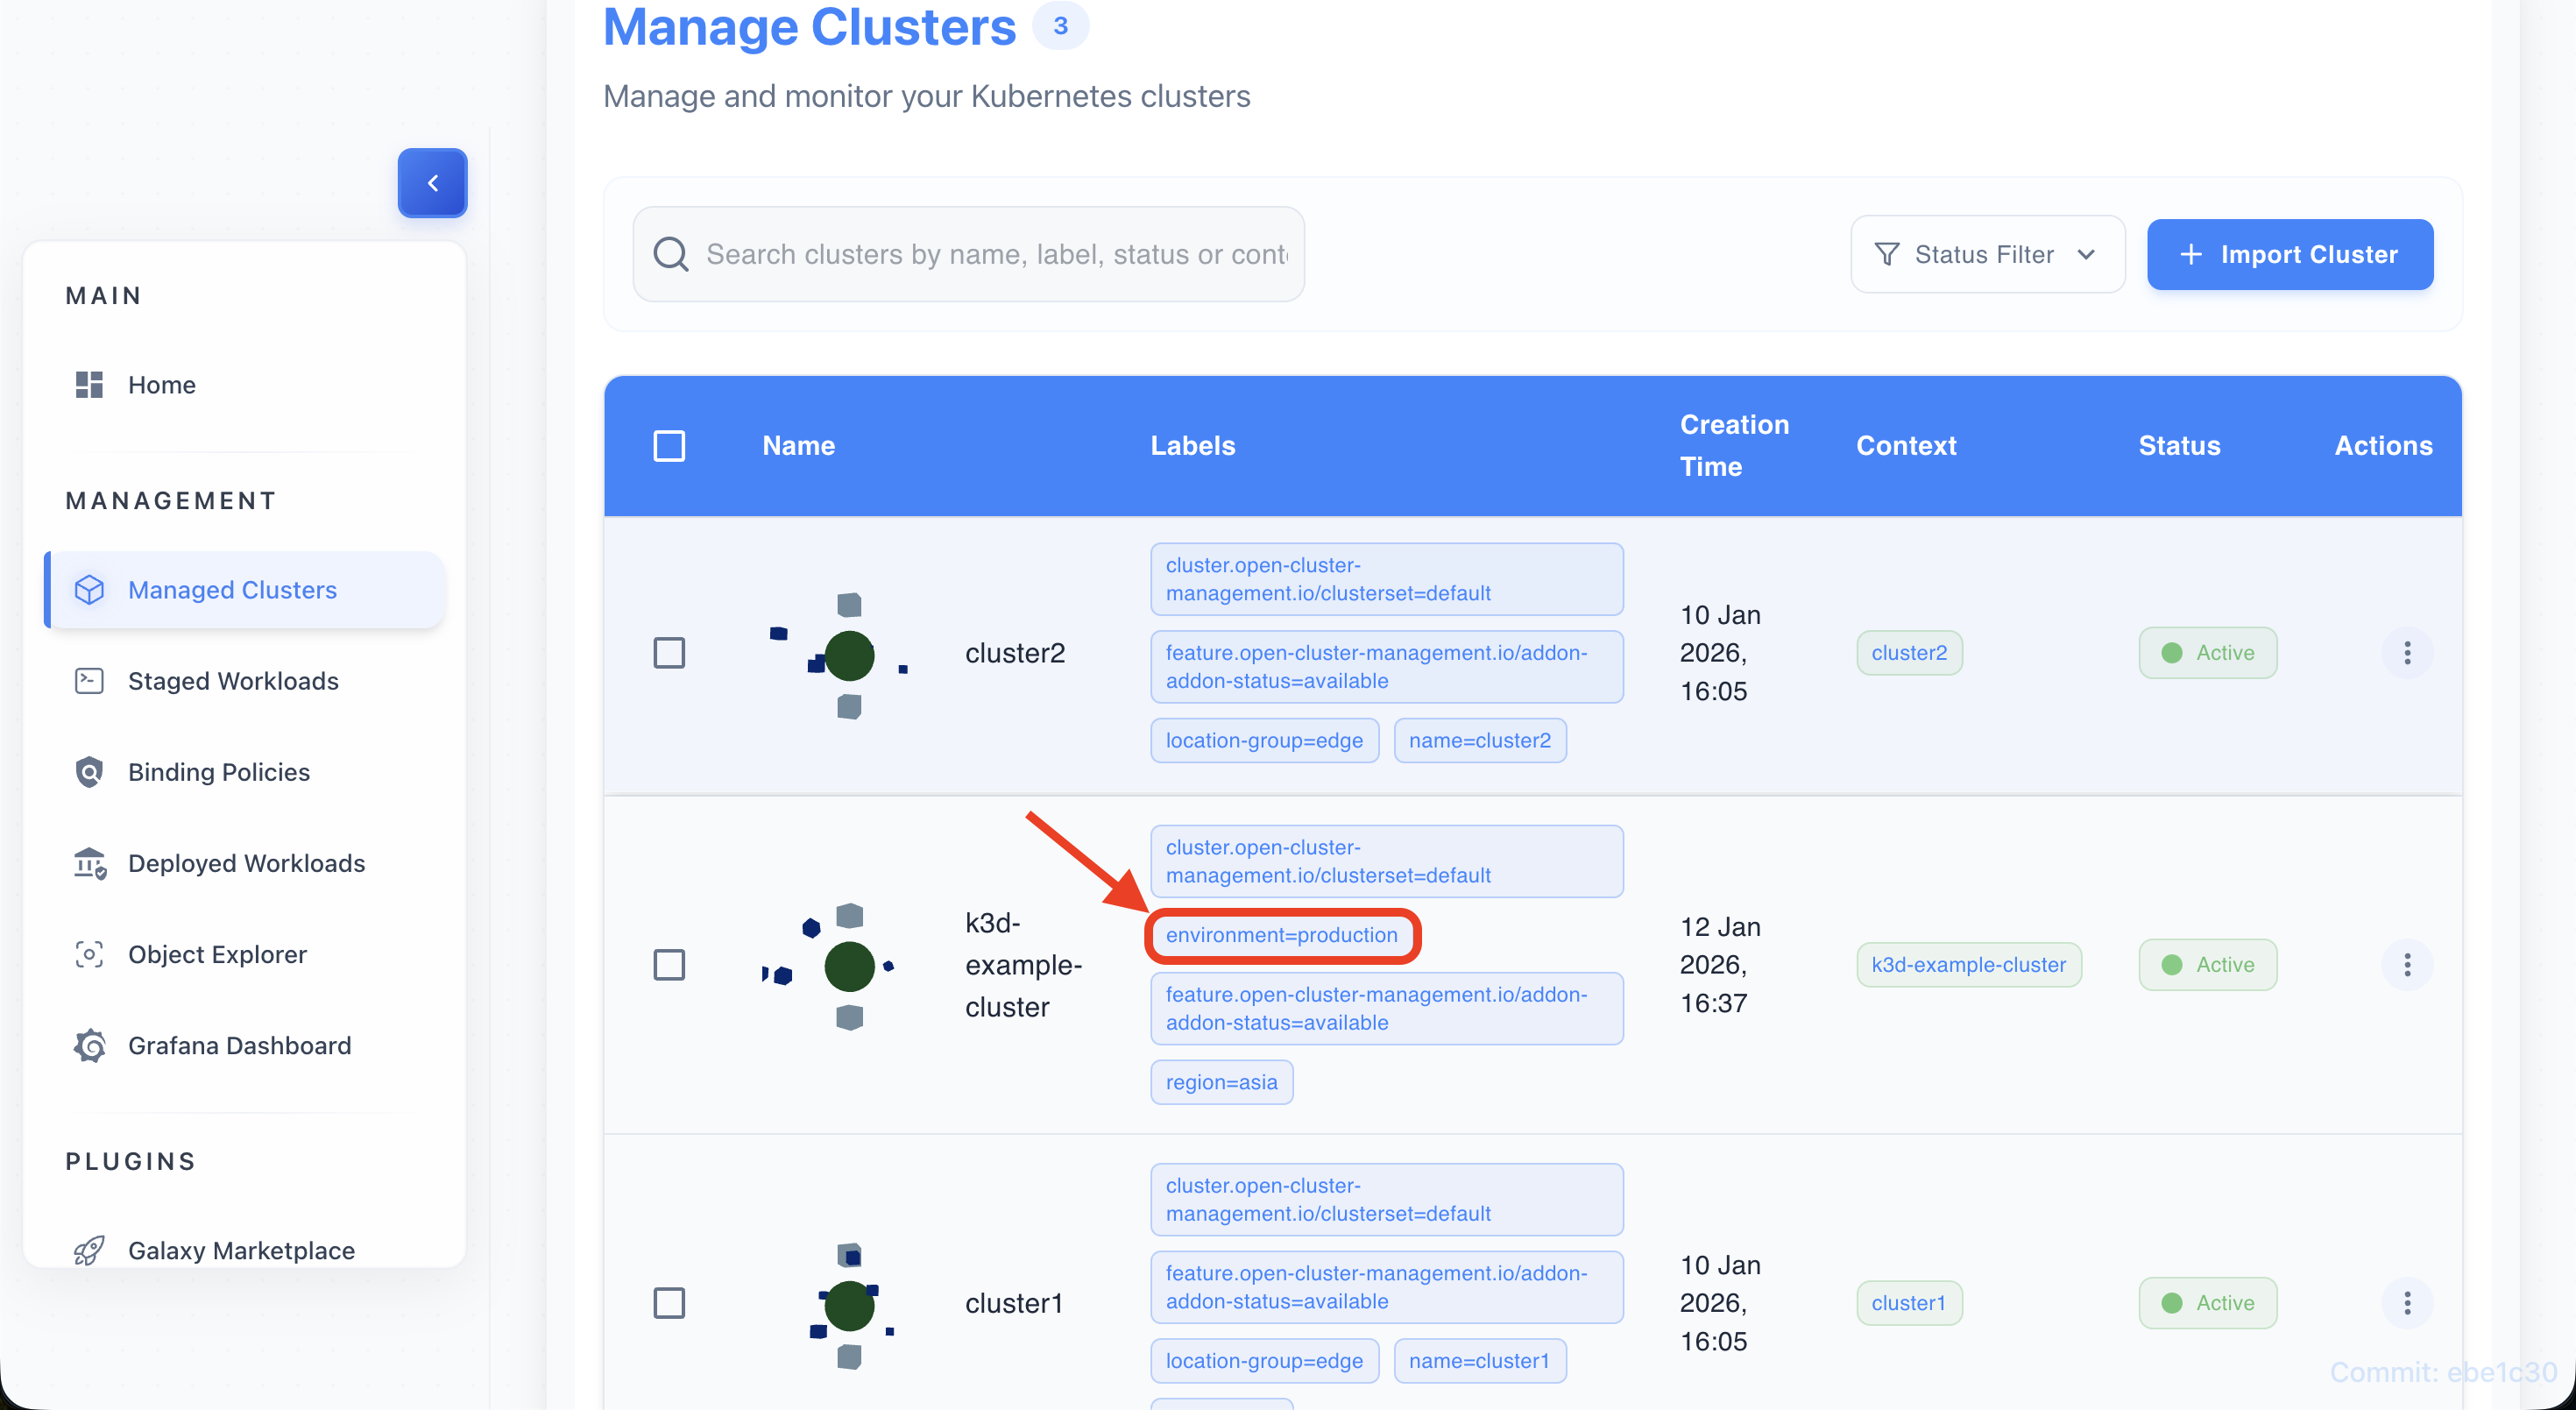
- Click the chip to apply a filter for that
-
View filtered results
- The table updates to show clusters matching the selected label.
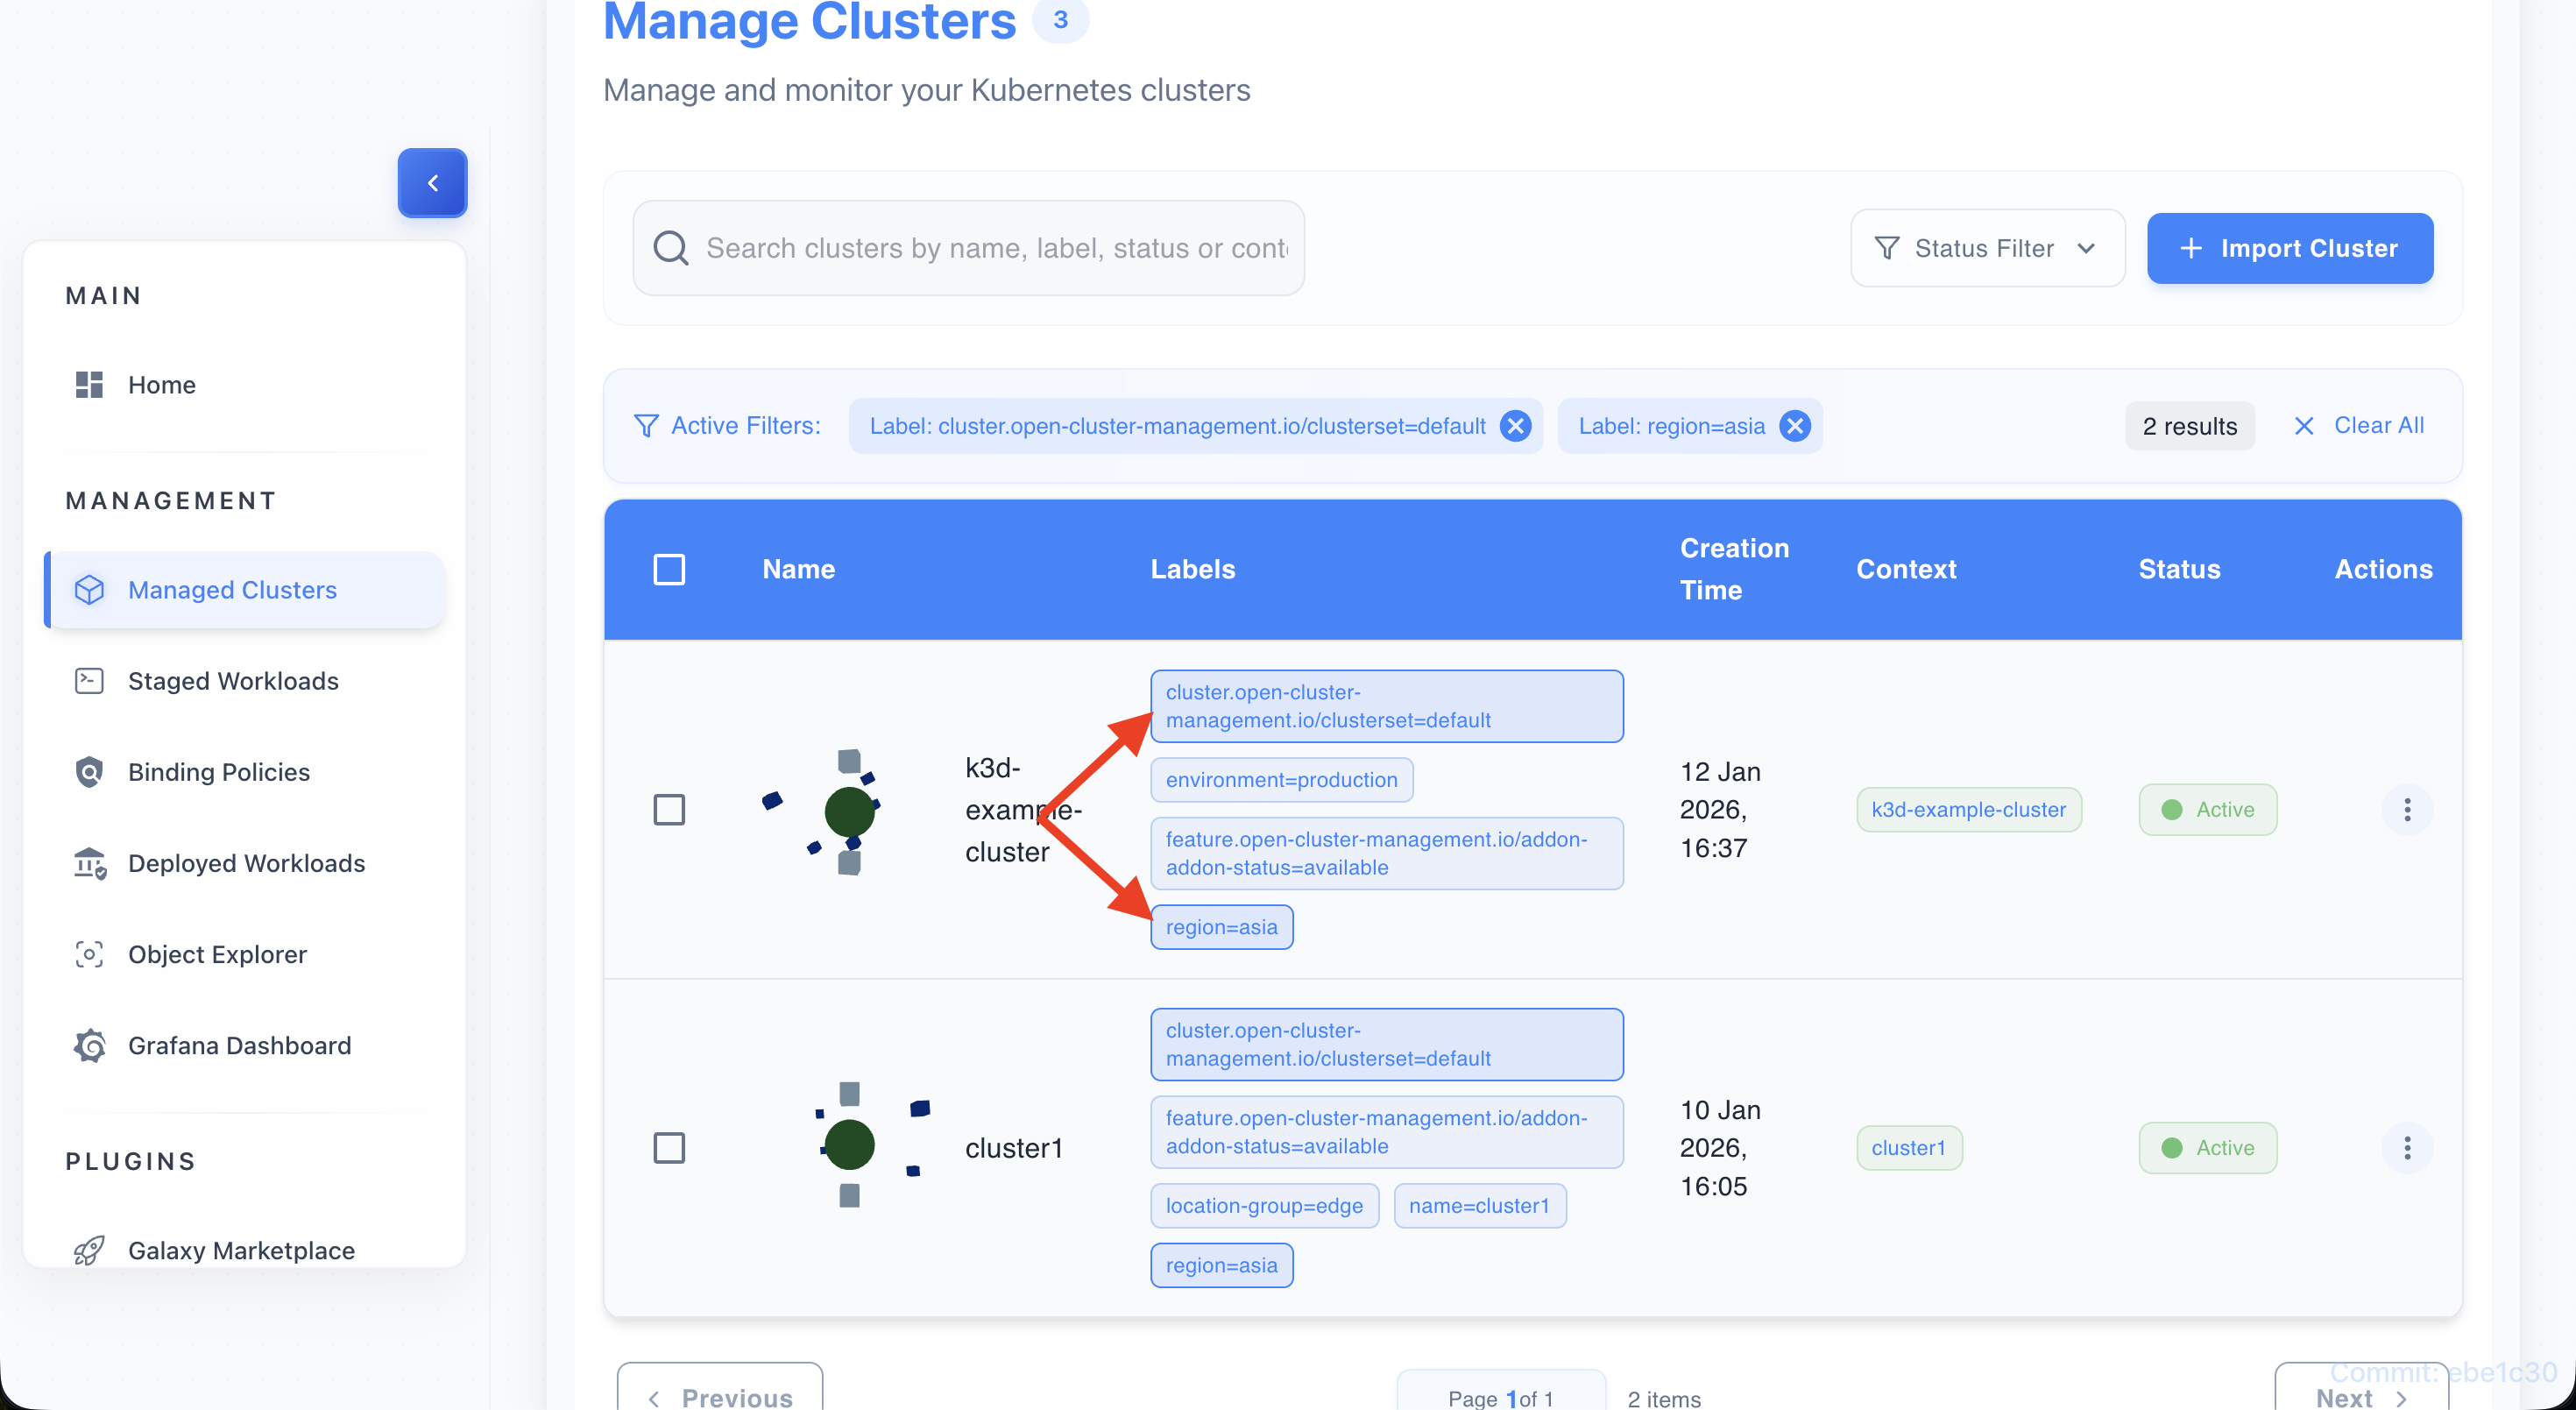
-
Add more label filters if needed
- Click additional label chips to stack multiple filters.
-
Remove filters by clicking X
- Remove a specific filter by clicking the
Xon its chip.
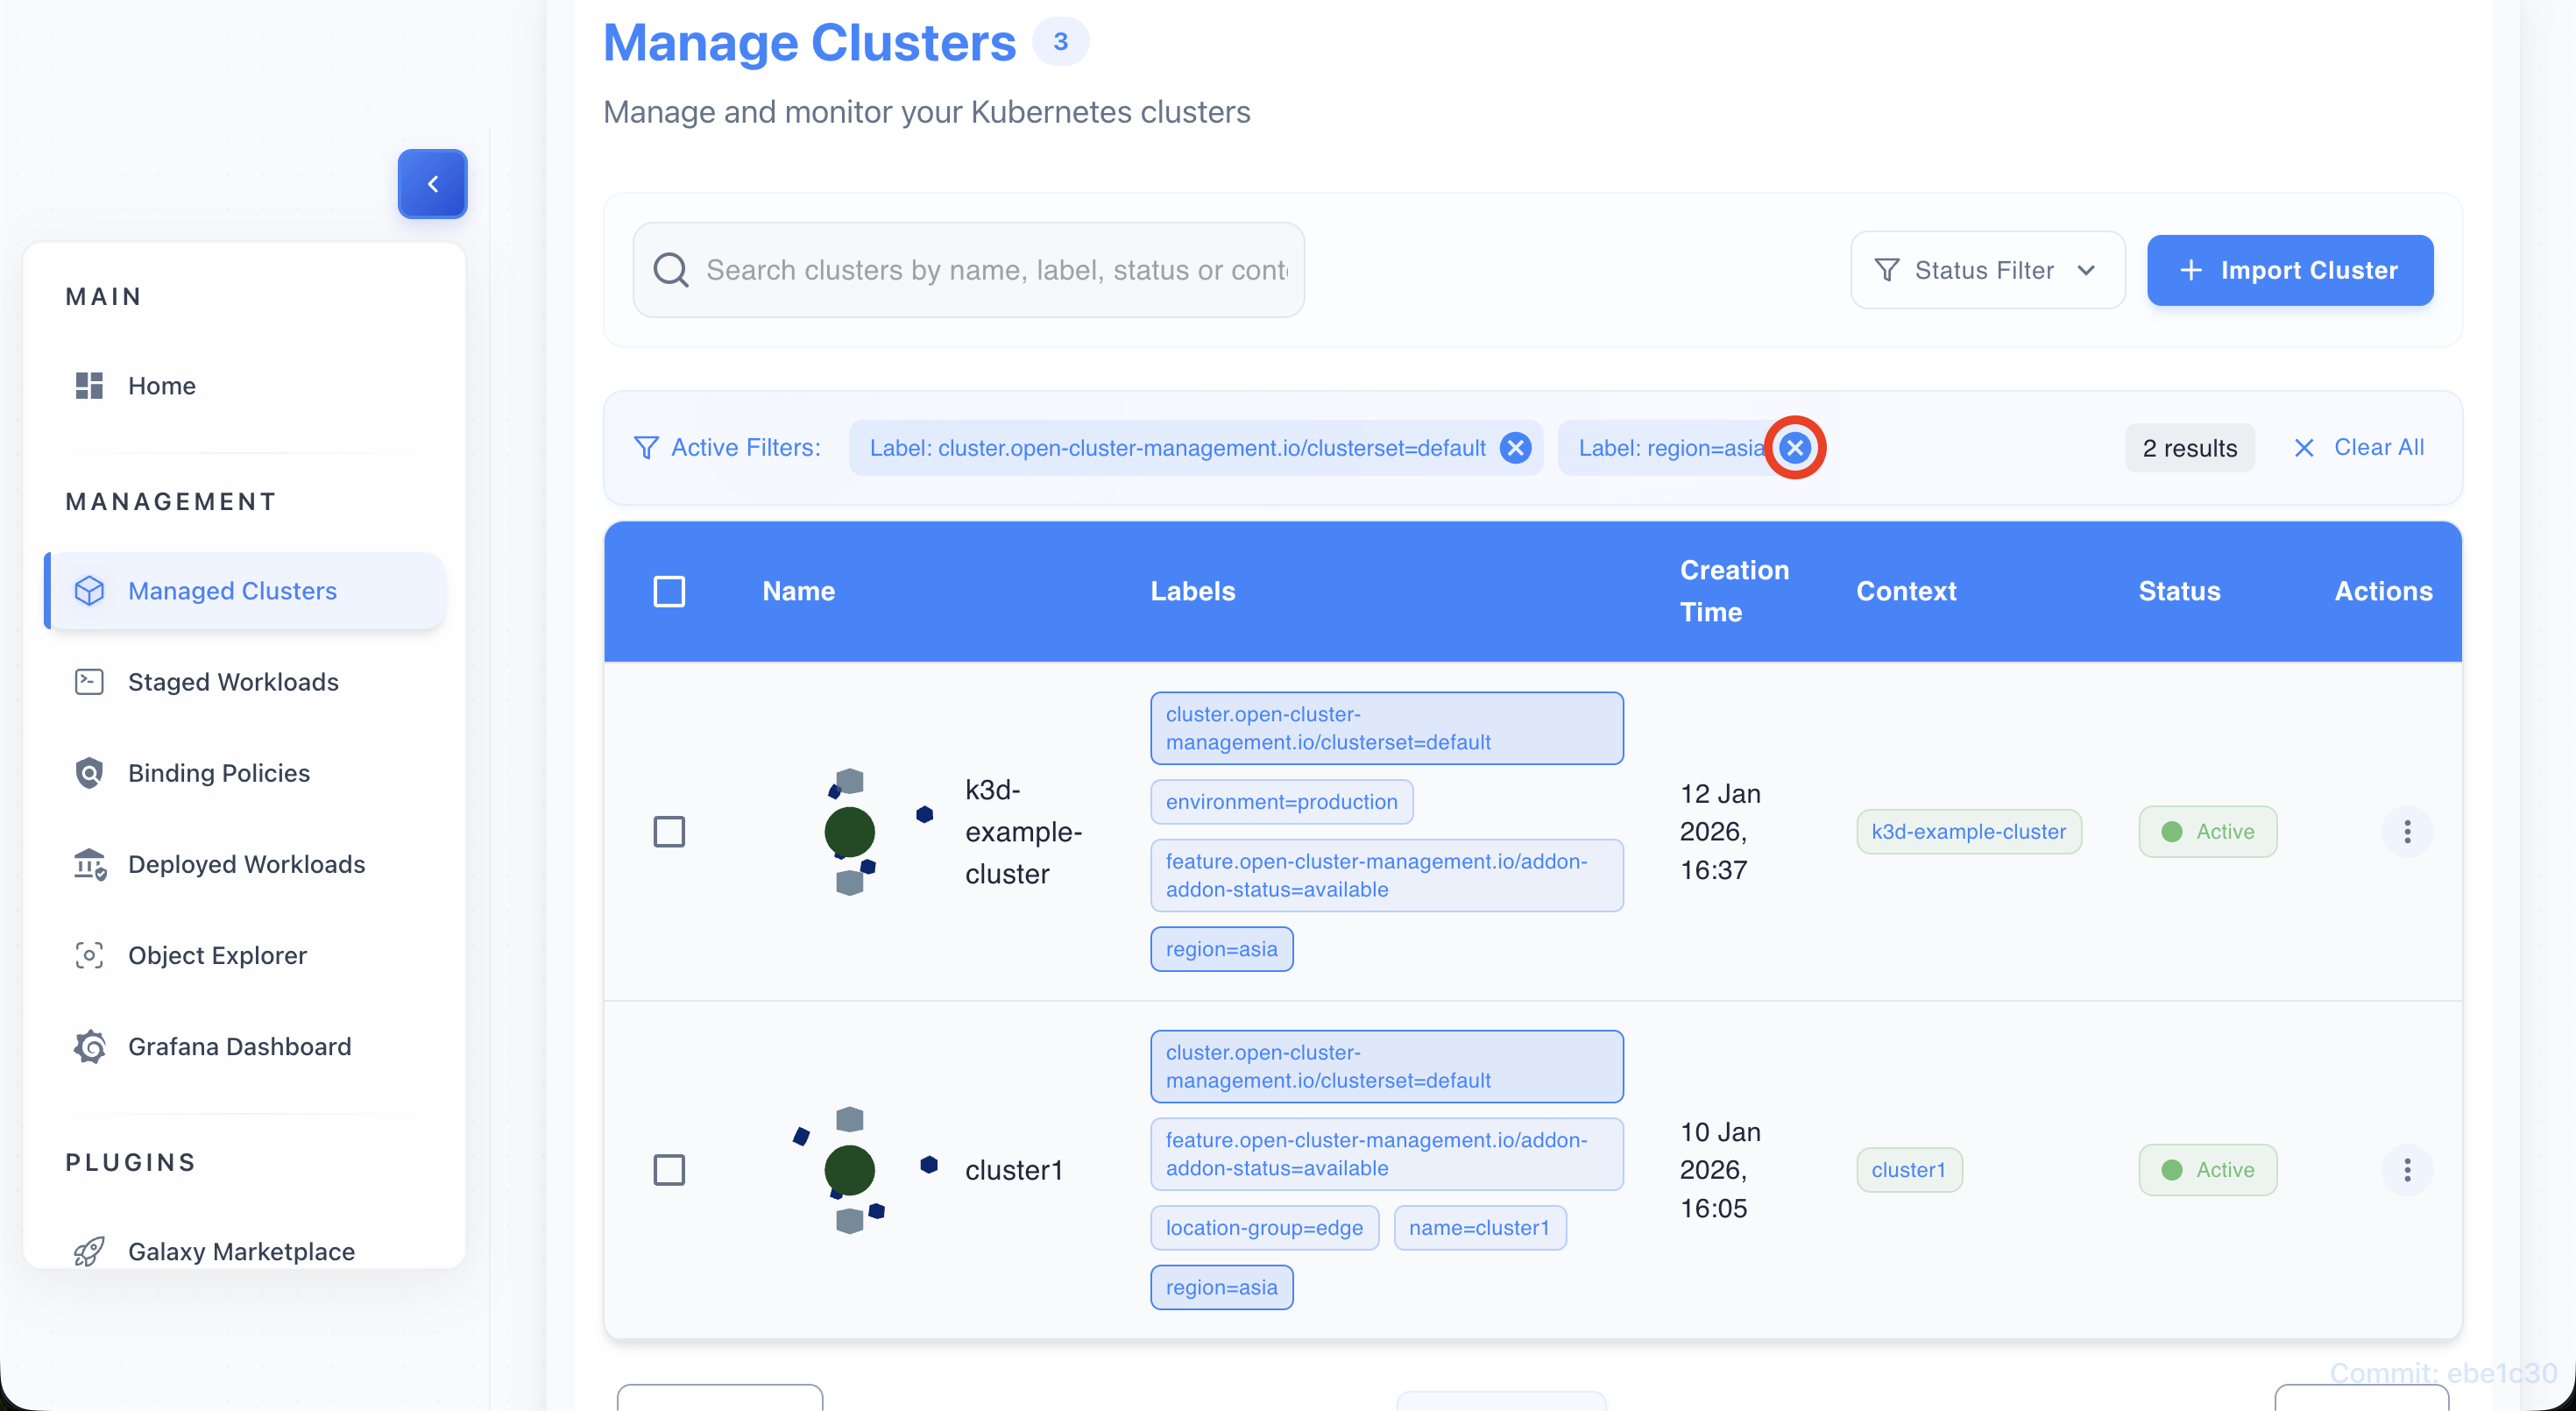
- Remove a specific filter by clicking the
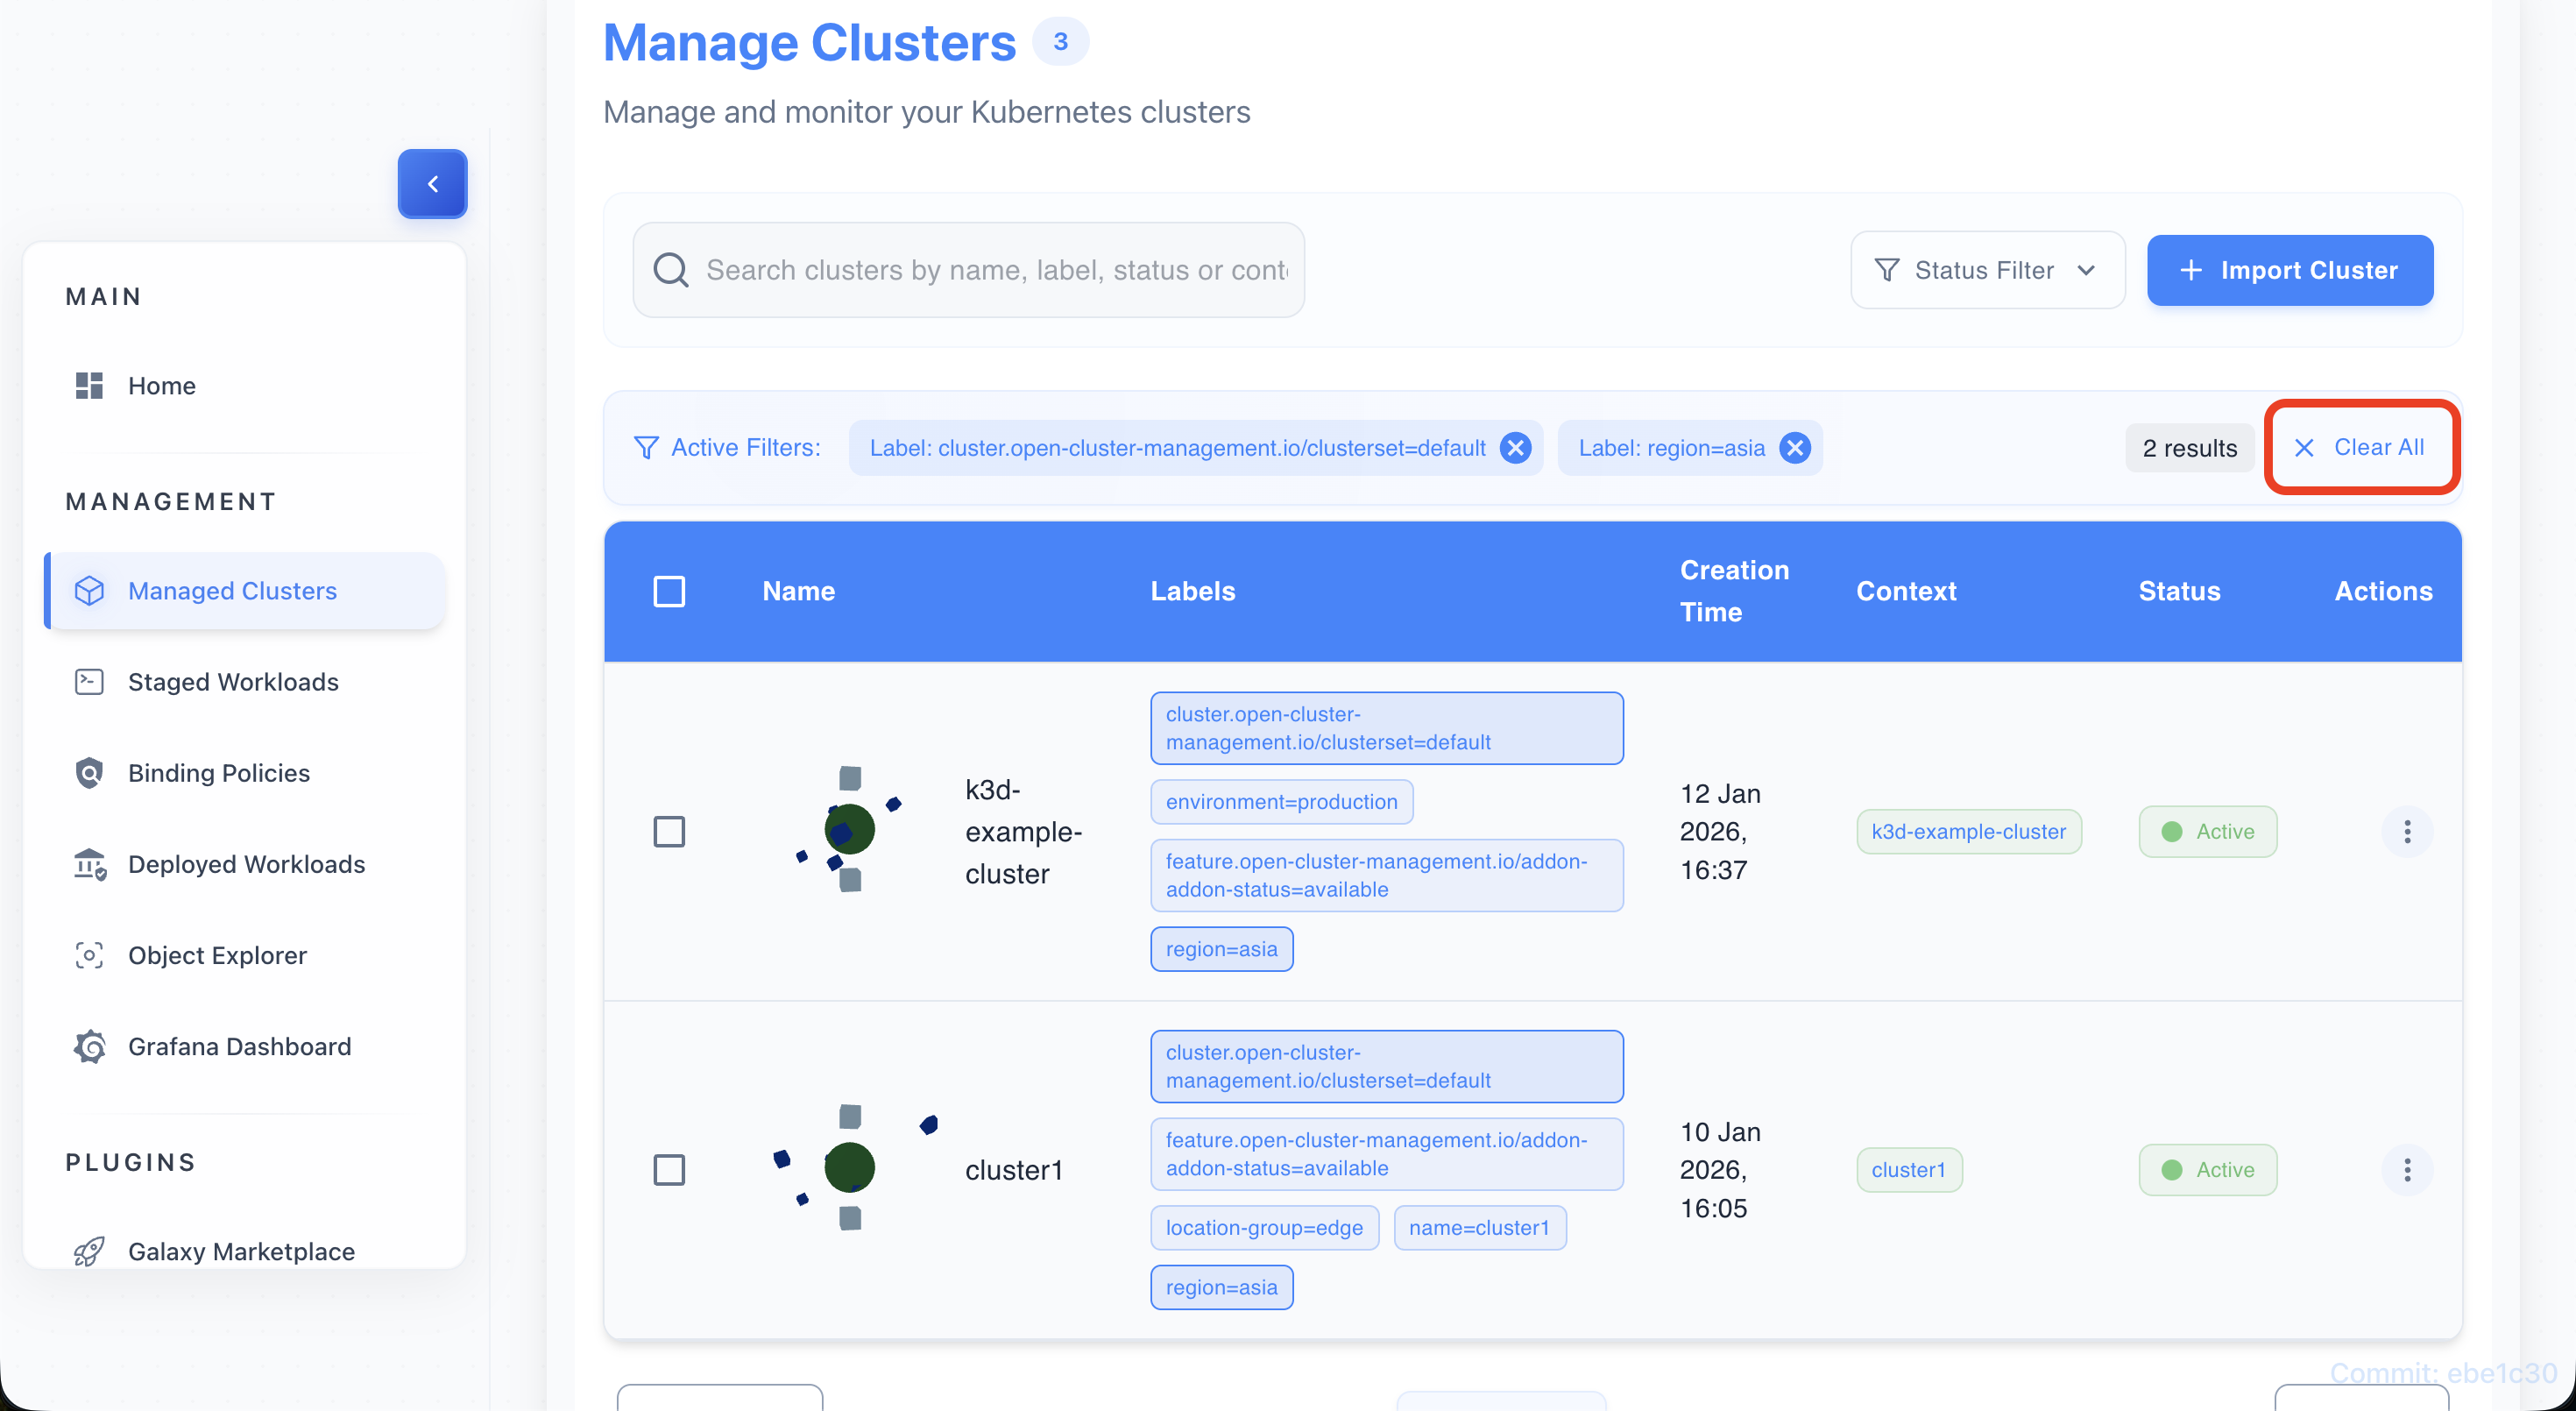
-
Clear all filters with “Clear All”
- Click Clear All to remove every active filter and restore full results.
Use Cases
Use Case 1: Multi-Environment Setup
Scenario: Managing production, staging, and development clusters Solution:
- Import all clusters
- Label with environment=production|staging|dev
- Label with region=us-east|us-west|eu-central
- Filter by environment when needed
- Create binding policies based on labels
Use Case 2: Edge Cluster Management
Scenario: Managing 50+ edge clusters across locations Solution:
- Use Quick Connect for bulk discovery
- Label with location=edge-site-XX
- Label with tier=edge
- Use bulk labeling for common labels
- Filter by location for maintenance
Use Case 3: Cluster Lifecycle Management
Scenario: Adding and removing clusters dynamically Solution:
- Import new clusters as they come
- Monitor status in real-time
- Use labels to track cluster purpose
- Detach decommissioned clusters
- View detachment logs for audit
Troubleshooting
Issue 1: Quick Connect not showing clusters
Error: “No clusters discovered” Solutions:
- Verify hub connection
- Check network connectivity
- Ensure clusters are properly configured
- Review hub API server logs
- Verify authentication tokens
Issue 2: Kubeconfig import fails
Error: “Invalid kubeconfig format” Solutions:
- Validate kubeconfig YAML syntax
- Ensure context is present
- Check cluster API server accessibility
- Verify credentials in kubeconfig
- Try different context
Issue 3: Labels not saving
Error: “Failed to update labels” Solutions:
- Check label key format (valid Kubernetes label)
- Verify label value format
- Ensure no duplicate labels
- Check backend connectivity
- Review browser console for errors
Issue 4: Bulk labeling partially fails
Error: “Some clusters failed to update” Solutions:
- Check individual cluster status
- Retry failed clusters individually
- Verify cluster connectivity
- Review error messages per cluster
- Check backend logs
Related Features
Integration with Binding Policies (BP)
- Labels from ITS used in cluster selectors
- Cluster names referenced in policies
- Label suggestions from existing policies
- Real-time policy status per cluster
Integration with WECS
- Clusters must be imported in ITS first
- WECS monitors workloads on ITS clusters
- Status synced between ITS and WECS
- Cluster context shared
Integration with Dashboard
- Cluster metrics from ITS shown on Dashboard
- Quick link to ITS from Dashboard
- Cluster health aggregated
- Import button on Dashboard